Visual Basic and the DataGridView Control
| Previous | Table of Contents | Next |
| Accessing Databases Using Visual Basic | Working with Files in Visual Basic |
| Purchase and download the fully updated Visual Basic 2010 edition of this eBook in PDF and ePub for only $9.99 |
The Visual Basic DataGridView control provides a table in which rows and columns from a database table can be displayed and modified. In this chapter we will explore the steps necessary to build a DataViewGrid into a Visual Basic application and connect it to a database table.
The examples in this chapter work with a Microsoft Access database. The concepts covered, however, apply equally to other databases such as Microsoft SQL Server.
The chapter assumes that you have Microsoft Access installed together with the NorthWind sample Access database. This can usually be found in Program Files\Microsoft Office\Officenn\Samples\Northwind.mdb (where nn signifies your version of Microsoft Office). If you are unable to locate this database on your system it can be downloaded from Microsoft's web site.
Connected to a Database
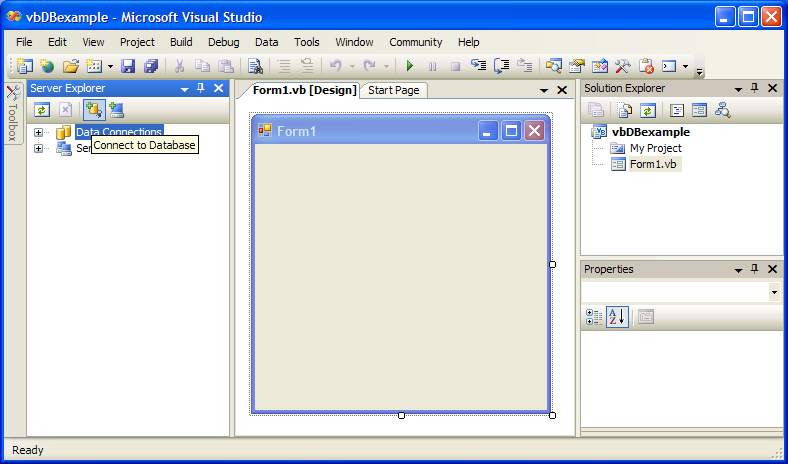
Begin by launching Visual Studio and creating a new Windows Application project called "VBdatabase". Once the new project has been created the first task is to connect to the Northwind database. Click on the View menu and select Server Explorer. The Server Explorer panel will appear on the left hand side of the main Visual Studio area:
This panel allows you to browse servers on your network and locate databases. Click on the Connect to Database button (highlighted above). The Add Connection dialog will appear as follows:
<google>ADSDAQBOX_FLOW</google>
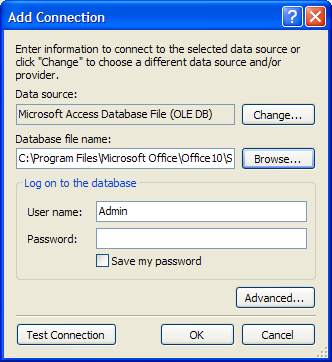
Change the Data source field to Microsoft Access Database if necessary. Click on the Browse button and locate the Northwind.mdb database. Once you have selected the Northwind database click on the Test Connection button to verify the database is accessible. Assuming the connection is successful, click on the OK button to apply the connection.
The database is now connected to the application and it is time to select a data source.
Selecting the Data Source
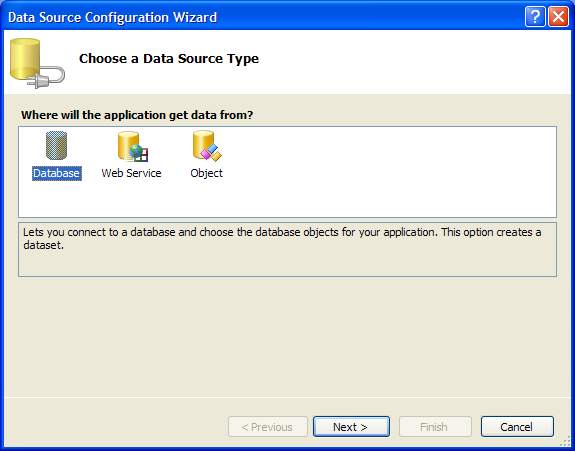
Once the database connection is established, the next step is to select the data source to be used in the application. To achieve this, select the Data->Add New Data Source menu option. The Data Source Configuration Wizard will appear as follows:
Since we are selecting data from a database, make sure that Database is highlighted in this dialog and click Next. Ensure that the Northwind database is listed in the following screen and press Next to proceed.
A dialog will appear asking if you wish to move the database file to your project area. Click Yes. Finally the wizard will display the connection string (this the name used to refer to the database in your code. Accept the default suggestion and click Next. Finally, you will be asked to select the data objects you wish to access from your application. For the purposes of this example click the Tables option and press Finish.
Adding a DataGridView Control
Now that we have our data sources configured the next step is to add a DataGridView control to our application. Access the Toolbox and drag and drop the DataGridView control onto the form. Resize the control so that fills the entire form and set the Anchor property in the Properties panel so that all sides are anchored (such that when the form is resized the DataGridView will also resize).
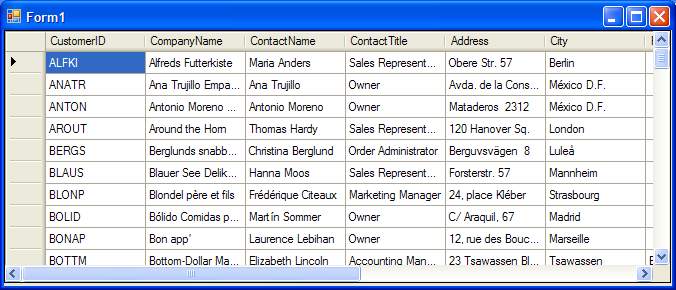
If the Data Sources panel is not visible, select the Data->Show Data Sources menu option. Once visible, click and drag the Customers table from the Data Sources panel over the DataGridView control on the form. The form will update to display columns and rows. Press F5 to build and run the application:
Saving Changes to a DataGridView
It is important to realize that when changes are made in a DataGridView control the changes are only made to the DataSet and are not written back to the database. In order for the data changes to be stored back to the database an additional step is needed.
Extend the above example to add a Button control. Once the Button has been added, double click on it to view the code for the Click code procedure and edit the code so that it appears as follows:
Private Sub Button1_Click(ByVal sender As System.Object, ByVal e As System.EventArgs)
        Handles Button1.Click

        Me.CustomersTableAdapter.Update(Me.NorthwindDataSet)

        Me.NorthwindDataSet.AcceptChanges()

End Sub
Customizing the DataGridView Control
Various aspects of the DataGridView control can be configured using Visual Studio, such as the columns displayed.
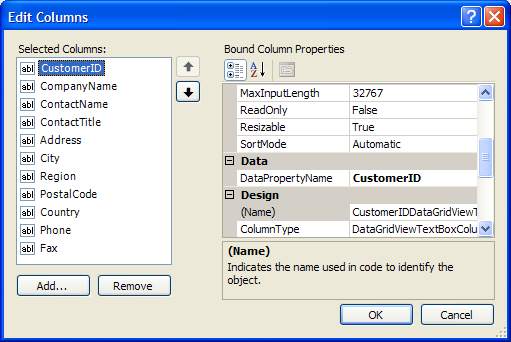
To edit the columns displayed in the grid, right click with the mouse over the control in the form designer and select Edit Columns.... The following dialog will appear. Use the Add... and Remove buttons to configure the columns displayed by the grid:
| Purchase and download the fully updated Visual Basic 2010 edition of this eBook in PDF and ePub for only $9.99 |


