Designing Forms in C Sharp and Visual Studio
| Previous | Table of Contents | Next |
| C# and Windows Forms | Understanding C# GUI Events |
| Purchase and download the full PDF and ePub versions of this Visual C# eBook for only $9.99 |
A primary job of a C# programmer is the development of graphical Windows based applications. Given this fact, it is not surprising that an important part of developing with C# and Visual Studio involves the design of Windows Forms. In this chapter of C# Essentials, we will cover in detail the design of Forms using Visual Studio.
Visual Basic Forms and Controls
The form object is essentially a container for holding the controls that allow the user to interact with an application. Controls are individual objects such as Buttons, Toggles and TextBoxes. In C# and Windows Forms we looked at the many options for configuring a Windows Form. In this chapter, however, we will cover the steps involved in laying out controls on a Form in Visual Studio.
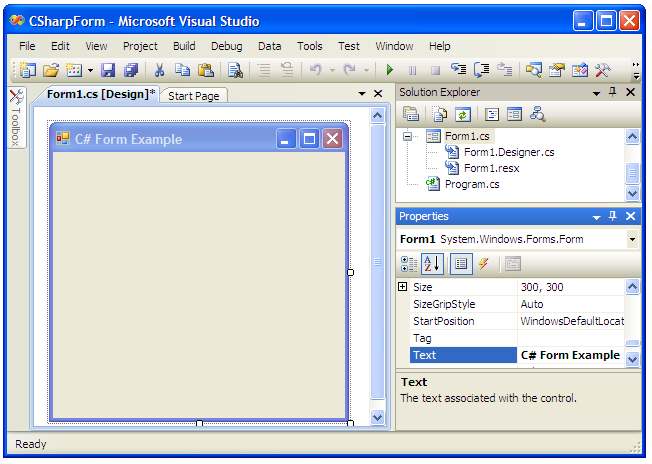
When a new Windows Application project is created in Visual Studio the first object you will see is a form. Typically it will appear in the design area as follows:
Controls are added to the form using the Toolbox. The Toolbox is usually accessed by clicking on the Toolbox tab to the left of the Visual Studio main window. The Toolbox can be pinned in place so that it no longer auto-hides by clicking on the push pin in the title bar. It can also be detached and allowed to float anywhere on the desktop by clicking and dragging on the title bar after applying the push pin. When detached, the Toolbox appears as follows:
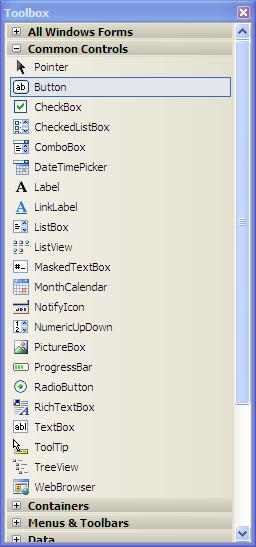
Visual Studio provides three methods for adding new controls to a form. In this chapter we will cover each of these different approaches.
Double Clicking the Control in the Toolbox
The Toolbox contains all of the controls available to be added to a form. One way to add a control to form is to simply double click on the control in the Toolbox. The control is then automatically added to the current form. The advantage of this approach is that it is very quick to add multiple controls to a form. The downside is that Visual Studio does not know where you want the control positioned in the form and consequently positions the controls near to the top left hand corner of the form. Once the control is added to the form you will need to click and drag it to the desired location.
Dragging a Dropping Controls onto the Form
Another approach to adding controls to a form is to click on the control in the Toolbox and drag it onto the form. When the control is in the required location, release the mouse button to drop the control into place. The position of the control can subsequently be refined using the mouse or arrow keys to move the location of the control.
Drawing a Control on the Form
The most precise mechanism for adding a control to a form is to draw it. This is achieved by first selecting the desired control in the Toolbox. Once the control is highlighted, move the mouse pointer to the location on the form where you would like the top left hand corner of the new control to appear. Click and hold down the left hand mouse button a drag the pointer. A box will be drawn as you drag the pointer. When the box reaches the required size for the new control, release the mouse button. The new control will appear positioned and sized according to the size and location of the box.
Positioning and Sizing Controls Using the Grid
When adding controls to a form it is possible to configure how controls are positioned and sized by activating a grid. When the grid is active, controls "snap" to the nearest grid position when added to a form.
There are a number of ways to configure the granularity and behavior of the Visual Studio grid. These settings are global in that, once defined, they apply to all forms and projects, not just to the current form or project. Note also that for some reason, changes to the grid do not immediately take effect in forms in which you are already working.
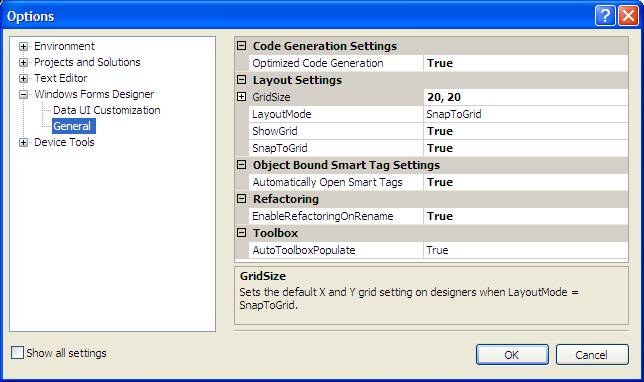
Grid settings are changed using the Visual Studio Options screen. To access this screen, select Options... from the Tools menu. When the dialog appears, click on Windows Forms Designer in the left hand tree. Once selected the dialog should appear as follows:
The settings available here require some explanation:
- GridSize - This setting controls the vertical and horizontal distances between the grid points on the form. This essentially controls the granularity of the grid. The smaller the gaps between grid points, the greater control over control size and position.
- ShowGrid - Controls whether the grid dots are visible in the form. Note that this setting controls only whether the grid is visible, not whether controls snap to the grid locations. Snapping is controlled by the SnapToGrid setting.
- SnapToGrid - This setting determines whether the grid is used when controls are added. When set to True new controls will "snap" to the nearest grid location when added. When set to False the grid is ignored and controls will appear where they are dropped or drawn.
- LayoutMode - Controls whether controls are laid out by snapping to a grid location, or are aligned with other controls in the form. Aligning with other controls is achieved using "Snap Lines" which are covered in detail in the next section of this chapter.
Spend some time changing the settings and adding new controls or move existing form controls. In particular, try different GridSize and SnapToGrid settings.
Positioning Controls Using Snap Lines
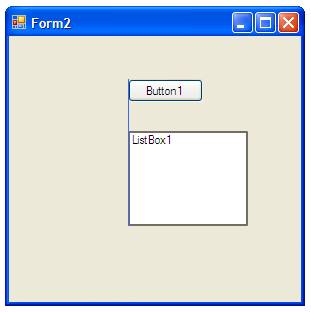
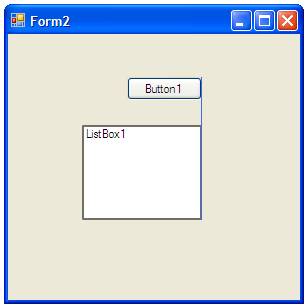
One of the key objectives in designing esthetically pleasing forms is getting controls aligned. One way to make the task of aligning controls involves the use of "Snap Lines" in Visual Studio. When activated, the Snap Lines feature causes a line to be drawn between an edge of the control you are currently moving and the corresponding edge of the closest control on the form when the edges are in alignment.
To active Snap Lines select Options... from the Tools menu, click on Windows Form Designer in the tree to the left of the Options dialog and configure the following settings:
- Layout Mode: SnapLines
- SnapToGrid: False
- ShowGrid: False
Once the settings are applied, add a Button control to a form. Next, click on the ListBox control in the ToolBox and drag it over to the form. As you move the ListBox below the Button a line will appear between the controls at any point that edges align. For example the following figures show a line appearing at the point the left and right hand edges of the controls align:
 |  |
Selecting Multiple Controls
It is often useful to be able to select multiple controls in a form. Normally when you click on one control in a form, the currently selected control is deselected. There are two ways to select multiple controls. One method is to hold down the Shift key while selecting controls. With the Shift key pressed any currently selected controls will remain selected while other controls are clicked.
Another method is to rubber band the controls. To do this click on any empty area of the form to the top left of the group of controls you wish to select. With the mouse button depressed drag to draw a box around the controls. When you release the mouse button all the controls within the box area will be selected.
To de-select individual controls from a group of selected controls, simply hold down the Shift key and click with the left hand mouse button on the control to de-select.
Once a group of controls are selected you can move all the controls at once, maintaining their positions relative to each other, simply by clicking and dragging the entire group.
Now that we have covered selecting groups of controls we can now look at some other tasks that can be performed on groups in Visual Studio.
Aligning and Sizing Groups of Controls
Visual Studio provides a number of tools to assist in aligning groups and sizing groups of controls in a form. These features are accessed using the layout toolbar. To display the layout toolbar right click on any part of the standard Visual Studio Toolbar and select Layout from the drop down menu. The resulting toolbar will appear as follows:
Select a group of components and click on the various buttons in the toolbar to see the effect. For example, all the controls can be left or right aligned and resized to the same size, width or height. It is also possible to equally space the controls, and then increase or decrease the spacing used to separate the controls. It is also possible place controls on top of one another and change which control appears on top of the stack (this can also be done in C# code using the BringToFront() and SendToBack() methods of the respective controls).
All together, the range of options allows just about any uniform layout to be achieved from a group of controls in a form.
Setting Properties on a Group of Controls
In addition to changing the size and layout of a group of controls it is also possible to set properties simultaneously on the group. When multiple controls are selected as a group the Visual Studio Properties panel changes to list only the properties which are common to all the control types comprising the group. Changing a property value in the properties panel applies that change to all selected controls.
Anchoring and Autosizing Form Controls
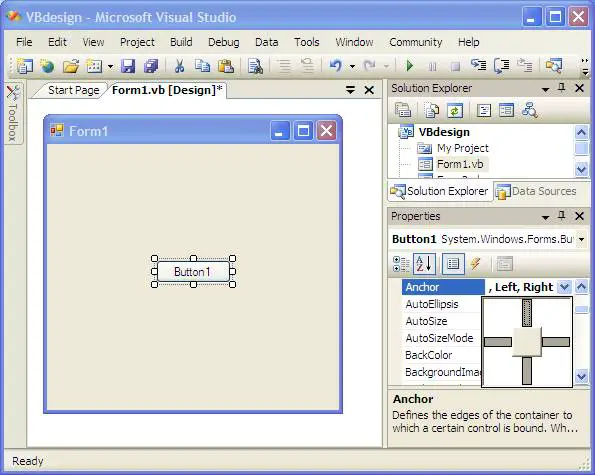
All the controls we have worked with so far have been a fixed size. They have also remained that same size, even if the form in which they reside is resized. It is often useful to have a control resize when the form is resized. This is achieved using the Anchor property. To use this property, select a control in a form and click on the down arrow in the value field of the Anchor property in the Properties panel. A graphic will be displayed indicating the anchors currently set (typically the top and left edges of the control). Activate the anchors on the right and bottom edges of the control to anchor those sides:
Once the anchors are in place, press F5 to compile und run the application. When the form is displayed and resized, the control with the anchors will grow in proportion to the size of the form.
Setting Tab Order in a Form
Despite the advent of the graphical user interface and the mouse, it is still common for users to navigate forms using the keyboard. The standard keyboard navigation technique involves the use of the Tab key to move from one control to the next in a form. For this reason it is vital that the Tab Order be configured to implement a sensible sequence of moves between controls.
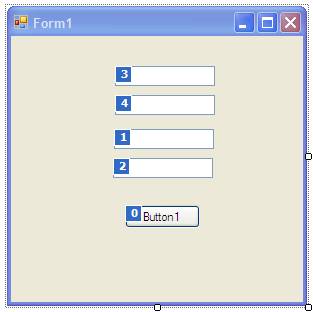
To view and change the current tab order for a form, display the Layout toolbar (if this is not already visible, right click on the standard Visual Studio toolbar and select Layout). On the Layout toolbar click the Tab order button (usually the last button on the right). The form will be displayed with a number next to each control:
To change the order, simply click on each control in the order you wish for them to be navigated by the tab key. As you click on each control the number will change, starting at 0 until all the controls have been sequenced. The tab order is now set.
| Purchase and download the full PDF and ePub versions of this Visual C# eBook for only $9.99 |
| Previous | Table of Contents | Next |
| C# and Windows Forms | Understanding C# GUI Events |


