An iOS 10 3D Touch Force Handling Tutorial
| Previous | Table of Contents | Next |
| An iOS 10 Gesture Recognition Tutorial | An iOS 10 3D Touch Quick Actions Tutorial |
Learn SwiftUI and take your iOS Development to the Next Level |
3D Touch brings with it a range of different features that can be added to an iOS app running on a 3D Touch enabled iOS device. Perhaps the simplest of these features is the ability to detect the force being applied to a touch on the screen and to react accordingly. A drawing app might, for example, enable the user to change the thickness of a line as it is being drawn based on the current level of force being applied to the touch.
In this chapter, a simple project will be created that is designed to quickly demonstrate the detection of force applied during a touch within an iOS 10 app.
Creating the 3D Touch Example Project
Begin by invoking Xcode and creating a new iOS Single View Application project named 3DTouchForce using Swift as the programming language and with the devices menu set to Universal.
Adding the UIView Subclass to the Project
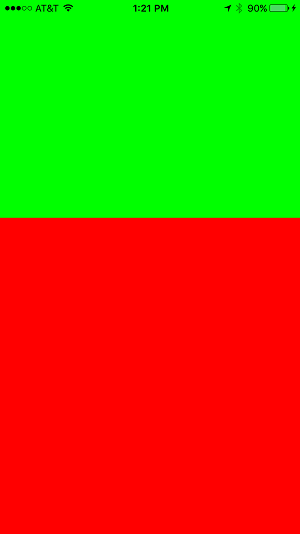
When the app launches, the background view will be colored green. As a touch is performed with increasing pressure, a red gauge effect will rise up from the bottom edge of the screen reflecting the force being applied. In practice the red area of the view will be implemented by repeatedly drawing a red rectangle, the height of which is sized in proportion to the prevailing touch force value.
In order to draw graphics on the view it is necessary to create a subclass of the UIView object and override the draw method. In the project navigator panel located on the left-hand side of the main Xcode window Ctrl-click on the 3DTouchForce folder entry and select New File… from the resulting menu. In the New File window, select the iOS source Cocoa Touch Class icon and click Next. On the subsequent options screen, change the Subclass of menu to UIView and the class name to MyUIView. Click Next and on the final screen click on the Create button.
Select the Main.storyboard file and select the UIView component in either the view controller canvas or the Document Outline panel. Display the Identity Inspector (View -> Utilities -> Show Identity Inspector) and change the Class setting from UIView to our new class named MyUIView.
With the UIView object still selected, display the Attributes Inspector panel and change the background color to green.
Locating the draw Method in the UIView Subclass
Now that we have subclassed our application’s UIView instance the next step is to implement the draw method in this subclass. Fortunately Xcode has already created a template of this method for us. To locate this method, select the MyUIView.swift file in the Project Navigator panel. Having located the method in the file, remove the comment markers (/* and */) within which it is currently encapsulated:
import UIKit

class MyUIView: UIView {

    override func draw(_ rect: CGRect) {
        // Drawing code
    }
}
Remaining within the MyUIView.swift file, add a variable to store the height of the rectangle and implement the drawing code in the draw method as follows:
class MyUIView: UIView {

    var size:CGFloat = 0

    override func draw(_ rect: CGRect) {
        let view_width = self.bounds.width
        let view_height = self.bounds.height

        let context = UIGraphicsGetCurrentContext()
        let rectangle = CGRect(x: 0, y: view_height - size,
				width: view_width, height: size)
        context?.addRect(rectangle)
        context?.setFillColor(UIColor.red.cgColor)
        context?.fill(rectangle)
    }
.
.
}
The code added identifies the height and width of the visible area of the display and then uses Core Graphics to draw a filled red rectangle starting at the bottom of the display at a height defined by the size variable. The next step is to implement the touch event methods to set the size value based on the force of the touch.
Implementing the Touch Methods
This example project will require that the touchesBegan, touchesMoved and touchesEnded methods be implemented. The touchesBegan and touchesMoved methods will both call a method named handleTouch, passing through to that method the UITouch objects associated with the touch event. The touchesEnded method, on the other hand, will set the size variable to zero and trigger a redraw of the rectangle via a call to the view’s setNeedsDisplay method. Within the MyUIView.swift file implement these three methods as follows:
override func touchesBegan(_ touches: Set<UITouch>,
                                with event: UIEvent?) {
    handleTouch(touches)
}

override func touchesMoved(_ touches: Set<UITouch>,
                                with event: UIEvent?) {
    handleTouch(touches)
}

override func touchesEnded(_ touches: Set<UITouch>,
                                with event: UIEvent?) {
    size = 0
    self.setNeedsDisplay()
}
The final task is to write the handleTouch method so that it reads as follows:
func handleTouch(_ touches:Set<UITouch>) {
    let touch = touches.first
    size = touch!.force * 100
    self.setNeedsDisplay()
}
The method extracts the first touch object from the set of touches and accesses the force property of that object. The method then calculates a height value based on the force value of the touch and assigns it to the size variable. The view is then instructed to redraw itself, thereby triggering a call to the draw method where the rectangle will be redrawn using the new size value.
Testing the Touch Force App
Figure 57-1
Summary
On devices with 3D Touch support, the pressure of a touch on a view can be measured by accessing the force property of the UITouch objects passed through to the touchesBegan, touchesMoved and touchesEnded methods. This chapter has illustrated this concept in action through the creation of a pressure gauge tied to the force applied to a touch.
Learn SwiftUI and take your iOS Development to the Next Level |
| Previous | Table of Contents | Next |
| An iOS 10 Gesture Recognition Tutorial | An iOS 10 3D Touch Quick Actions Tutorial |


