An Overview of HTML Forms
| Previous | Table of Contents | Next |
| Working with Directories in PHP | PHP and HTML Forms |
| Purchase and download the full PDF and ePub versions of this PHP eBook for only $8.99 |
A large part of developing a web based application involves handling interaction with user via their web browsers. One of the most common tasks in this area of web development involves presenting the user with forms to collect information, and then processing that information.
Web forms are typically created using the HTML <FORM> element together with various user interface objects (such as text fields, toggle buttons and push buttons).
Before exploring the interaction between PHP and the HTML form elements it is first important to have a basic understanding of HTML forms. The purpose of this chapter, therefore, is to provide this basic grounding before moving on to the more PHP specific areas of building a form. If you are already familiar with HTML forms feel free to move on to PHP and HTML Forms.
Creating HTML Forms
HTML forms are used to collect data from users. Users essentially enter data into forms by filling in text fields, selecting toggles and making choices from selection objects. When the user has filled in the data it is transmitted to the server for processing.
HTML forms are specified using the <form> element. The form element contains an attribute that specifies the script on the server to which the gathered data is to be sent. Data can be sent to the server using one of two methods, GET or POST. With GET, all the data is passed to the server embedded in the URL. POST is typically used for larger volumes of data.
The various <input> elements are then specified within the body of the <form>.
With this information in mind we can create a simple HTML form containing a text field input and a submit button as follows:
<html>
<head>
<title>Simple HTML Form</title>
</head>
<body>
<form action="submit.php" method="post">
<input type="text" name="customerName" value="Default text here" />
<input type="submit" name="submit_button" value="Press to Submit" />

</form>
</body>
</html>
Now that we have a basic understanding of the structure of an HTML form we can now look at each of the form elements in detail.
HTML Text Object
The syntax for creating a text object within a Form is as follows:
<input type="TEXT" name="objectname" id="object id" value="current value" size="30" event handling>
- type - specifies that the type of object is a TEXT object.
- name - represents the name by which this object may be reference in JavaScript.
- id - the id used when accessing Form object elements using the getElementById() method (described later in this chapter)
- value - primes the text object with an initial value (optional).
- size - specifies the maximum number of characters that can be entered into the Text field.
event handling specifies what JavaScript action to take when a particular event on the object is triggered. Events that can be triggered by the Text object are:
- onFocus - triggered when the text field gains focus (typically when the cursor is moved into the field to begin typing).
- onBlur - triggered when the text field loses focus (typically when the user clicks somewhere outside the text area).
- onChange - triggered when the contents of the text area is changed by the user and focus is lost.
- onSelect - triggered when the user highlights text in the text field.
In addition to events, the Text object also has a number of JavaScript methods that can be accessed to perform such tasks as selecting text and changing focus:
- focus() - Sets focus and sets the cursor on the text field
- blur() - Removes focus from the field (the opposite of focus())
- select() - Selects the text in the field so that when the user types all the existing text is replaced.
HTML TextArea Object
The TextArea object is created using the <textarea> tag and differs from the Text object in that it allows multiple lines of text to be entered by the user. Additional attributes allow control over such issues as the size of the TextArea defined in terms of row and columns, whether the text should wrap or not and whether the TextArea should be read-only.
There are two options for the wrap attribute, virtual and physical. When set to virtual the TextArea object will wrap text at the end of each line as it is entered by the user but the actual text stored in the value will not contain any carriage returns unless the user specifically enters one while typing. The physical setting also wraps automatically as text is entered, but this time a carriage return is also inserted into the text.
The following is an example of using the TextArea object with pre-set dimensions and wrapping enabled:
<textarea name="myTextArea" rows="10" cols="60" wrap="virtual">
Some default text here
</textarea>
In the above example you will see some text before the closing </textarea> tag. If provided, this represents the text to be displayed by default in the TextArea object.
The HTML Button Object
Next to the Text object the HTML Button is probably the second most commonly used GUI component when developing HTML forms. There are three types of Button object available. As with the Text object, the Button uses the <input> tag. The type= attribute is then used to define which type of button is to be created. The three different types are:
- type="BUTTON" - The basic button which performs no action by default unless an event handler is assigned to it.
- type="SUBMIT" - The submit button. When pressed this button causes the data in the Form to be sent to the server using the settings defined in the enclosing <Form> tag. If the onsubmit attribute on the enclosing <form> tag has been specified this will be executed before the form data is submitted (useful for JavaScript form data validation).
- type="RESET" - The reset button. When pressed causes the fields in the Form to be either cleared, or reset to the defaultValue (if one has been specified).
A submit button can be created as follows:
<form name="registerForm" method="GET" action="/subscribe.php">

   <input type="TEXT" name="myName"  value=""/>
   <input type="TEXT" name="myPhone"  value=""/>
   <input type="SUBMIT" name="buttonName" value="Click here to submit information">

</form>
When the submit button is pressed in the above example the data in the two Text fields will be submitted to the subscribe.php script specified in the <form> tag.
The generic "BUTTON" type can be defined as follows:
<form name="registerForm" method="GET" action="register.php">

   <input type="TEXT" name="myName"  value=""/>
   <input type="TEXT" name="myPhone"  value=""/>
   <input type="BUTTON" name="buttonName" value="Product codes" onClick="showCodes()">

</form>
In this case we have configured the button to call a JavaScript function when it is pressed. This function could, for example, pop up a window containing a description or product code list. To learn about JavaScript we recommend reading JavaScript Essentials.
HTML Check Boxes
The Check Box object creates a small square which changes between a checked and unchecked state when clicked. Check Boxes are ideal for providing the user with a "Yes" or "No" choice.
The Check Box object uses the <input> tag as follows:
<form action="" name="orderForm">
<input type="CHECKBOX" name="mailListBox" checked>Add me to the mailing List.
</form>
The checked attribute states whether the box should be checked by default when it is first created.
The current setting of a CheckBox can be obtained in JavaScript by accessing the checked property of the object. For example:
if (document.orderForm.mailListBox.checked)
{
     addToMailingList();
}
You can also change the state of a Check Box by explicitly setting the checked property:
document.orderForm.mailListBox.checked = false;
The Check Box object has one JavaScript event, onClick, which is triggered when the user clicks on the box, and one method, click(), which simulates a user click when called.
HTML Radio Buttons
The HTML Radio Button takes its name from the buttons on an old style radio. In the old days a radio would have a number of buttons for making selections (such as frequency band). Depressing one button would cause the currently selected button to pop up, thereby ensuring that only one button was pressed at any one time. HTML Radio Buttons provide a similar functionality for situations where a "one of many" choice is to be presented to the user.
The syntax for creating a group of Radio Buttons is as follows:
<form action="" name="orderForm">
   <input type="RADIO" name="myColor" value="Red" checked> Red
   <input type="RADIO" name="myColor" value="Green"> Green
   <input type="RADIO" name="myColor" value="Blue"> Blue
</form>
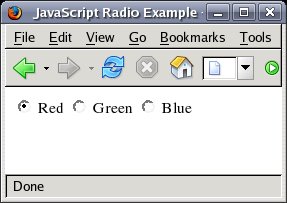
The above statements create a Radio Box group containing 3 Radio Buttons:
All three buttons share the same name attribute which acts to tie them together into a group. The value attribute defines the value that is passed through the server to indicate which button is selected when the form is submitted.
There are number of actions that can be performed using JavaScript when working with Radio Buttons. Firstly, you can find out the number of Radio Buttons in a group by accessing the length property:
var numButtons = document.orderForm.myColor.length;
Secondly you can change the value of an individual button:
document.orderForm.myColor[0].checked = true;
Note: Programmatically changing the value of one Radio Button in a group using the above technique will not automatically uncheck the currently checked button (as it would if a user really clicked on it). You must, therefore, remember to programmatically change the checked status of the other buttons.
HTML Drop-down / Select Object
The HTML Select object provides a drop down list of choices from which the user can choose (often referred to as ComboBoxes in other GUI environments). When the drop down list is not visible the current selection is displayed in a text area. Due to the fact that the Select Object supports both single and multiple selection of items in the list it is ideal for both "one of many" and "many of many" selection choices.
The Select Object uses the <select> tag together with <option> tags representing the choices to be displayed in the drop-down list:
<select name="carBrands">
<option value="Ford" SELECTED>Ford Motor Company
<option value="GM">General Motors
<option value="Honda">Honda Motor Company
</select>
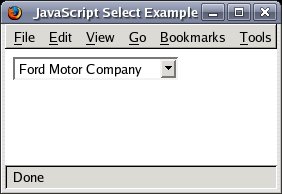
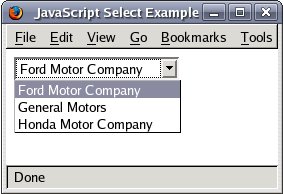
The above example will create a Selection object that appears as follows. The image on the left shows the Select object before the user clicks on it. The image on the right shows the drop-down list as it appears after the object has been clicked:
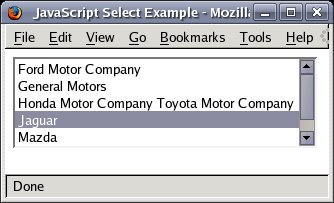
If the size attribute is specified and set to a value greater than 1 then a scrolled list, instead of a drop down list, will be displayed with a scrollbar for scrolling through the list of options. For example:
<select name="carBrands" size=5>
<option value="Ford" SELECTED>Ford Motor Company
<option value="GM">General Motors
<option value="Honda">Honda Motor Company
<ottion value="Toyota">Toyota Motor Company
<option value="Ford">Jaguar
<option value="Mazda">Mazda
<option value="Volvo">Volvo
</select>
will produce the following in the browser:
The optional multiple attribute may be added to the <select> tag to enable multiple selection of items from the list. When the Select element is used in multiple selection mode it is important to place [] after the element name so that the PHP script on the receiving end of the submission is able to access the multiple selections via an array:
<select name="carBrands[]" size=5 multiple>
This is covered in detail in PHP and HTML Forms.
HTML Password Object
The HTML Password object is used to collect information from a user (typically, but limited to a password or account number) when the data entered should not visible on the screen. As the user types '*' characters appear in the text field for each key press, instead of the actual typed character.
The basic syntax for the Password Object is as follows:
<input type="PASSWORD" name="objectName" size="10" />
Summary
Now that we have provided a basic overview of how HTML forms are constructed we can look at how to submit the data to a PHP script on the server and process that data. This is covered in the chapter entitled PHP and HTML Forms.
| Purchase and download the full PDF and ePub versions of this PHP eBook for only $8.99 |


