Performing a Clean Windows Server 2008 R2 Installation
| Previous | Table of Contents | Next |
| Windows Server 2008 R2 Editions and System Requirements | Performing a Windows Server 2008 R2 Upgrade |
<google>BUY_WINSERV_2008R2</google>
Windows Server 2008 R2 may be installed using a number of different approaches. One such approach involves installing an entirely new instance of the operating system on a disk or partition such that any previous operating system installation and associated data are destroyed. Another option is to perform an upgrade of an existing Windows installation such that user data, settings and applications are retained. In addition, the installation may be performed interactively where the user is required to respond to prompts during the installation, or unattended where pre-configured responses are supplied by an answer file.
The topic of this chapter is the clean, interactive installation of Windows Server 2008 R2. The subject of upgrades is covered in Performing a Windows Server 2008 R2 Upgrade.
Obtaining Windows Server 2008 R2
If you do not already have access to the Windows Server 2008 R2 installation media this can be downloaded from the Microsoft web site. Downloads are available for the Foundation, Standard, Enterprise, Datacenter and Web editions of the operating system. For detailed information on the features provided with each edition refer to Chapter 2 - Windows Server 2008 R2 Editions and System Requirements.
All downloadable editions can be run either without a key (i.e. in evaluation mode) or with a key (if a license has already been purchased). The evaluation period lasts for 180 days.
The Windows Server 2008 R2 download is provided in the form of an ISO image which may burned to a DVD and subsequently be used to perform the installation.
Starting the Installation Process
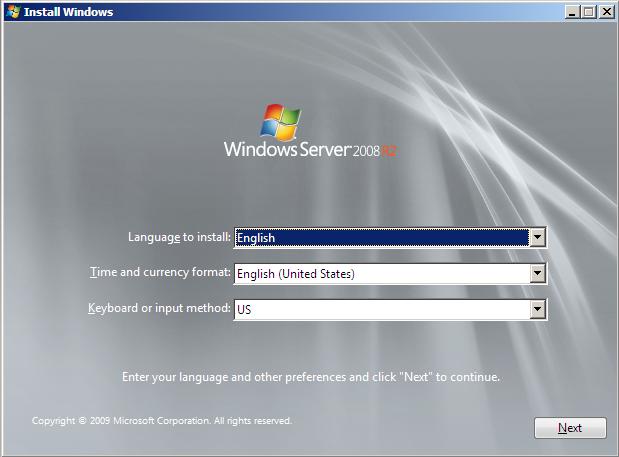
Windows Server 2008 R2 may be installed either by booting from the installation DVD or by logging into the previously installed operating system as an administrator and launching the Setup tool on the DVD (typically this will auto-run when the DVD is inserted into the drive). The following figure shows the initial installation screen:
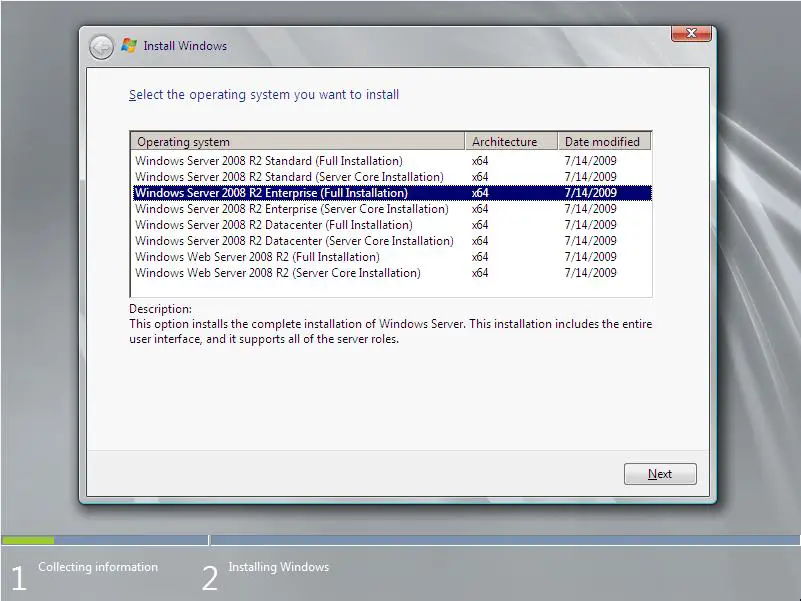
Select the appropriate language preferences and click Next to proceed with the installation process. On the subsequent screen the installation may be started by clicking on the Install now button. Alternatively, the What To Know Before Installing Windows Server 2008 link will provide information on system requirements and advice about issues such as application and driver compatibility. Clicking on Install now proceeds to the Operating System Selection screen shown in the following figure:
Having selected the edition of Windows Server 2008 R2 that you wish to install, click Next to proceed to license terms screen. Read and agree (assuming you do agree) to the license terms and proceed to the next screen where the options to upgrade or perform a custom installation are provided. If the installer was invoked by booting from the DVD, or the host operating system is not suitable for upgrade, only the custom installation option will work at this point. Select this option to proceed.
Disk and Partition Management
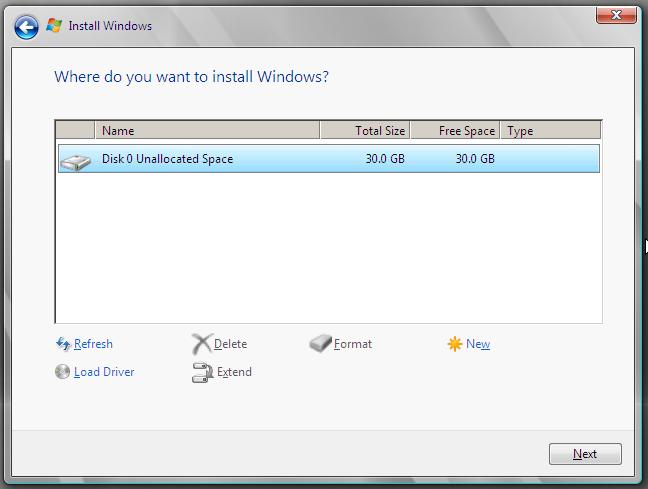
The next screen provides an interface for selecting and configuring disks and partitions for the installation. Initially, this screen displays a list of physical disk drives available on the system together with any pre-existing partitions on those disks. Clicking on the Drive options (advanced) option displays a number of options including the deletion, creation and formatting of partitions on the listed disk drives. In addition, the Load driver option allows any driver necessary to access a disk drive to be loaded into to system so that the device may be used as an installation destination. For the purposes of this installation, the entire disk drive will be used as the installation target. The following figure shows a single, unpartitioned disk drive with the Drive options displayed:
Click Next to begin the installation process. A new screen will appear listing the progress of the installation and highlighting the fact that the system will reboot a number of times during the installation.
Accessing the Command Prompt during Installation
At any point during the setup process (except when the installation is actually being performed) Shift+F10 may be pressed to gain access to the command-prompt. From within this command prompt window most of the standard Windows Server 2008 R2 command-line tools are available allowing tasks to be performed that might otherwise not be possible from within the setup interface. A full list of available commands and respective descriptions can be found in Windows Server 2008 R2 Command-line Tools.
<google>BUY_WINSERV_2008R2_BOTTOM</google>


