Running Windows on Fedora Using KVM Virtualization
| Previous | Table of Contents | Next |
| Installing a KVM Guest OS from the Command-line (virt-install) | Managing and Monitoring Fedora based KVM Guest Systems |
<google>BUY_FEDORA</google>
In Installing Fedora Linux on a Windows System (Dual booting) we looked at partitioning a disk so that both Windows and Linux could reside on a hard drive. The concept behind this configuration was that of creating a dual boot environment. The problem with dual boot environments is that only one operating system can run at any one time. If you are running Linux and need to run Windows you have to shutdown Linux and boot from Windows.
One of the advantages of virtualization is that it makes it possible to run Windows in a virtual machine on top of a running Linux system. This means that it is possible to have both operating systems running concurrently on the computer system without the need to shut one down and boot another.
In this chapter of Fedora Linux Essentials we will cover in detail every step necessary to install and run Windows inside a KVM virtual machine on Fedora Linux.
KVM System Requirements
Before embarking on the configuration outlined in this chapter it is important to understand some hardware requirements. Firstly, KVM virtualization of Windows guests is only available on certain processor types. The processors typical include Intel-VT or AMD-V technology.
To check for Intel-VT support, run the following command which checks for the presence of vmx:
# grep vmx /proc/cpuinfo
flags           : fpu tsc msr pae mce cx8 apic mtrr mca cmov pat pse36 clflush dts
acpi mmx fxsr sse sse2 ss ht tm syscall nx lm constant_tsc pni monitor ds_cpl vmx est tm2 cx16 xtpr lahf_lm
To check for AMD-V support, run the following command which checks for the presence of svm:
# grep svm /proc/cpuinfo
flags           : fpu tsc msr pae mce cx8 apic mtrr mca cmov pat pse36 clflush mmx fxsr sse sse2 ht
syscall nx mmxext fxsr_opt rdtscp lm 3dnowext 3dnow pni cx16 lahf_lm cmp_legacy svm cr8_legacy
<google>ADSDAQBOX_FLOW</google> Note that the above commands only report whether the processor supports the respective feature, it does not indicate whether the feature is currently enabled in the BIOS. In practice virtualization support is typically disabled in the BIOS of most systems. It is recommended, therefore, that you check your BIOS settings to ensure the appropriate virtualization technology is enabled before proceeding with this tutorial.
Unlike a dual booting environment a virtualized environment involves the running of two complete operating systems concurrently on a single computer system. This means that the system must have enough physical memory, disk space and CPU processing power to comfortably accommodate both systems in parallel. Before beginning the configuration and installation process check on the minimum system requirements for both Fedora Linux and your chosen Windows version and verify that your system has sufficient resources to handle the requirements of both systems.
Preparing Fedora for KVM Virtualization
KVM support is pre-built into the Fedora Linux kernel for Fedora release 7 and later. As a result KVM support is already available in the standard kernel avoiding the necessity to install and boot from a special kernel.
The tools required to setup and maintain virtualized system are not, however, installed by default. To fully utilize the KVM support built into the kernel the following packages are required:
- kvm
- virt-manager
- qemu
Check to find out if these packages are already installed on your system by running the following commands:
rpm -q qemu kvm virt-manager
If any of these packages are reported as not installed they may be installed using the yum package manager:
su -
yum install kvm qemu virt-manager
This command will install all the required packages. All that is required to enable KVM support at this point is to reboot the system. When the re-boot has completed, log in as usual.
Building a Fedora KVM Virtual System
Virtual systems can easily be configured using either the virt-install command-line tool, or the virt-manager GUI tool. For the purposes of this chapter we will use the virt-manager tool.
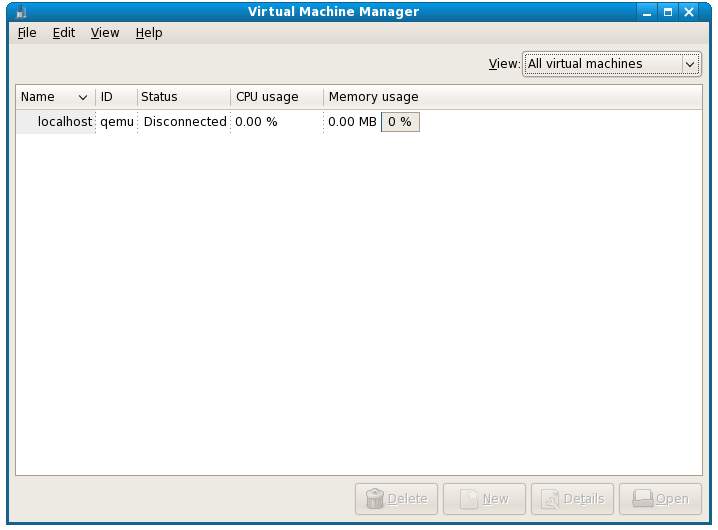
Begin by launching virt-manager either by selecting the Applications->System Tools->Virtual Machine Manager menu option or from the command-line by running /usr/sbin/virt-manager. Once loaded, the virtual manager will display the following screen:
The main virt-manager screen lists the current virtual machines running on the system. At this point there should only be one, the host system. Connect to the host system by right clicking on the entry in the list and selecting Connect from the popup menu. The Status field for this VM should now change to Active, and the New and Details buttons at the bottom of the dialog should be enabled.
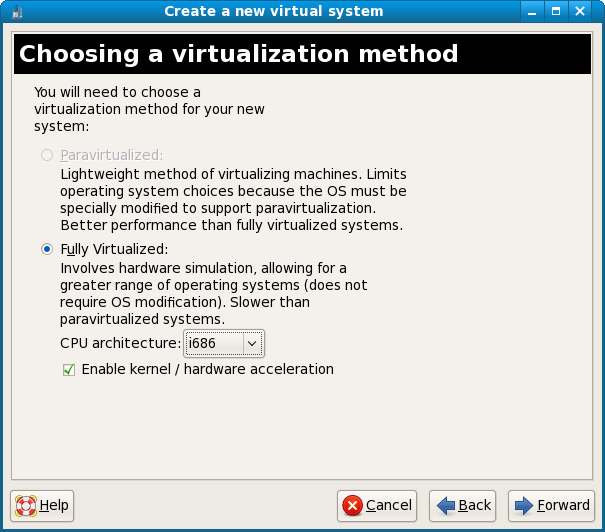
To create a new virtual system, click on the New button to display the first configuration screen. Click the Forward button to proceed to the Naming screen and enter a name for the virtual system can be any name you choose. Clicking Forward once more will display the virtualization options screen:
As KVM supports only full virtualization this is the sole option on this screen. The most important setting to note is the Enable kernel / hardware acceleration checkbox. If this option is disabled and cannot be selected then the appropriate virtualization technology for KVM is either missing from your CPU or is disabled in the BIOS (see the section above on system requirements for more information). Make sure this option is selected before pressing the Forward button.
Configuring the KVM Virtual System
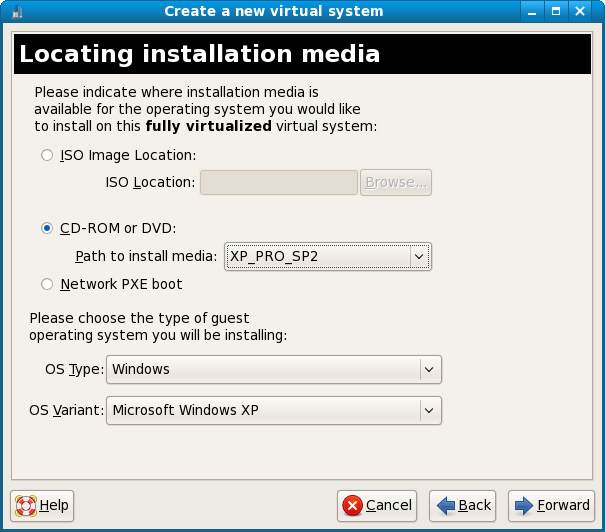
On the next page, you can choose where the installation media can be found for this virtual system. Options include CDROM or ISO image. You can also choose whether you plan to install Windows or Linux into the virtual system. Select Windows from the OS Type menu and your Windows version from the OS Variant menu. The following figure shows the screen configured for Windows XP.
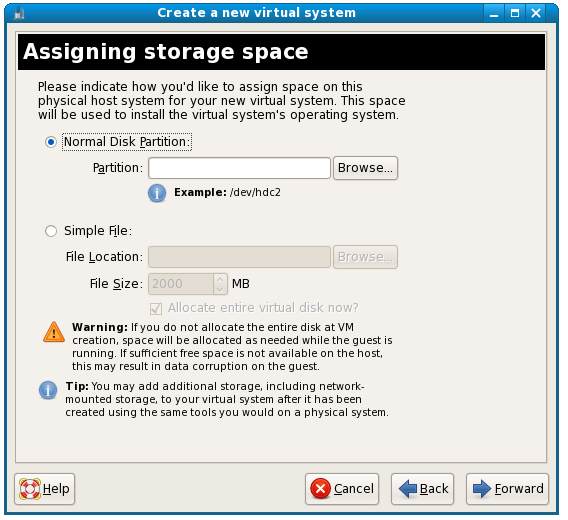
Once an appropriate configuration has been entered, click the next button to assign storage space:
If you have a disk partition available for the guest operating system, enter the device path. Otherwise, select Simple file, enter the path of the file to be created and select a file size (keeping in mind the space requirements for your chosen guest OS). Click the Forward key once more, configure your networking options and click the Forward button once again.
On the Connect to host network select the Virtual network option unless you have special networking requirements. Leave this setting as default and press the Forward button.
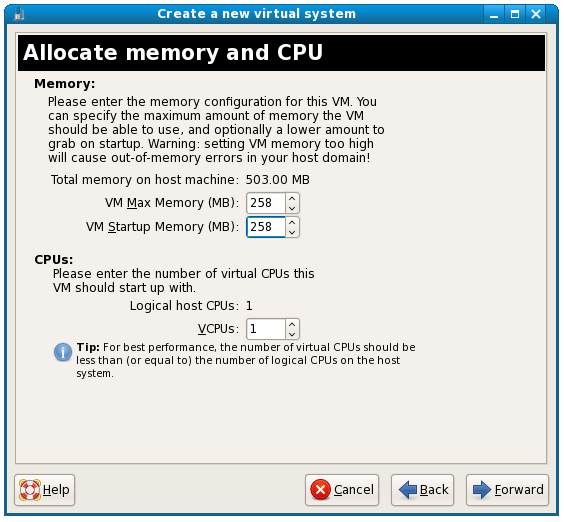
The next screen allows configuration of memory and CPU usage:
Setting the startup memory lower than the maximum will configure the system to allocate the minimum specified memory at start up and then acquire more as needed until the maximum is reached.
Select a memory setting which allows sufficient memory for the host system and the guest system to co-exist. If you plan to run multiple guest operating systems, be sure to allow for this.
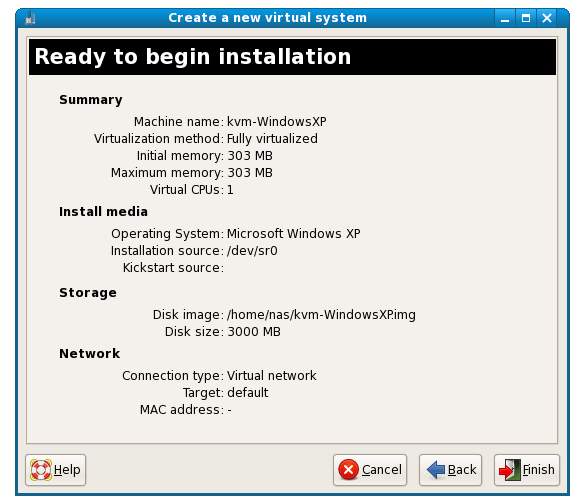
On a multi-CPU or multi-core CPU environment it is possible to define how many CPUs the guest OS will have access to. The final screen displays a summary of the configuration:
Configuring the KVM Virtual System CDROM Drive
Click on the Finish button to begin the creation process. The virtualization manager will create the disk and configure KVM before starting the system. Once the creation process is complete the system will startup. Unfortunately, we aren't quite ready to install Windows yet, so press the Shutdown button to stop the guest system from running.
Some versions of Windows (noteably Windows XP) perform a reboot partway through the installation process before entering the graphical phase of the installation. At this point in our tutorial, if we let the installation process start it will fail after it enters the graphical installation phase because it will no longer be able to see the CDROM drive containing the Windows installation media. The Windows installer will keep asking for the Windows installation CD into a disk drive it cannot actually access.
To avoid this problem, the next step is to configure a CD or DVD-ROM drive into our virtual system. To do so, select the new virtual machine in the main screen and select Details. On the details screen, select the Hardware tab and press the Add button. From Hardware type select Storage Device and press the Forward button.
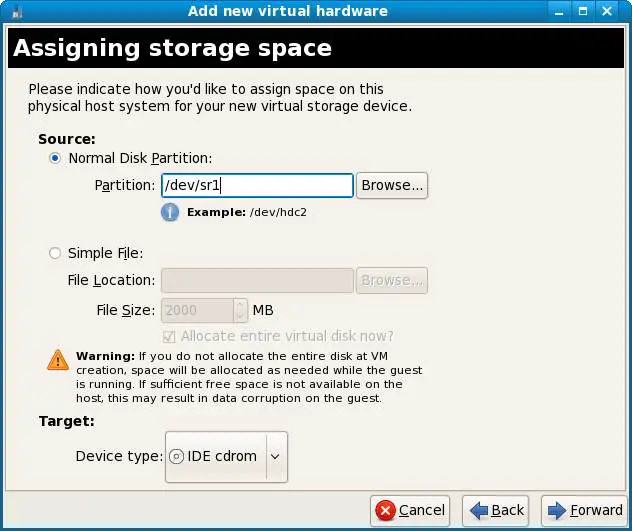
Enter the CDROM or DVD-ROM device for system in the Partition field and set the Target Device type to IDE CDROM. If you are unsure of the correct device, insert the Windows XP CDROM the drive and run the mount command in a terminal window. The following output shows the CDROM labeled XP_PRO_SP2 mounted on device /dev/sr1:
 mount
/dev/mapper/VolGroup00-LogVol00 on / type ext3 (rw)
proc on /proc type proc (rw)
sysfs on /sys type sysfs (rw)
devpts on /dev/pts type devpts (rw,gid=5,mode=620)
/dev/sda5 on /boot type ext3 (rw)
tmpfs on /dev/shm type tmpfs (rw)
none on /proc/sys/fs/binfmt_misc type binfmt_misc (rw)
sunrpc on /var/lib/nfs/rpc_pipefs type rpc_pipefs (rw)
/dev/sdc1 on /media/disk type ext3 (rw,nosuid,nodev,uhelper=hal)
/dev/sr1 on /media/XP_PRO_SP2 type iso9660 (ro,nosuid,nodev,uhelper=hal,uid=500)
The following screen shows the settings configured based on the above output from the mount command:
Click Forward followed by Finish to complete the installation of the CDROM drive.
Starting the KVM Virtual System
Return to the Virtual Machine Console and run the new virtual system by pressing the Run button. If the Virtual Machine Console is not running go to the Virtual Machine Manager, right click on the virtual system and select Run from the menu.
When the system starts up press F10 to choose the boot device and select CDROM.
From this point on, simply follow the operating installation instructions to install the Windows on your Fedora OS.
For information on starting, stopping, configuring and monitoring your Windows guest system read the chapter entitled Managing and Monitoring Fedora based KVM Guest Systems.
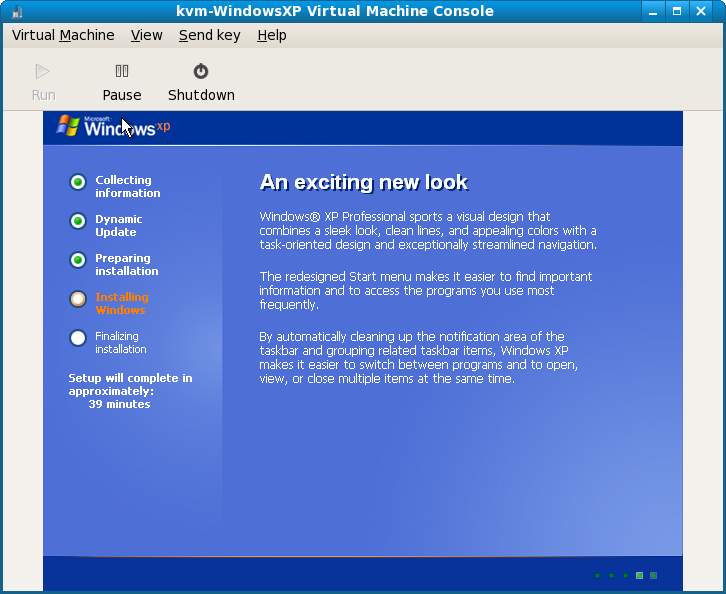
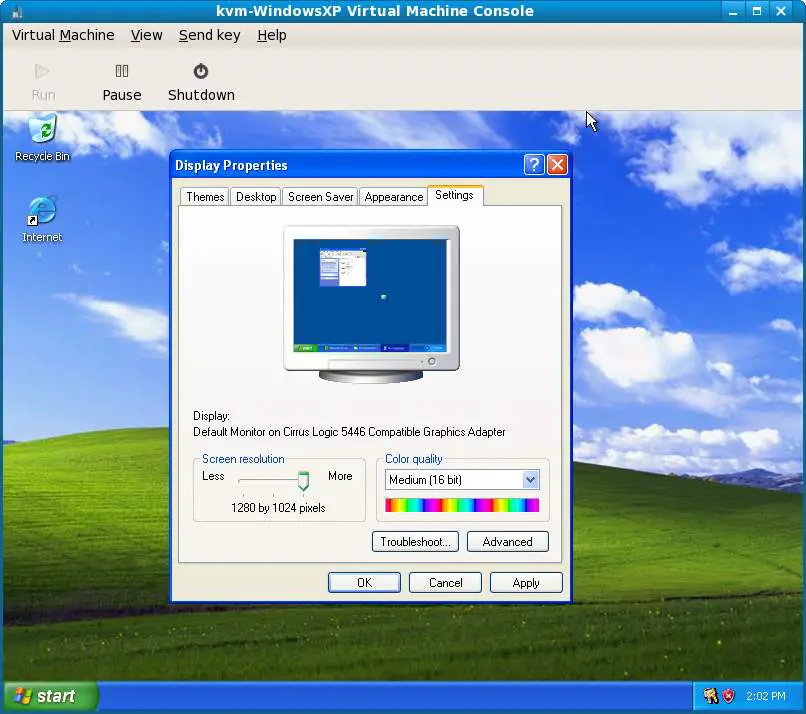
The following screen shows Windows XP running under KVM:
<google>BUY_FEDORA_BOTTOM</google>
| Previous | Table of Contents | Next |
| Installing a KVM Guest OS from the Command-line (virt-install) | Managing and Monitoring Fedora based KVM Guest Systems |
