Sharing Ubuntu Linux Folders with Remote Windows Systems
| Previous | Table of Contents | |
| Sharing Ubuntu Linux Folders with Remote Linux and UNIX Systems |
Although Linux is increasingly making inroads into the desktop market, its origins are very much server based. It is not surprising therefore that Linux has the ability to act as a file server. Files on a Linux system can be accessed both from other Linux (and UNIX) systems and Windows based systems over network connections.
Windows systems share resources such as file systems and printers using something called Server Message Block (SMB). In order for a Linux system to serve such resources over a network to a Windows system it must, therefore, support SMB. This is achieved using technology called Samba. Samba may also be used to provide folder sharing between Linux systems (as an alternative to NFS which was covered in Sharing Ubuntu Linux Folders with Remote Linux and UNIX Systems.
In this chapter we will look at the steps necessary to share file system resources and printers on an Ubuntu Linux system with remote Windows and Linux systems.
Setting Up Ubuntu Linux/Windows File Sharing
The sharing of Linux folders with Windows based systems is not installed and configured by default on Ubuntu Linux. Fortunately, attempting to share folders will automatically trigger the installation of the appropriate services.
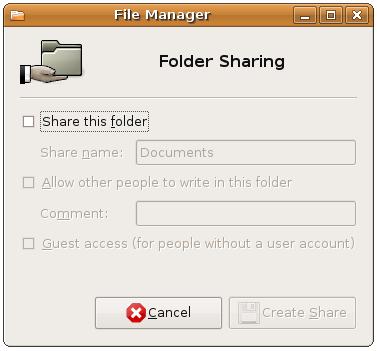
To begin the process of sharing, open file browser window by selecting, for example, Places->Home Folder. Navigate using the file browser until the folder to be shared is visible. Right click on the icon for this folder and select Sharing options' from the resulting menu to invoke the following dialog: <google>ADSDAQBOX_FLOW</google>
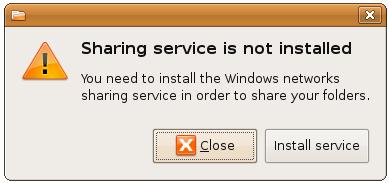
To enable folder sharing, set the Share this folder option. If the folder sharing service has not previously been installed, the following dialog will appear seeking permission to install the service:
Click Install, enter your password and wait for the installation to complete. Once the installation is finished it will be necessary to log out of the current desktop session and log in again before the changes take effect.
Sharing Ubuntu Linux Folders
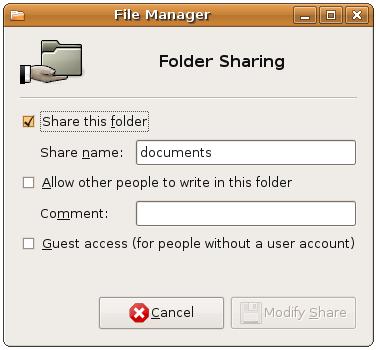
Once the folder sharing services are installed, the next step is to share a folder. Once again, open a file browser, locate a suitable file, right click on it and select Sharing Options. This time the Sharing Options dialog will appear with a number of configuration options available for editing:
The configuration options provided in this dialog are as follows:
- Share this folder - When selected, this option makes the folder available to other Windows and Linux systems on the network.
- Share name - The share name by which the folder will be referenced by Windows systems.
- Allow other people to write to this folder - Controls whether users accessing the folder remotely have read-only or read/write access to the folder.
- Guest access - Allows remote users who do not have an account on the local system to access the shared folder.
Once completed, the folder you specified will be visible from any Windows systems on the same network as your Ubuntu Linux system. You should now have remote access to your Linux folder from the Windows system.
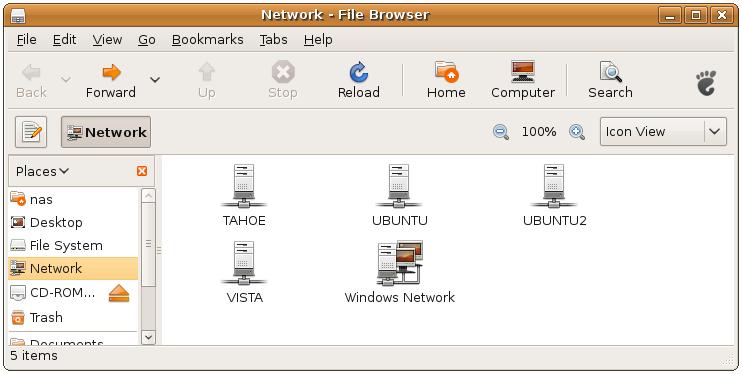
To access a shared folder from an Ubuntu system, select the Places->Network menu option. Once loaded, the browser will list all systems on the network as illustrated in the following figure:
To access a shared folder, simply double click on the corresponding host to view a list of available folders.


