An Android Java ConstraintSet Tutorial
The previous chapter introduced the basic concepts of creating and modifying user interface layouts in Java code using the ConstraintLayout and ConstraintSet classes. This chapter will take these concepts and put them into practice through the creation of an example layout created entirely in Java code and without using the Android Studio Layout Editor tool.
Creating the Example Project in Android Studio
Launch Android Studio and select the Start a new Android Studio project option from the quick start menu in the welcome screen.
In the new project configuration dialog, enter JavaLayout into the Application name field and ebookfrenzy.com as the Company Domain setting before clicking on the Next button.
On the form factors screen, enable the Phone and Tablet option and set the minimum SDK setting to API 26: Android 8.0 (Oreo). Continue to proceed through the screens, requesting the creation of an Empty Activity named JavaLayoutActivity with a corresponding layout named activity_java_layout.
Once the project has been created, the JavaLayoutActivity.java file should automatically load into the editing panel. As we have come to expect, Android Studio has created a template activity and overridden the onCreate() method, providing an ideal location for Java code to be added to create a user interface.
Adding Views to an Activity
The onCreate() method is currently designed to use a resource layout file for the user interface. Begin, therefore, by deleting this line from the method:
@Override
protected void onCreate(Bundle savedInstanceState) {
       super.onCreate(savedInstanceState);
       setContentView(R.layout.activity_java_layout);
}
The next modification is to add a ConstraintLayout object with a single Button view child to the activity. This involves the creation of new instances of the ConstraintLayout and Button classes. The Button view then needs to be added as a child to the ConstraintLayout view which, in turn, is displayed via a call to the setContentView() method of the activity instance:
package com.ebookfrenzy.javalayout;

import android.support.v7.app.AppCompatActivity;
import android.os.Bundle;
import android.support.constraint.ConstraintLayout;
import android.widget.Button;
import android.widget.EditText;

public class JavaLayoutActivity extends AppCompatActivity {

    @Override
    protected void onCreate(Bundle savedInstanceState) {
        super.onCreate(savedInstanceState);
        configureLayout();
    }

    private void configureLayout() {
        Button myButton = new Button(this);
        ConstraintLayout myLayout = new ConstraintLayout(this);
        myLayout.addView(myButton);
        setContentView(myLayout);
    }
}
When new instances of user interface objects are created in this way, the constructor methods must be passed the context within which the object is being created which, in this case, is the current activity. Since the above code resides within the activity class, the context is simply referenced by the standard this keyword:
Button myButton = new Button(this);
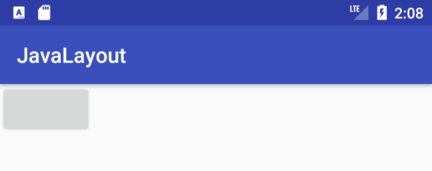
Once the above additions have been made, compile and run the application (either on a physical device or an emulator). Once launched, the visible result will be a button containing no text appearing in the top left-hand corner of the ConstraintLayout view as shown in Figure 23-1:
Setting View Attributes
For the purposes of this exercise, we need the background of the ConstraintLayout view to be blue and the Button view to display text that reads “Press Me” on a yellow background. Both of these tasks can be achieved by setting attributes on the views in the Java code as outlined in the following code fragment. In order to allow the text on the button to be easily translated to other languages it will be added as a String resource. Within the Project tool window, locate the app -> res -> values -> strings.xml file and modify it to add a resource value for the “Press Me” string:
<resources>
    <string name="app_name">JavaLayout</string>
    <string name="press_me">Press Me</string>
</resources>
Although this is the recommended way to handle strings that are directly referenced in code, to avoid repetition of this step throughout the remainder of the book, many subsequent code samples will directly enter strings into the code.
Once the string is stored as a resource it can be accessed from within code as follows:
getString(R.string.press_me);
With the string resource created, add code to the configureLayout() method to set the button text and color attributes:
.
.
import android.graphics.Color;

public class JavaLayoutActivity extends AppCompatActivity {

    private void configureLayout() {
        Button myButton = new Button(this);
        myButton.setText(getString(R.string.press_me));
        myButton.setBackgroundColor(Color.YELLOW);

        ConstraintLayout myLayout = new ConstraintLayout(this);
        myLayout.setBackgroundColor(Color.BLUE);

        myLayout.addView(myButton);
        setContentView(myLayout);
}
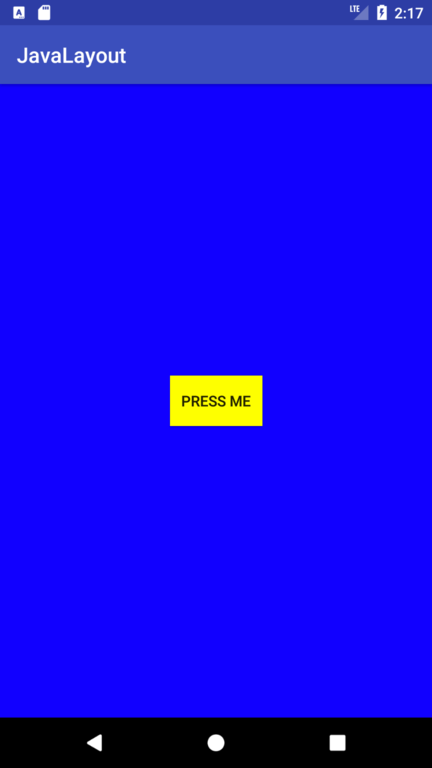
When the application is now compiled and run, the layout will reflect the property settings such that the layout will appear with a blue background and the button will display the assigned text on a yellow background.
Creating View IDs
When the layout is complete it will consist of a Button and an EditText view. Before these views can be referenced within the methods of the ConstraintSet class, they must be assigned unique view IDs. The first step in this process is to create a new resource file containing these ID values.
Right click on the app -> res -> values folder, select the New -> Values resource file menu option and name the new resource file id.xml. With the resource file created, edit it so that it reads as follows:
<?xml version="1.0" encoding="utf-8"?>
<resources>
    <item name="myButton" type="id" />
    <item name="myEditText" type="id" />
</resources>
At this point in the tutorial, only the Button has been created, so edit the createLayout() method to assign the corresponding ID to the object:
private void configureLayout() {
    Button myButton = new Button(this);
    myButton.setText(getString(R.string.press_me));
    myButton.setBackgroundColor(Color.YELLOW);
    myButton.setId(R.id.myButton);
.
.
Configuring the Constraint Set
In the absence of any constraints, the ConstraintLayout view has placed the Button view in the top left corner of the display. In order to instruct the layout view to place the button in a different location, in this case centered both horizontally and vertically, it will be necessary to create a ConstraintSet instance, initialize it with the appropriate settings and apply it to the parent layout.
For this example, the button needs to be configured so that the width and height are constrained to the size of the text it is displaying and the view centered within the parent layout. Edit the onCreate() method once more to make these changes:
.
.
import android.support.constraint.ConstraintSet;
.
.
private void configureLayout() {
    Button myButton = new Button(this);
    myButton.setText(getString(R.string.press_me));
    myButton.setBackgroundColor(Color.YELLOW);
    myButton.setId(R.id.myButton);

    ConstraintLayout myLayout = new ConstraintLayout(this);
    myLayout.setBackgroundColor(Color.BLUE);

    myLayout.addView(myButton);
    setContentView(myLayout);

    ConstraintSet set = new ConstraintSet();

    set.constrainHeight(myButton.getId(),
            ConstraintSet.WRAP_CONTENT);
    set.constrainWidth(myButton.getId(),
            ConstraintSet.WRAP_CONTENT);

    set.connect(myButton.getId(), ConstraintSet.START,
            ConstraintSet.PARENT_ID, ConstraintSet.START, 0);
    set.connect(myButton.getId(), ConstraintSet.END,
            ConstraintSet.PARENT_ID, ConstraintSet.END, 0);
    set.connect(myButton.getId(), ConstraintSet.TOP,
            ConstraintSet.PARENT_ID, ConstraintSet.TOP, 0);
    set.connect(myButton.getId(), ConstraintSet.BOTTOM,
            ConstraintSet.PARENT_ID, ConstraintSet.BOTTOM, 0);

    set.applyTo(myLayout);
}
With the initial constraints configured, compile and run the application and verify that the Button view now appears in the center of the layout:
Adding the EditText View
The next item to be added to the layout is the EditText view. The first step is to create the EditText object, assign it the ID as declared in the id.xml resource file and add it to the layout. The code changes to achieve these steps now need to be made to the onCreate() method as follows:
private void configureLayout() {
    Button myButton = new Button(this);
    myButton.setText(getString(R.string.press_me));
    myButton.setBackgroundColor(Color.YELLOW);
    myButton.setId(R.id.myButton);

    EditText myEditText = new EditText(this);
    myEditText.setId(R.id.myEditText);

    ConstraintLayout myLayout = new ConstraintLayout(this);
    myLayout.setBackgroundColor(Color.BLUE);

    myLayout.addView(myButton);
    myLayout.addView(myEditText);

    setContentView(myLayout);
.
.
}
The EditText widget is intended to be sized subject to the content it is displaying, centered horizontally within the layout and positioned 70dp above the existing Button view. Add code to the configureLayout() method so that it reads as follows:
.
.
set.connect(myButton.getId(), ConstraintSet.START,
              ConstraintSet.PARENT_ID, ConstraintSet.START, 0);
set.connect(myButton.getId(), ConstraintSet.END,
              ConstraintSet.PARENT_ID, ConstraintSet.END, 0);
set.connect(myButton.getId(), ConstraintSet.TOP,
              ConstraintSet.PARENT_ID, ConstraintSet.TOP, 0);
set.connect(myButton.getId(), ConstraintSet.BOTTOM,
              ConstraintSet.PARENT_ID, ConstraintSet.BOTTOM, 0);

set.constrainHeight(myEditText.getId(),
                         ConstraintSet.WRAP_CONTENT);
set.constrainWidth(myEditText.getId(),
                         ConstraintSet.WRAP_CONTENT);

set.connect(myEditText.getId(), ConstraintSet.START,
              ConstraintSet.PARENT_ID, ConstraintSet.START, 0);
set.connect(myEditText.getId(), ConstraintSet.END,
              ConstraintSet.PARENT_ID, ConstraintSet.END, 0);
set.connect(myEditText.getId(), ConstraintSet.BOTTOM,
              myButton.getId(), ConstraintSet.TOP, 70);

set.applyTo(myLayout);
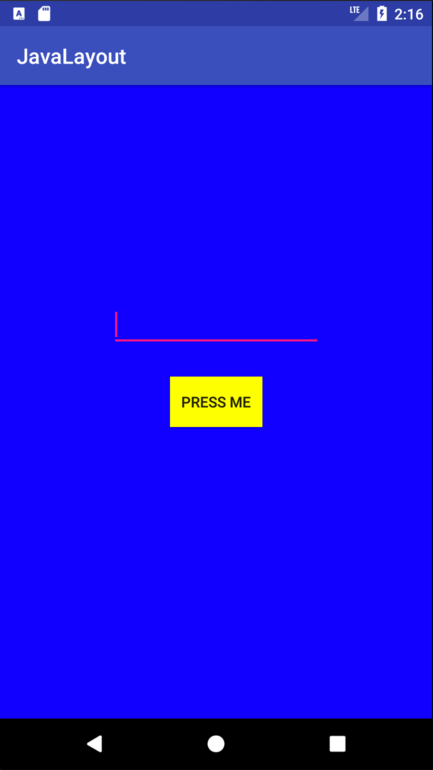
A test run of the application should show the EditText field centered above the button with a margin of 70dp.
Converting Density Independent Pixels (dp) to Pixels (px)
The next task in this exercise is to set the width of the EditText view to 200dp. As outlined in the chapter entitled “An Android Studio Layout Editor ConstraintLayout Tutorial” when setting sizes and positions in user interface layouts it is better to use density independent pixels (dp) rather than pixels (px). In order to set a position using dp it is necessary to convert a dp value to a px value at runtime, taking into consideration the density of the device display. In order, therefore, to set the width of the EditText view to 200dp, the following code needs to be added to the class:
package com.ebookfrenzy.javalayout;
.
.
import android.content.res.Resources;
import android.util.TypedValue;

public class JavaLayoutActivity extends AppCompatActivity {

    private int convertToPx(int value) {
        Resources r = getResources();
        int px = (int) TypedValue.applyDimension(
                TypedValue.COMPLEX_UNIT_DIP, value,
                r.getDisplayMetrics());
        return px;
    }

    private void configureLayout() {
        Button myButton = new Button(this);
        myButton.setText(getString(R.string.press_me));
        myButton.setBackgroundColor(Color.YELLOW);
        myButton.setId(R.id.myButton);

        EditText myEditText = new EditText(this);
        myEditText.setId(R.id.myEditText);

        int px = convertToPx(200);
        myEditText.setWidth(px);
.
.
}
Compile and run the application one more time and note that the width of the EditText view has changed as illustrated in Figure 23-3:
Summary
The example activity created in this chapter has, of course, created a similar user interface (the change in background color and view type notwithstanding) as that created in the earlier “Manual XML Layout Design in Android Studio” chapter. If nothing else, this chapter should have provided an appreciation of the level to which the Android Studio Layout Editor tool and XML resources shield the developer from many of the complexities of creating Android user interface layouts.
There are, however, instances where it makes sense to create a user interface in Java. This approach is most useful, for example, when creating dynamic user interface layouts.


