Testing Android Studio Apps on a Physical Android Device
| Previous | Table of Contents | Next |
| A Tour of the Android Studio User Interface | The Basics of the Android Studio Code Editor |
While much can be achieved by testing applications using an Android Virtual Device (AVD), there is no substitute for performing real world application testing on a physical Android device and there are a number of Android features that are only available on physical Android devices.
Communication with both AVD instances and connected Android devices is handled by the Android Debug Bridge (ADB). In this chapter we will work through the steps to configure the adb environment to enable application testing on a physical Android device with macOS, Windows and Linux based systems.
An Overview of the Android Debug Bridge (ADB)
The primary purpose of the ADB is to facilitate interaction between a development system, in this case Android Studio, and both AVD emulators and physical Android devices for the purposes of running and debugging applications.
The ADB consists of a client, a server process running in the background on the development system and a daemon background process running in either AVDs or real Android devices such as phones and tablets.
The ADB client can take a variety of forms. For example, a client is provided in the form of a command-line tool named adb located in the Android SDK platform-tools sub-directory. Similarly, Android Studio also has a built-in client.
A variety of tasks may be performed using the adb command-line tool. For example, a listing of currently active virtual or physical devices may be obtained using the devices command-line argument. The following command output indicates the presence of an AVD on the system but no physical devices:
$ adb devices
List of devices attached
emulator-5554   device
Enabling ADB on Android based Devices
Before ADB can connect to an Android device, that device must first be configured to allow the connection. On phone and tablet devices running Android 6.0 or later, the steps to achieve this are as follows:
Open the Settings app on the device and select the About tablet or About phone option (on newer versions of Android this can be found on the System page of the Settings app).
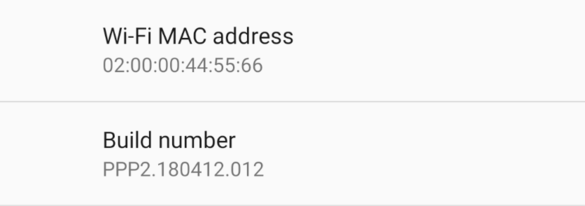
On the About screen, scroll down to the Build number field (Figure 7-1) and tap on it seven times until a message appears indicating that developer mode has been enabled. If the build number is not displayed, unfold the Advanced section of the list.
Return to the main Settings screen and note the appearance of a new option titled Developer options. Select this option and locate the setting on the developer screen entitled USB debugging. Enable the switch next to this item as illustrated in Figure 7-2:
Swipe downward from the top of the screen to display the notifications panel (Figure 7-3) and note that the device is currently connected for debugging.
At this point, the device is now configured to accept debugging connections from adb on the development system. All that remains is to configure the development system to detect the device when it is attached. While this is a relatively straightforward process, the steps involved differ depending on whether the development system is running Windows, macOS or Linux. Note that the following steps assume that the Android SDK platform-tools directory is included in the operating system PATH environment variable as described in the chapter entitled “Setting up an Android Studio Development Environment”.
macOS ADB Configuration
In order to configure the ADB environment on a macOS system, connect the device to the computer system using a USB cable, open a terminal window and execute the following command to restart the adb server:
$ adb kill-server
$ adb start-server
* daemon not running. starting it now on port 5037 *
* daemon started successfully *
Once the server is successfully running, execute the following command to verify that the device has been detected:
$ adb devices
List of devices attached
74CE000600000001        offline
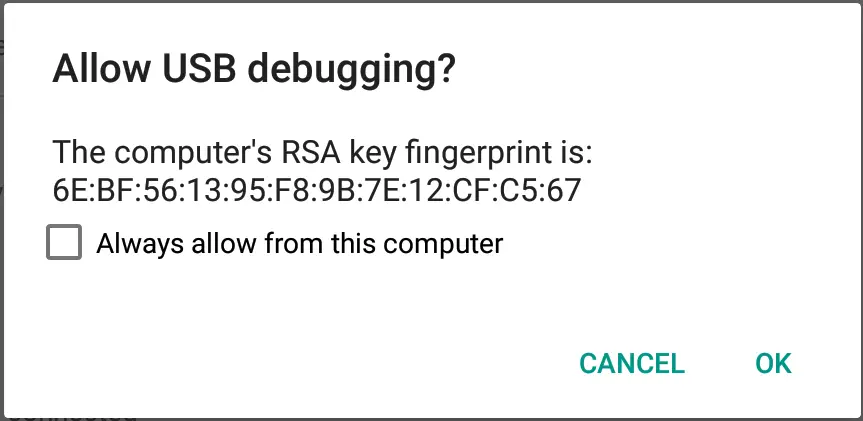
If the device is listed as offline, go to the Android device and check for the presence of the dialog shown in Figure 7-4 seeking permission to Allow USB debugging. Enable the checkbox next to the option that reads Always allow from this computer, before clicking on OK. Repeating the adb devices command should now list the device as being available:
List of devices attached
015d41d4454bf80c        device
In the event that the device is not listed, try logging out and then back in to the macOS desktop and, if the problem persists, rebooting the system.
Windows ADB Configuration
The first step in configuring a Windows based development system to connect to an Android device using ADB is to install the appropriate USB drivers on the system. The USB drivers to install will depend on the model of Android Device. If you have a Google Nexus device, then it will be necessary to install and configure the Google USB Driver package on your Windows system. Detailed steps to achieve this are outlined on the following web page:
https://developer.android.com/sdk/win-usb.html
For Android devices not supported by the Google USB driver, it will be necessary to download the drivers provided by the device manufacturer. A listing of drivers together with download and installation information can be obtained online at:
https://developer.android.com/tools/extras/oem-usb.html
With the drivers installed and the device now being recognized as the correct device type, open a Command Prompt window and execute the following command:
adb devices
This command should output information about the connected device similar to the following:
List of devices attached
HT4CTJT01906        offline
If the device is listed as offline or unauthorized, go to the device display and check for the dialog shown in Figure 7-4 seeking permission to Allow USB debugging.
Enable the checkbox next to the option that reads Always allow from this computer, before clicking on OK. Repeating the adb devices command should now list the device as being ready:
List of devices attached
HT4CTJT01906    device
In the event that the device is not listed, execute the following commands to restart the ADB server:
adb kill-server
adb start-server
If the device is still not listed, try executing the following command:
android update adb
Note that it may also be necessary to reboot the system.
Linux adb Configuration
For the purposes of this chapter, we will once again use Ubuntu Linux as a reference example in terms of configuring adb on Linux to connect to a physical Android device for application testing.
Physical device testing on Ubuntu Linux requires the installation of a package named android-tools-adb which, in turn, requires that the Android Studio user be a member of the plugdev group. This is the default for user accounts on most Ubuntu versions and can be verified by running the id command. If the plugdev group is not listed, run the following command to add your account to the group:
sudo usermod -aG plugdev $LOGNAME
After the group membership requirement has been met, the android-tools-adb package can be installed by executing the following command:
sudo apt-get install android-tools-adb
Once the above changes have been made, reboot the Ubuntu system. Once the system has restarted, open a Terminal window, start the adb server and check the list of attached devices:
$ adb start-server
* daemon not running. starting it now on port 5037 *
* daemon started successfully *
$ adb devices
List of devices attached
015d41d4454bf80c        offline
If the device is listed as offline or unauthorized, go to the Android device and check for the dialog shown in Figure 7-4 seeking permission to Allow USB debugging.
Testing the adb Connection
Assuming that the adb configuration has been successful on your chosen development platform, the next step is to try running the test application created in the chapter entitled “Creating an Example Android App in Android Studio” on the device.
Launch Android Studio, open the AndroidSample project and, once the project has loaded, click on the run button located in the Android Studio toolbar (Figure 7-5).
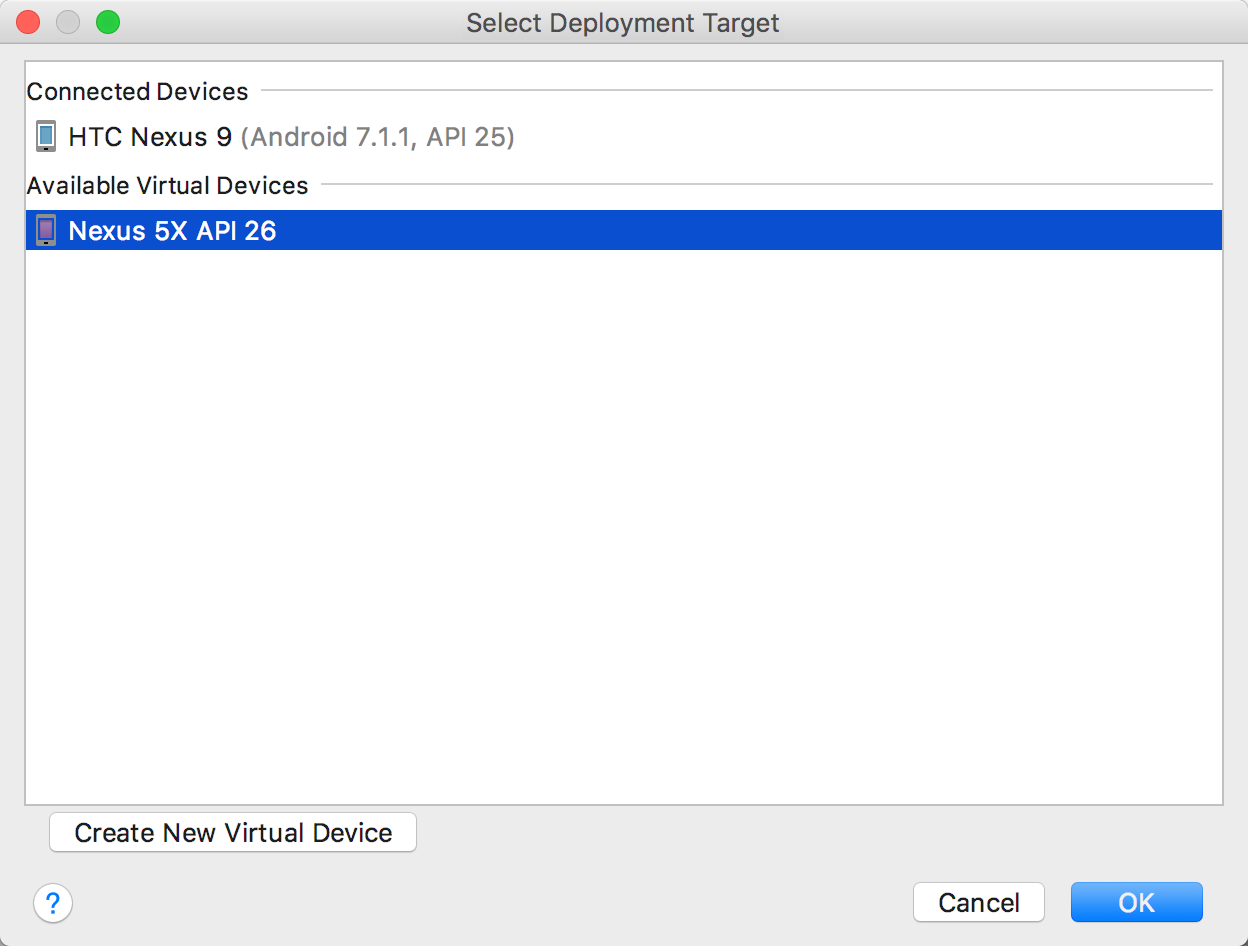
Assuming that the project has not previously been configured to run automatically in an emulator environment, the deployment target selection dialog will appear with the connected Android device listed as a currently running device. Figure 7-6, for example, lists a Nexus 9 device as a suitable target for installing and executing the application.
To make this the default device for testing, enable the Use same device for future launches option. With the device selected, click on the OK button to install and run the application on the device. As with the emulator environment, diagnostic output relating to the installation and launch of the application on the device will be logged in the Run tool window.
Summary
While the Android Virtual Device emulator provides an excellent testing environment, it is important to keep in mind that there is no real substitute for making sure an application functions correctly on a physical Android device. This, after all, is where the application will be used in the real world.
By default, however, the Android Studio environment is not configured to detect Android devices as a target testing device. It is necessary, therefore, to perform some steps in order to be able to load applications directly onto an Android device from within the Android Studio development environment. The exact steps to achieve this goal differ depending on the development platform being used. In this chapter, we have covered those steps for Linux, macOS and Windows based platforms.
| Previous | Table of Contents | Next |
| A Tour of the Android Studio User Interface | The Basics of the Android Studio Code Editor |


