Installing and Configuring Fedora Xen Virtualization
Virtualization is the ability to run multiple operating systems simultaneously on a single computer system.
Virtualization has come to prominence in recent years because it provides a way to fully utilize CPU and resource capacity of a server system whilst providing stability (in that if one virtualized guest system crashes, the host and any other guest systems continue to run).
Virtualization is also useful in terms of trying out different operating systems without having to configure dual boot environments. For example, you can try out Ubuntu Linux without having to re-partition the disk and reboot from Fedora Linux. You simply start up virtualized version of Ubuntu as a guest operating system.
There are a number of ways to implement virtualization on Fedora. Options include VMware and KVM. One of the most popular technologies on Fedora is called Xen. Red Hat engineers have invested considerable effort into making Xen easy to install, configure and manage on both Red Hat Enterprise Linux and Fedora. Many of these improvements appeared in Fedora 7. For these reasons, this chapter will focus on Xen Virtualization in Fedora and will assume you are using Fedora 7 or later.
Checking Xen Hardware Compatibility
Before using Xen, it is important to ensure that your current hardware configuration is suitable to support Xen.
Each guest operating system installed will reside on the existing filesystems of the host Fedora system. It is important, therefore, that there is enough disk space available to install your choice of guest operating systems. As a guideline, a command line version of Fedora Linux requires approximately 600Mb of disk space. A full, installation of Fedora (including desktop) requires around 3Gb of disk space.
Of further concern is physical memory. Sufficient memory is required to run both the host operating system and the guest operating system. If the guest operating system is not using a desktop environment, then it is possible to allocate 256Mb of memory to the guest OS. A full, graphical desktop Linux installation will require considerably more (a minimum of between 300 - 400Mb will provide reasonable performance).
In order to support virtualization, the CPU must, at a minimum, support the PAE extension. To verify that your CPU supports PAE run the following command from a Terminal window:
grep pae /proc/cpuinfo
If no output is displayed, then your CPU is not able to support Xen virtualization. If, on the other hand, you see output similar to the following, then you can proceed with the Xen configuration:
flags           : fpu tsc msr pae mce cx8 apic mtrr mca cmov pat pse36 clflush dts acpi
                     mmx fxsr sse sse2 ss nx constant_tsc up pni ds_cpl
To support full hardware virtualization the CPU must include Intel-VT or AND-V support. This can be verified using the following commands:
For Intel CPUs:
grep vmx /proc/cpuinfo
For AMD CPUSs:
grep svm /proc/cpuinfo
If your system does not include this support you can still use Xen in para-virtualization mode.
Preparing Fedora for Xen Virtualization
Xen requires a specially modified Linux kernel and a number of tools in order to operate. By default Fedora does not use this Kernel or these tools. The next step, therefore, is to prepare the operating system for Xen. Begin by installing the virtualization tools and kernel as follows:
su -
yum groupinstall 'Virtualization'
This command will install all the required packages, and configure the boot loader to provide a Xen virtualization option when the system is next booted.
At this point, reboot the system. When the boot screen appears hit any key to enter to boot menu and select the Fedora Xen boot option. During the boot phase you will notice some different messages appearing from previous boots. This is a good sign that the kernel with Xen support is loading.
When the boot has completed, log in as usual and open a Terminal window. In that window run the following command to verify that kernel with Xen support has loaded:
uname -r
You should expect to see output similar to the following:
2.6.20-2931.fc7xen
You can also check that Xen is running with the following command:
su -
/sbin/xm list
This command will list any currently running Xen machines.
It is now time to build a Xen virtual machine to contain a guest operating system:
Name                                      ID   Mem VCPUs      State   Time(s)
Domain-0                                   0   384     1     r-----   1710.0
Currently, this command lists only the host operating system. When guest operating systems are running, these too will be listed.
It is now time to build a Xen virtual machine to contain a guest operating system.
Building a Fedora Xen Guest System
Guest systems can easily be configured using either the virt-install command-line tool, or the virt-manager GUI tool. For the purposes of this chapter we will use the virt-manager tool.
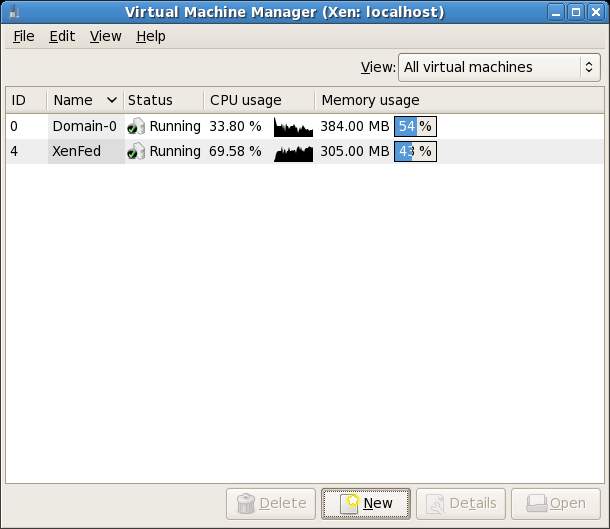
Begin by launching virt-manager either by selecting the Applications->System Tools->Virtual Machine Manager or from the command-line by running /usr/sbin/virt-manager. Once loaded, the virtual manager will display the following screen:
To create a new guest system, click on the New button to display the first configuration screen. Click the Forward button to proceed to the Naming screen and enter a name for the virtual machine. This can be any name you choose.
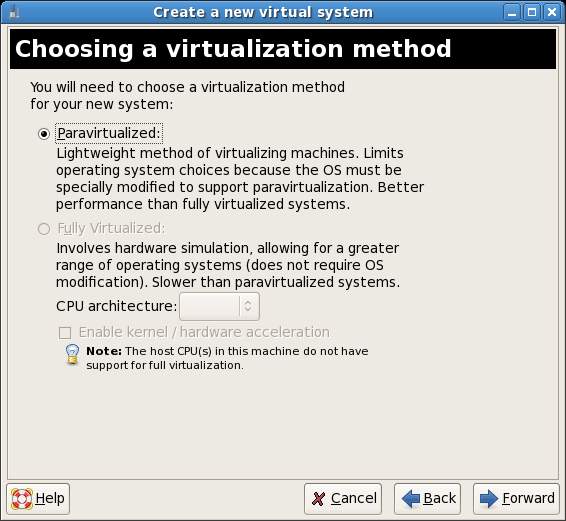
On the next page, you can choose to configure a Full or Para-virtualized method. The Full virtualization option will only be selectable if your hardware supports it:
Select Para-virtualized and press Forward. The next screen requires information about the location of the operating system installation files. Currently guest operating systems can only be installed over a network or the internet. The easiest way is to provide the http address of the operating system installation files. To install the i386 Fedora 7 distribution you might, for example, enter:
http://download.fedora.redhat.com/pub/fedora/linux/releases/7/Fedora/i386/os/
Alternatively, select a mirror site closest to your geographical location from the Fedora mirror list.
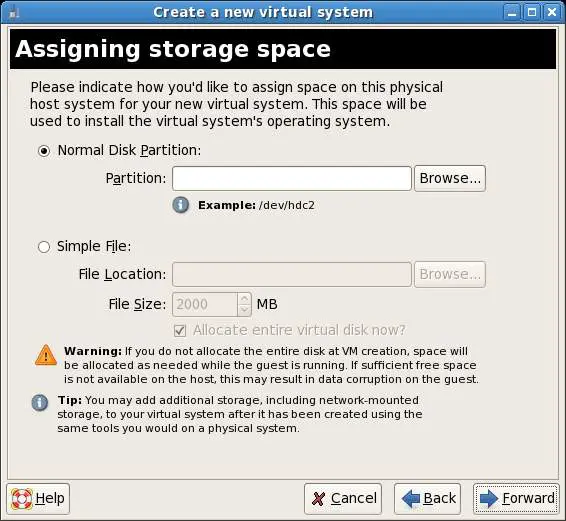
Once an appropriate address has been entered, click the next button to assign storage space:
if you have a disk partition available for the guest operating system, enter the device path. Otherwise, select Simple file and enter the path of the file to be created and select a file size (keeping in mind the space requirements for your chosen guest OS). Click the Forward key once more.
On the Connect to network host select Shared physical device and click Forward. This will configure the guest OS to share the host operating system's ethernet connection.
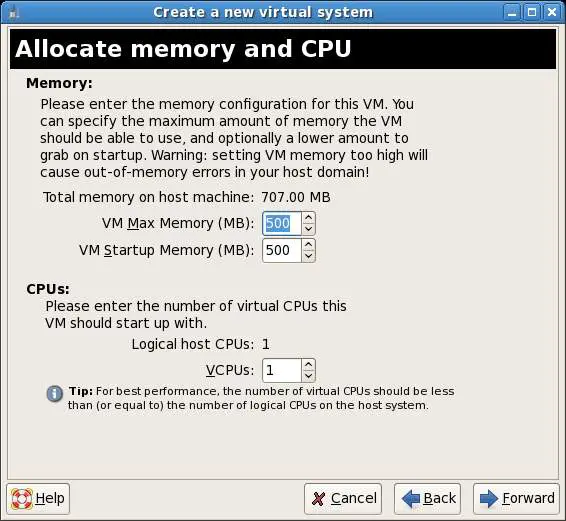
The next screen allows configuration of memory and CPU usage:
Select a memory setting which allow sufficient memory for the host system and the guest system to co-exist. If you plan to run multiple guest operating systems, be sure to allow for this.
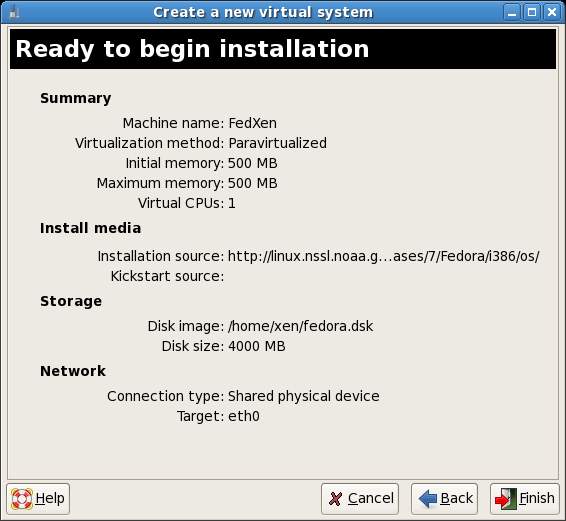
On a multi-CPU or multi-core CPU environment it is possible to define how many CPUs the guest OS will have access to. The final screen displays a summary of the configuration:
Click on the Finish button to begin the creation process. The virtualization manager will create the disk and configure Xen before starting the system. Once started, the guest OS installation will begin:
File:Fedora xen os install,jpg
From this point on, simply follow the operating installation instructions to install the guest OS.
The next chapter will focus on Managing Fedora based Xen Virtualization.
