Ubuntu 10.x Desktop Visual Effects
| Previous | Table of Contents | Next |
| Configuring the Ubuntu 10.x Desktop Menu System | Configuring Ubuntu 10.x Wireless Networking |
Recent versions of Ubuntu have begun to introduce some impressive visual desktop effects. Such effects include the desktop rotating as a 3D cube when the workspace is changed and interesting effects when windows are opened, closed or moved. Other useful effects involve all the currently opened windows appearing tiled on the desktop when the mouse pointer is positioned in the top right hand corner of the desktop. This allows the user to see all currently running applications on the desktop and select one to bring to the top of the window stack.
Introducing Compiz Fusion
These desktop effects are provided by technology called Compiz Fusion which is installed by default. When the Ubuntu GNOME desktop is first run after an installation the Compiz Fusion features will be configured at a level appropriate for the computer's graphics card. These settings can be configured in a number of different ways, and this will be the focus of this chapter. Before proceeding it is important to keep in mind that the more advanced visual effects may not work with basic, entry level or older video cards. Attempting to use visual effects with a low end video card may cause the X server to exit.
Changing the Default Visual Effects Settings
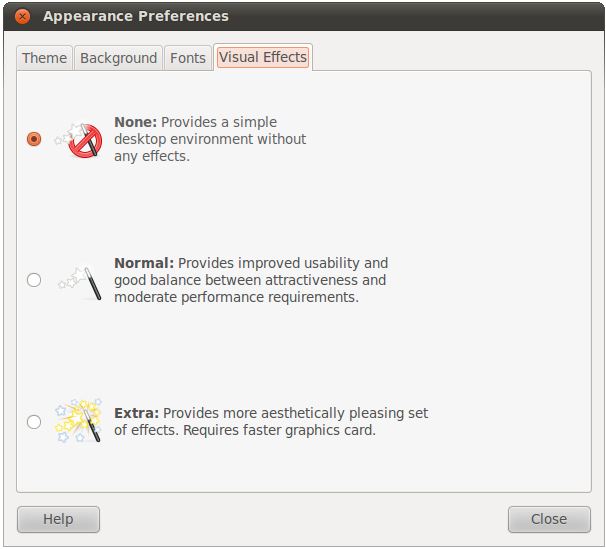
The default level of visual effects applied to the desktop is configurable from the Appearance Preferences Dialog. This is accessed by selecting the System -> Preferences -> Appearance menu option. Once the dialog is visible, click on the Visual Effects tab to display the following settings panel:
To change the default effects level simply click on the appropriate toggle. If a video card driver is required to support visual effects, Ubuntu will attempt to locate and install one.
Advanced Desktop Effects Settings
The above settings dialog provides only very broad configuration options. For more fine grained desktop effect configuration it is necessary to use the CompizConfig Settings Manager. Typically this configuration utility is not installed by default with Ubuntu so the first step is to install it.
Begin by launching the Ubuntu Software Center tool from the desktop Applications menu and then enter CompizConfig into the search field. The tool will subsequently list the Advanced Desktop Effects Settings application. Select this item and click on the Install button to begin the installation process. Once the package is installed close the software center tool.
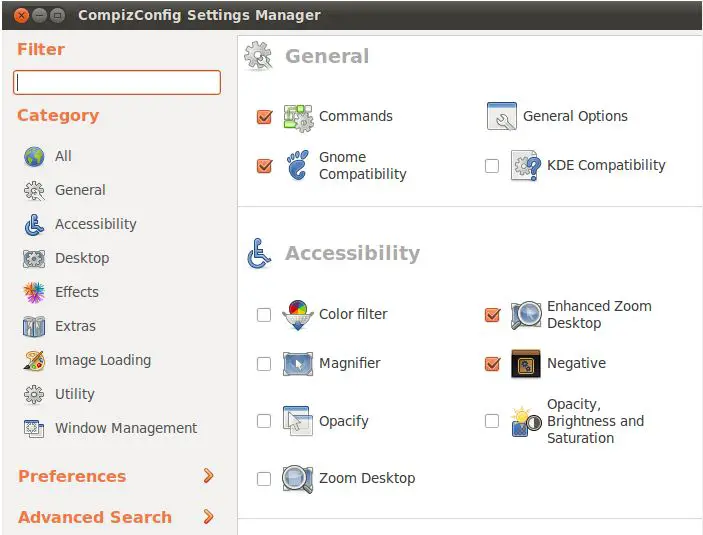
The CompizConfig Settings Manager is invoked via the CompizConfig Settings Manager option located in the System -> Preferences menu. When the tool starts the following dialog will appear:
The left hand panel lists the different categories of settings. Clicking on a category displays the related properties in the right hand panel. The above figure shows the General and Accessibility settings. Some of the effect names are not very self-explanatory. To get more information about an effect let the mouse pointer hover over the name until a tooltip window pops up with a description.
The best way to learn about these effects is to experiment with them until you find a mix that you find pleasing.
Summary
The purpose of this chapter was to provide an overview of configuring Ubuntu desktop visual effects.
| Previous | Table of Contents | Next |
| Configuring the Ubuntu 10.x Desktop Menu System | Configuring Ubuntu 10.x Wireless Networking |


