An iOS 6 iPhone State Preservation and Restoration Tutorial
| Previous | Table of Contents | Next |
| An Overview of iOS 6 Application State Preservation and Restoration | Integrating Maps into iPhone iOS 6 Applications using MKMapItem |
Learn SwiftUI and take your iOS Development to the Next Level |
In the previous chapter, a significant amount of information was conveyed relating to using the new features of UIKit in iOS 6 to preserve and restore application state when an application currently placed into the background is terminated by the operating system and needs to be restarted.
The knowledge covered in the previous chapter will now be re-enforced through the creation of an example application that demonstrates exactly how to implement state preservation and restoration in iOS 6.
Creating the Example Application
Begin by launching Xcode and selecting the options to create a new iPhone iOS application based on the Tabbed Application template. Enter StateApp as the product name and class prefix, set the device to iPhone and select the Use Storyboards and Use Automatic Reference Counting options if they are not already enabled.
Trying the Application without State Preservation
The Tabbed Application template has provided enough functionality to experience some of the default effects of state preservation and restoration. First, run the application without opting in to state preservation. To so do, simply select a target of either the iOS Simulator or a physical iPhone device in the Xcode toolbar and click on the Run button. When the application has loaded, select the Second tab so that the Second View is visible before pressing the round home button at the bottom of the device to place the application into the background.
The easiest way to test state preservation is to simulate the application being terminated by the operating system whilst in the background. To achieve this, simply click on the Stop button in the Xcode toolbar. Once the application has stopped running, launch it a second time by clicking on the Run button. When the application launches, the First tab will be selected instead of the Second tab. Clearly no application state has been preserved between application launches. This is because the application has not “opted-in” to state preservation and restoration.
Opting-in to State Preservation
Before any kind of state preservation and restoration will become effective, the application must first opt in to the system. Within the project navigator panel, select the application delegate implementation source file (StateAppAppDelegate.m) and modify it to add the two methods required to opt in to both the saving and restoration of application state:
-(BOOL)application:(UIApplication *)application shouldRestoreApplicationState:(NSCoder *)coder
{
    return YES;
}

-(BOOL)application:(UIApplication *)application shouldSaveApplicationState:(NSCoder *)coder
{
    return YES;
}
With the above code changes implemented, once again run the application and perform the previous test to verify that the application is restored to the Second tab. Yet again, the application will re-launch with the First tab selected. This is because, although the application opted in to state preservation, restoration IDs have not been assigned. As far as UIKit is concerned, therefore, no state needed to be preserved.
Setting Restoration Identifiers
So far the application storyboard consists of a Tab Bar Controller, two view controllers and a view for each controller (each of which in turn currently contains labels added by Xcode when the Tabbed Application template was selected). In order for any kind of application state to be saved, restoration IDs must be assigned to appropriate objects. The rules of state preservation dictate that any view or view controller object, and its direct ancestors up to and including the root view controller must have a restoration ID in order to be included in the state save file. In the case of this application, restoration IDs need to be added to the Tab Controller and the two view controllers. Since the view controllers will be responsible for the state of the views, these views do not need restoration IDs.
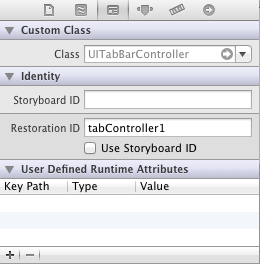
Select the MainStoryboard.storyboard file in the project navigator panel and locate the Tab Bar Controller in the storyboard canvas. Display the Identity Inspector and enter tabController1 into the Restoration ID field as illustrated in Figure 58-1:
Figure 58-1
Repeat these steps to assign restoration IDs of viewController1 and viewController2 to the first and second view controllers respectively. When doing so, make sure that it is the view controllers, and not the view objects, that are being selected by clicking on the black status bar at the top of the view containing the battery status indicator and not the white background of the view.
With the restoration IDs assigned, run the application and select the Second tab. Put the application into the background and then stop and restart the application. This time the application will re-launch and restore the second view as the current view. The default state saving features of UIKit in iOS 6 are now working and more advanced examples of state preservation can be explored.
Encoding and Decoding View Controller State
The next phase of this tutorial will extend the example application to demonstrate encoding and decoding the state of a view controller. In order to do so, however, some design changes will need to be made to the second view controller.
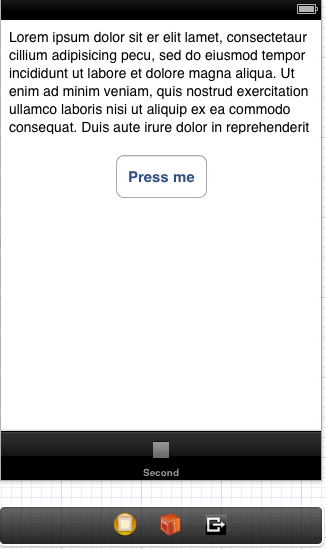
With the MainStoryboard.storyboard file still selected, locate the second view controller and select and delete the labels currently present in the layout. With a blank view object to work with, drag and drop a Text View object onto the layout. Using the resize handles, reduce the height of the Text View so that it is approximately a quarter of the height of the containing view. Next, add a button, change the label to “Press Me” and position it beneath the Text View as illustrated in Figure 58-2.
Figure 58-2
Select the Text View object, display the Attribute Inspector and delete the sample Latin text from the Text property.
Select the Text View object, display the Assistant Editor and click and drag from the Text View object to the space beneath the @interface line. Release the line and in the resulting panel, establish a new outlet connection named myTextView. Close the Assistant Editor.
Build and run the application and, once running, select the second tab and then select and enter some text into the Text View object. Place the application into the background and stop the application using the Xcode Stop button. Click on run to launch the application again. Whilst the selection of the second tab has been preserved, the text entered into the Text View has been lost.
In order to preserve the text entered by the user, it will be necessary to implement the encodeRestorableStateWithCoder: and decodeRestorableStateWithCoder: methods in the parent view controller of the Text View (in this case StateAppSecondViewController).
Select the StateAppSecondViewController.m file and add the encoding methods as follows:
-(void)encodeRestorableStateWithCoder:(NSCoder *)coder
{
    [coder encodeObject:_myTextView.text forKey:@"UnsavedText"];
    [super encodeRestorableStateWithCoder:coder];
}
This code is actually very straightforward. The method is called by UIKit while the state of the view controller is being saved and is passed an NSCoder object. The encodeObject: method of the coder (methods exist for other types of data as documented in Apple documentation for the NSCoder class) is then used to encode the text that is currently held in the myTextView object using a key that will be used to decode the data later. The superclass method is then called and the method returns. The corresponding decode method also needs to be added:
-(void)decodeRestorableStateWithCoder:(NSCoder *)coder
{
    _myTextView.text = [coder decodeObjectForKey:@"UnsavedText"];
    [super decodeRestorableStateWithCoder:coder];

}
This method simply does the reverse of the encode method. It is called by UIKit during the view controller restoration process and passed the NSCoder object containing the saved data. The method decodes the text using the previously assigned key and assigns it to the Text View.
Compile and run the application once again, enter some text into the Text View object. Place the application into the background before stopping and restarting the application. The previously entered text should now be restored and any work entered by the user but not saved has not been lost between application invocations, a key objective of iOS state preservation.
Up until this point in the tutorial all view controllers have resided within a storyboard file. As such, UIKit has been able to implicitly find and load the controllers at run time. The tutorial has so far, therefore, failed to demonstrate the use of a restoration class to restore a view controller that was created in code as opposed to being stored in a storyboard file. The remainder of this chapter will focus on just such a scenario.
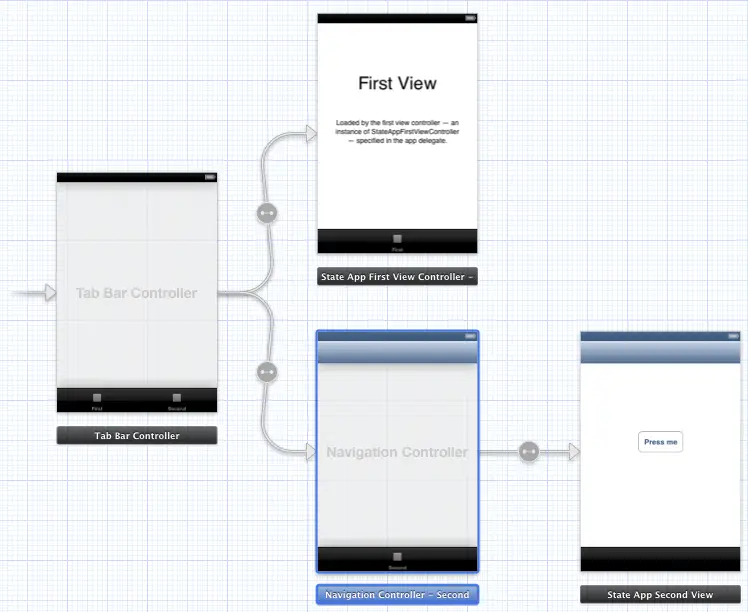
Within the storyboard, select the Second view controller and insert a navigation controller using the Editor -> Embed In -> Navigation Controller menu option. Once added, the storyboard should match that illustrated in Figure 58-3.
Figure 58-3
Select the navigation controller in the storyboard canvas, display the Identity Inspector and set the restoration ID to navController1. Next, select the Second view controller, display the Assistant Editor and Ctrl-click from the Button object in the second view to a location just beneath the myTextView outlet in the Assistant Editor panel before releasing the line. In the resulting panel, change the Connection type to Action and specify displayVC3 as the method name. It is within this action method that the third view controller will be instantiated and pushed onto the navigation controller stack so that it becomes visible to the user. At this point the StateAppSecondViewController.h interface file should read as follows:
#import <UIKit/UIKit.h>

@interface StateAppSecondViewController : UIViewController
@property (strong, nonatomic) IBOutlet UITextView *myTextView;
- (IBAction)displayVC3:(id)sender;
@end
Adding the Third View Controller
When the “Press Me” button in the second view is touched by the user, a third view controller needs to be instantiated and presented to the user using the navigation controller. This new view controller class first needs to be created. Since the objective here is to demonstrate the use of a restoration class, the view will be created in code and not in the storyboard file. Begin, therefore, by selecting the File -> New -> File… menu option and in the resulting panel select Objective-C class from the list of templates before clicking on the Next button.
On the next screen, name the class StateAppThirdViewController and configure it to be subclass of UIViewController. Ensure that the With XIB for user interface option is selected and click Next followed by Create.
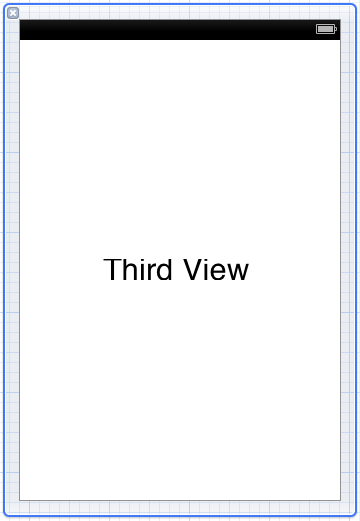
Select the newly created StateAppThirdViewController.xib file to load it into Interface Builder and add a label that indicates this is the view for the third view controller (Figure 58-4):

Figure 58-4
The next step is to write some code in the second view controller to create an instance of the StateAppThirdViewController class and to push it onto the navigation controller stack when the “Press Me” button is touched.
Select the StateAppSecondViewController.h file and modify it to import the interface file for the StateAppThirdViewController class and to declare a property for the corresponding view controller object when it is created:
#import <UIKit/UIKit.h>
#import "StateAppThirdViewController.h"

@interface StateAppSecondViewController : UIViewController
@property (strong, nonatomic) IBOutlet UITextView *myTextView;
@property (strong, nonatomic) UIViewController *thirdViewController;

- (IBAction)displayVC3:(id)sender;

@end
Select the StateAppSecondViewController.m file and modify the viewDidLoad: method to create a new instance of the third view controller class and the displayVC3: action method to push the view controller onto the navigation stack so that it is appears to the user when the button is touched:
- (void)viewDidLoad
{
    [super viewDidLoad];
    // Do any additional setup after loading the view, typically from a nib.
    _thirdViewController = [[StateAppThirdViewController alloc]
           initWithNibName:@"StateAppThirdViewController"
           bundle:nil];
}
.
.
.
- (IBAction)displayVC3:(id)sender {
    [self.navigationController
          pushViewController:_thirdViewController animated:YES];
}
Finally, the code in the StateAppThirdViewController class needs to be modified so that instances of the class are assigned a restoration ID. Select the StateAppThirdViewController.m file and add a line to the viewDidLoad: method:
- (void)viewDidLoad
{
    [super viewDidLoad];
    // Do any additional setup after loading the view from its nib.
    self.restorationIdentifier = @"thirdViewController";
}
Build and run the application, navigate to the third view controller in the user interface and then perform the usual background/kill/run cycle. Note that the application returned to the second view controller screen and not the third view controller. Because the third view controller was created in code, UIKit is unable to find a way to recreate it when the application state is restored. This is where it becomes necessary to implement and register a restoration class for the StateAppThirdViewController class.
Creating the Restoration Class
There are three very simple rules for implementing a restoration class. Firstly, the class must implement the <UIViewControllerRestoration> protocol. Secondly, in doing so, it must implement the viewControllerWithRestorationIdentifierPath: class method which, in turn, must return an instance of the view controller for which it is acting as the restoration class. Lastly, the restoration class must be assigned to the restorationClass property of the view controller it is designed to restore.
In this instance, the StateAppThirdViewController class is going to act as its own restoration class. Select the StateAppThirdViewController.h file, therefore, and modify it to declare that the class now implements the view controller restoration protocol:
#import <UIKit/UIKit.h>

@interface StateAppThirdViewController : UIViewController
<UIViewControllerRestoration>
@end
Next, implement the viewControllerWithRestorationIdentifierPath: class method in the StateAppThirdViewController.m file:
+(UIViewController *)viewControllerWithRestorationIdentifierPath:(NSArray *)identifierComponents coder:(NSCoder *)coder
{
    UIViewController * myViewController =
            [[StateAppThirdViewController alloc]
             initWithNibName:@"StateAppThirdViewController"
             bundle:nil];

    return myViewController;
}
All this class method does is create a new instance of the StateAppThirdViewController class initialized with the user interface XIB file and returns it to UIKit. The last task is to the make sure the restoration class is assigned to the view controller. This is achieved by adding a single line to the viewDidLoad: method, referencing self since the class is acting as its own restoration class:
- (void)viewDidLoad
{
    [super viewDidLoad];
    // Do any additional setup after loading the view from its nib.
    self.restorationIdentifier = @"thirdViewController";
    self.restorationClass = [self class];
}
Compile and run the application, navigate to the third view controller and background, stop and rerun the application. On the second run, the application should now be restored to the view of the third view controller, a clear sign that the restoration class worked.
Summary
The objective of this chapter has been to work through the creation of an example application designed to demonstrate the practical implementation of state preservation and restoration using the new features of the UIKit Framework in the iOS 6 SDK.
Learn SwiftUI and take your iOS Development to the Next Level |
| Previous | Table of Contents | Next |
| An Overview of iOS 6 Application State Preservation and Restoration | Integrating Maps into iPhone iOS 6 Applications using MKMapItem |


