Configuring CentOS GNOME Screen Resolution and Multiple Monitors
| Previous | Table of Contents | Next |
| Logging into the CentOS GNOME Desktop | A Guided Tour of the CentOS GNOME Desktop |
<google>BUY_CENTOS</google>
After CentOS installs and boots for the first time you may find that the desktop is not using the entire screen space available, leaving a black border around the desktop, or using a lower resolution than is supported by the monitor and display adapter. In addition, you may have more than one monitor connected to the system and would like the CentOS desktop to be accessible from both. In this chapter of CentOS Essentials we will cover the steps necessary to adjust the display device and resolution of the GNOME desktop and configure multiple monitors.
Configuring the Display Resolution
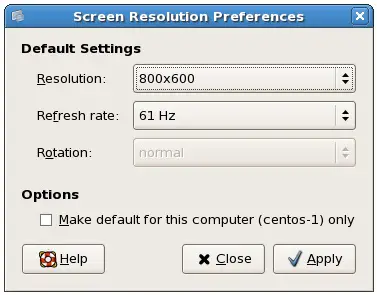
The first step in configuring monitors involves setting the optimal screen resolution for both the monitor and the user. CentOS will generally do a good job of configuring these settings during installation, but it can sometimes be necessary to modify these settings to obtain optimal results. If CentOS has correctly identified your display and graphics cards then it should be possible to increase the resolution to any value up to the maximum supported by the hardware using the Screen Resolution Preferences screen, accessed via the System -> Preferences -> Screen Resolution menu option:
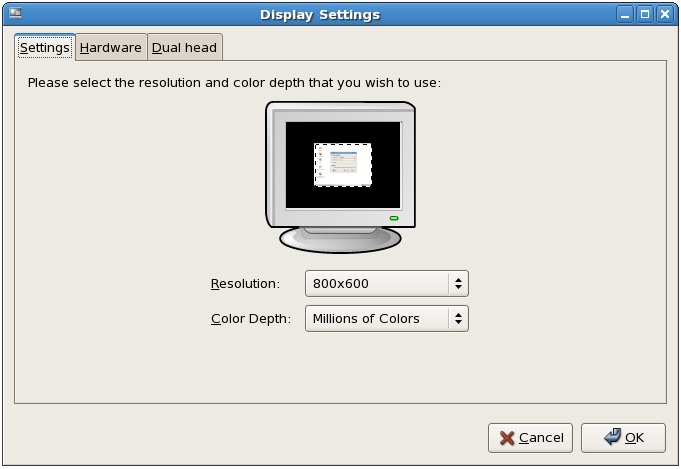
If the resolution menu allows you to make a selection that matches the maximum resolution capability of your hardware then make the appropriate selection and click Apply to commit the changes. If, on the other hand, the maximum resolution available is less than your hardware is capable of displaying, it will be necessary to manually configure your display and graphics card settings. This is achieved using the Display Settings tool which may be accessed from the System -> Administration -> Display menu option and typically appears as illustrated below. Note that since CentOS considers this as configuration change, as opposed to preference setting, the root password will need to be entered before proceeding.
Once these settings have been configured, select the Settings tab at the top of the dialog and select the new maximum resolution before clicking on OK. A dialog will appear instructing you to log out and log back in again in order for the changes to take effect. This can be achieved either by logging out using the System -> Logout menu option, or by pressing the Ctrl-Alt-Backspace keys. On logging back into the system, the desktop should be displayed using the new resolution. If the new setting has not taken effect, open the Screen Resolution dialog (System -> Preferences -> Screen Resolution) and change the resolution to the new value.
Configuring Multiple Monitors
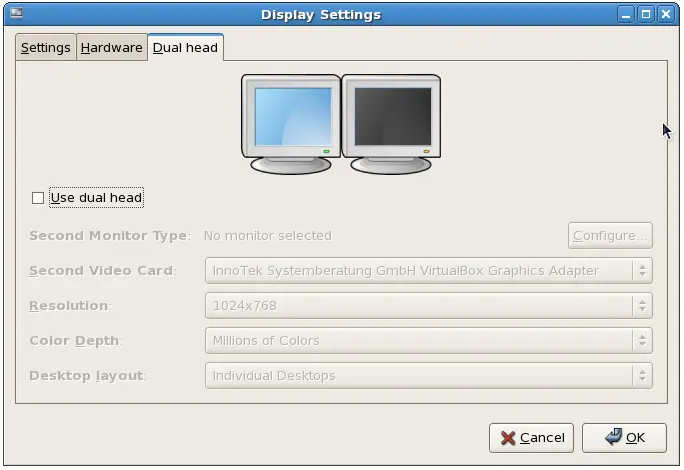
CentOS supports dual monitors connected to a single system allowing the desktop environment and running applications to be spread over two screens. Multiple monitors are configured, once again, using the Display Settings tool which may be accessed from the System -> Administration -> Display menu option:
If a second monitor is attached to the system, select the Use dual head option to enable the various configuration settings. Click on the Configure button to select the monitor type before making appropriate video card, resolution and color depth settings. If you would like each monitor to display its own desktop, select Individual Desktops. Alternatively, to specify a single desktop that spans both monitors, select Spanning Desktops.
<google>BUY_CENTOS_BOTTOM</google>
| Previous | Table of Contents | Next |
| Logging into the CentOS GNOME Desktop | A Guided Tour of the CentOS GNOME Desktop |


