An Android TableLayout and TableRow Tutorial
| Previous | Table of Contents | Next |
| An Overview of Android SQLite Databases | An Android SQLite Database Tutorial |
<google>BUY_KINDLE_FIRE</google>
When the work began on the next chapter of this book (An Android SQLite Database Tutorial) it was originally intended that it would include the steps to design the user interface layout for the database example application. It quickly became evident, however, that the best way to implement the user interface was to make use of the Android TableLayout and TableRow views and that this topic area deserved a self-contained chapter. As a result, this chapter will focus solely on the user interface design of the database application completed in the next chapter, and in doing so, take some time to introduce the basic concepts of table layouts in Android.
The TableLayout and TableRow Layout Views
The purpose of the TableLayout container view is to allow user interface elements to be organized on the screen in a table format consisting of rows and columns. Each row within a TableLayout is occupied by a TableRow instance, which, in turn, is divided into cells, with each cell containing a single child view (which may itself be a container with multiple view children).
The number of columns in a table is dictated by the row with the most columns and, by default, the width of each column is defined by the widest cell in that column. Columns may be configured to be shrinkable or stretchable (or both) such that they change in size relative to the parent TableLayout. In addition, a single cell may be configured to span multiple columns.
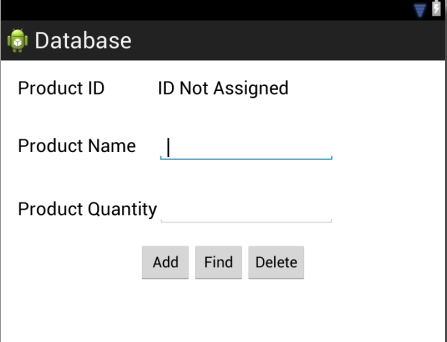
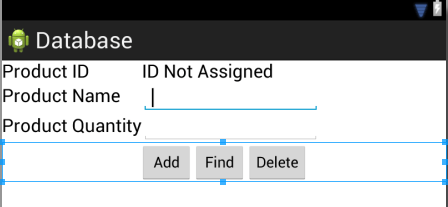
Consider the user interface layout shown in Figure 33-1:
Figure 33-1
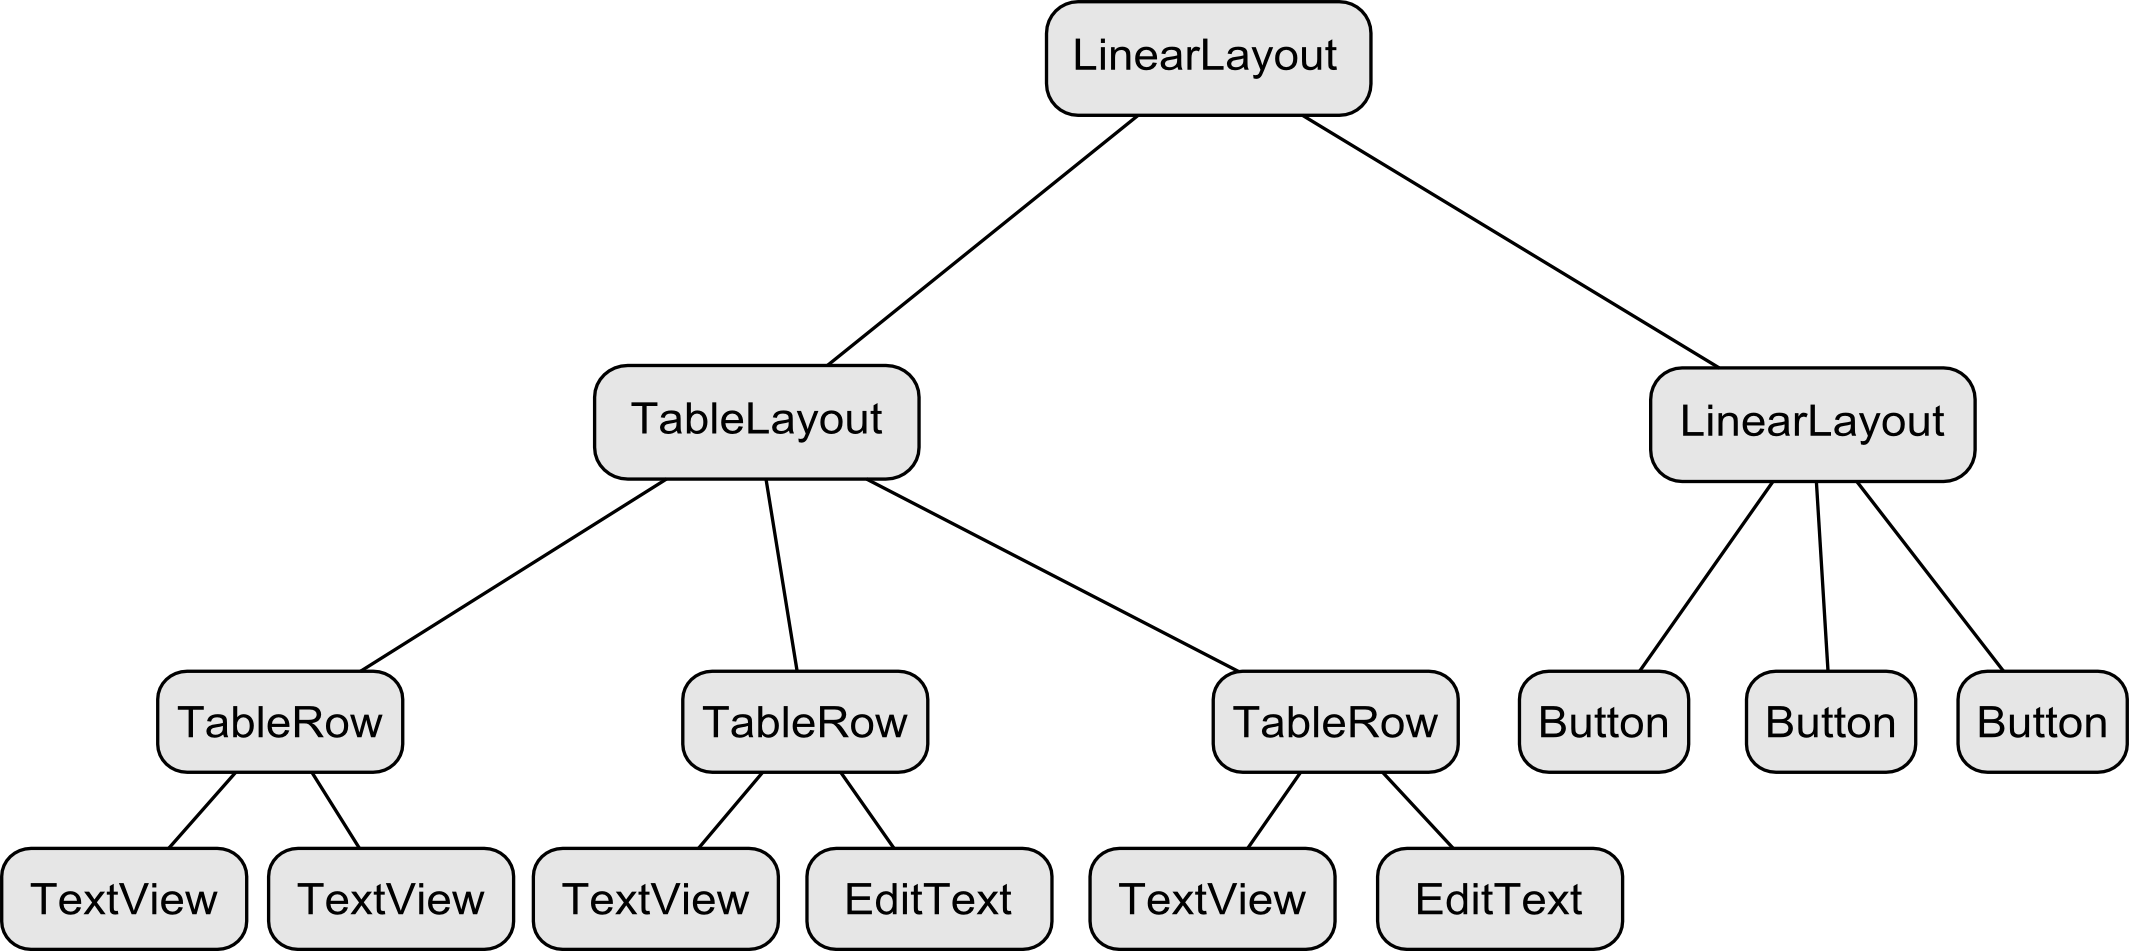
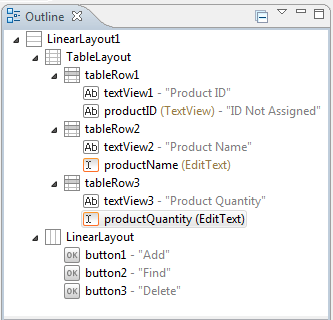
From the visual appearance of the layout, it is difficult to identify the TableLayout structure used to design the interface. The hierarchical tree illustrated in Figure 33 2, however, makes the structure a little easier to understand:
Figure 33-2
Clearly, the layout consists of a parent LinearLayout view with TableLayout and LinearLayout children. The TableLayout contains three TableRow children representing three rows in the table. The TableRows contain two child views, with each child representing the contents of a column cell. The LinearLayout child view contains three Button children.
The layout shown in Figure 33-2 is the exact layout that is required for the database example that will be completed in the next chapter. The remainder of this chapter, therefore, will be used to work step by step through the design of this user interface using the Graphical Layout tool.
Creating the Database Project
Start Eclipse and create a new Android Application project named Database using the appropriate Android SDK versions, a package name of com.example.database and including a blank activity named DatabaseActivity with a corresponding layout file named activity_database.
Designing the User Interface Layout
If it is not already displayed, locate the activity_database.xml file in the Package Explorer panel and double click on it to load it into the Graphical Layout tool. Once loaded, select the example TextView object from the layout and press the keyboard Delete key to remove it from the layout. Next, switch to the XML view and remove the padding properties so that the file reads as follows:
<RelativeLayout xmlns:android="http://schemas.android.com/apk/res/android"
    xmlns:tools="http://schemas.android.com/tools"
    android:layout_width="match_parent"
    android:layout_height="match_parent"
    tools:context=".DatabaseActivity" >
</RelativeLayout>
Switch back to the Graphical Layout view, right-click on the white background representing the RelativeLayout view, select the Change Layout… menu option and change the New Layout Type: menu to Linear Layout (Vertical).
Click on the Layouts section of the Palette and drag and drop a TableLayout view so that it is positioned at the top of the LinearLayout canvas area as illustrated in Figure 33-3:
Figure 33-3
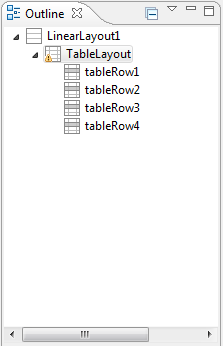
By default, the Table Layout will have associated with it four Table Rows. This can be verified by referring to the Outline panel, which should appear as shown in Figure 33-4:
Figure 33-4
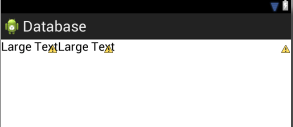
From within the Form Widgets section of the palette, drag and drop two Large Text TextView objects onto the uppermost TableRow. As the TextView object is moved over the TableRow, orange lines will appear to indicate where the columns are located. Be sure to position the two views so that they are side by side in the uppermost Table Row as illustrated in Figure 33-5:
Figure 33-5
Modify the properties of the views so that they display text that reads “Product ID” and “ID Not Assigned” respectively, making sure to create new string resources for each label. Change the ID of the right hand TextView to productID. This can be achieved either by right-clicking on the view in the visual layout and selecting the appropriate menu option, or by double clicking on the component and directly editing the appropriate XML elements in the activity_database.xml file.
Drag and drop another TextView and a Plain Text EditText view onto the second TableRow. Change the text on the TextView to Product Name and the ID of the EditText object to productName. With the Text View object selected in the layout, locate the Input Type property in the Property panel and change the type to text.
Drag and drop another TextView and a Number Text EditText view onto the third TableRow. Change the text on the TextView to Product Quantity and the ID of the EditText object to productQuantity.
Since the fourth TableRow added by the layout tool is not required, locate and select it in the Outline panel and press the keyboard Delete key to remove it from the table.
Finally, add a LinearLayout (Horizontal) to the parent LinearLayout view, positioned immediately below the TableLayout view. Drag and drop three Button objects onto the LinearLayout and create and assign string resources for each button that read “Add”, “Find” and “Delete” respectively.
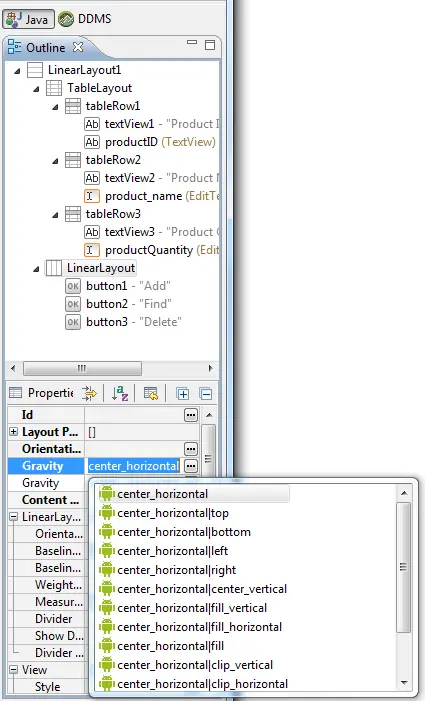
With the Linear Layout view selected in the Outline panel, change the Gravity setting in the Properties panel to center_horizontal so that the buttons are centered within the display:
Figure 33-6
At this point, the user interface should appear as shown in Figure 33-7:
Figure 33-7
Before proceeding, also check the outline of the layout in the Outline panel, taking extra care to ensure the view ID names match those in the following figure:
Figure 33-8
All that remains is to adjust some of the layout settings. In the first instance, right-click on the tableRow1 entry in the Outline panel and select the Other Properties -> Layout Parameters -> Layout Margin menu option and set the margin to 20dp. Repeat these steps for tableRow2 and tableRow3.
With these settings complete, the user interface should appear as illustrated in Figure 33-1. For the sake of completeness, and for comparison purposes in the event that your layout does not match that in Figure 33 1, the full activity_database.xml structure for this layout is outlined below.
<LinearLayout xmlns:android="http://schemas.android.com/apk/res/android"
    xmlns:tools="http://schemas.android.com/tools"
    android:id="@+id/LinearLayout1"
    android:layout_width="match_parent"
    android:layout_height="match_parent"
    android:orientation="vertical"
    tools:context=".DatabaseActivity" >

    <TableLayout
        android:layout_width="match_parent"
        android:layout_height="wrap_content" >

        <TableRow
            android:id="@+id/tableRow1"
            android:layout_width="wrap_content"
            android:layout_height="wrap_content"
            android:layout_margin="20dp" >

            <TextView
                android:id="@+id/textView1"
                android:layout_width="wrap_content"
                android:layout_height="wrap_content"
                android:text="@string/productid_text"
                android:textAppearance="?android:attr/textAppearanceLarge" />

            <TextView
                android:id="@+id/productID"
                android:layout_width="wrap_content"
                android:layout_height="wrap_content"
                android:text="@string/idvalue_text"
                android:textAppearance="?android:attr/textAppearanceLarge" />

        </TableRow>
         <TableRow
            android:id="@+id/tableRow2"
            android:layout_width="wrap_content"
            android:layout_height="wrap_content"
            android:layout_margin="20dp" >

            <TextView
                android:id="@+id/textView2"
                android:layout_width="wrap_content"
                android:layout_height="wrap_content"
                android:text="@string/productname_text"
                android:textAppearance="?android:attr/textAppearanceLarge" />

            <EditText
                android:id="@+id/product_name"
                android:layout_width="wrap_content"
                android:layout_height="wrap_content"
                android:ems="10"
                android:inputType="text" >

                <requestFocus />
            </EditText>

        </TableRow>
         <TableRow
            android:id="@+id/tableRow3"
            android:layout_width="wrap_content"
            android:layout_height="wrap_content"
            android:layout_margin="20dp" >

            <TextView
                android:id="@+id/textView3"
                android:layout_width="wrap_content"
                android:layout_height="wrap_content"
                android:text="@string/productquantity_text"
                android:textAppearance="?android:attr/textAppearanceLarge" />

            <EditText
                android:id="@+id/productQuantity"
                android:layout_width="wrap_content"
                android:layout_height="wrap_content"
                android:ems="10"
                android:inputType="number" />

        </TableRow>
    </TableLayout>

    <LinearLayout
        android:layout_width="match_parent"
        android:layout_height="wrap_content"
        android:gravity="center_horizontal" >

        <Button
            android:id="@+id/button1"
            android:layout_width="wrap_content"
            android:layout_height="wrap_content"
            android:text="@string/add_string" />

        <Button
            android:id="@+id/button2"
            android:layout_width="wrap_content"
            android:layout_height="wrap_content"
            android:text="@string/find_text" />

        <Button
            android:id="@+id/button3"
            android:layout_width="wrap_content"
            android:layout_height="wrap_content"
            android:text="@string/delete_text" />

    </LinearLayout>

</LinearLayout>
Summary
The Android TableLayout container view provides a way to arrange view components in a row and column configuration. Whilst the TableLayout view provides the overall container, each row, and the cells contained therein, are implemented via instances of the TableRow view. In this chapter, a user interface has been designed using the TableLayout and TableRow containers. The next chapter will add the functionality behind this user interface to implement the SQLite database capabilities.
<google>BUY_KINDLE_FIRE</google>
| Previous | Table of Contents | Next |
| An Overview of Android SQLite Databases | An Android SQLite Database Tutorial |
