Managing RHEL 5 Users and Groups
During the installation of Red Hat Enterprise Linux 5, the Setup Agent prompted for information to create a single user account for the system. We should not lose sight of the fact that RHEL 5 is actually an enterprise class, multi-user and multi-tasking operating system. In order to use the full power of RHEL, therefore, it is likely that more than one user will need to be given access to the system. Each user should have his or her own user account login, password, home directory and privileges.
Users are further divided into groups for the purposes of easier administration and those groups can have different levels of privileges. For example, you may have a group of users who work in the Accounting department. In such an environment you may wish to create an accounts group and assign all the Accounting department users to that group.
In this chapter we will cover the steps to add, remove and manage users and groups on an RHEL 5 system.
Adding a New User to am RHEL System
There are two methods for adding new users to a system, one way is using the graphical User Manager tool and the other is to use the useradd command-line tool. In this section we will look at both approaches.
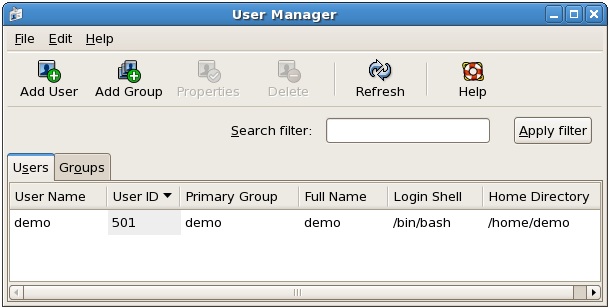
To add a new user to your RHEL system using the User Management tool, select the System desktop menu and choose Users and Groups from the Administration sub-menu. A dialog similar to the one shown below will appear:
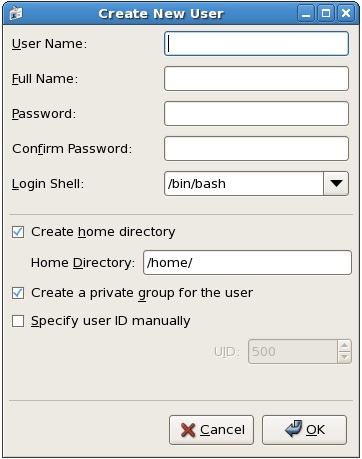
To add a new user, click on the Add User button located in the toolbar. The Create New User dialog will subsequently appear ready to be filled in with data relating to the new user, such as username, real name, password and contact information:
Once the new user is configured, click on the OK button to add the new user. Once added, the new user should appear in the list of users in the settings dialog and it should be possible to login into the RHEL system using the username and password specified.
As mentioned above it is also possible to add new users from the command-line. To do so, start a terminal window session (Applications -> Accessories -> Terminal) and at the command prompt enter a command similar to the following:
su -
useradd --home /home/john john
passwd john
The above commands will prompt for the root password of your system and the password for the account. Once the information has been gathered useradd creates the new account and the /home/john home directory. The useradd command provides a number of different options which can be learned from the man page:
man useradd
Editing the Properties of a User
The properties of a user may be changed using the same User Manager tool used to add a user as outlined above. Select the System desktop menu and choose Users and Groups from the Administration sub-menu to launch the User Manager tool. To make changes to the user properties select the user from the list and click on Properties. Work through the various screens in the User Properties dialog for the selected user and click on the OK button to apply the changes. These screens allow settings such as the expiration date of the account and the number of days before the password must be changed by the user to be configured.
Deleting a User from an RHEL System
An existing user may be deleted using the same User Manager dialog used to add a user as outlined above. Select the System desktop menu and choose Users and Groups from the Administration sub-menu to launch the User Manager dialog.
Select the user to be deleted and click on Delete. A confirmation dialog will appear providing the option to delete the user's home directory and temporary files. If you wish to proceed, click on Delete.
A user account may also be deleted from command-line using the userdel utility:
su -
userdel john
It is also possible to remove the user's home directory and mail spool as part of the deletion process:
su -
userdel --remove john
Adding a New Group to an RHEL System
All users are members of one or more groups. By default, new users are added to a private group with the same name as the user (in the above example, the account created for user john was a member of a private group also named john). As an administrator, it makes sense to organize users into more logical groups. For example all sales people might belong to a sales group, whilst accounting staff might belong to the accounts group and so on. New groups are added either using the User Manager graphical tool, or by using the groupadd command-line tool. In this section we will look at both methods.
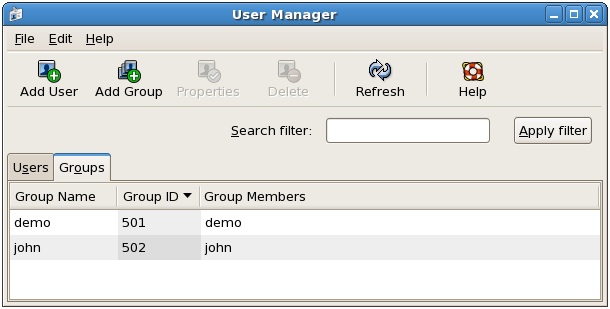
To access the User Manager tool, select the desktop System menu and choose Users and Groups from the Administration sub-menu. To administer the group settings click on the Groups tab. The Group panel will appear, listing all the groups available on the system:
To add a new group click on the Add Group toolbar button and enter the name of the group you wish to add and press OK. Once the new group has been added, select the group in the list and click on the Properties button in the toolbar. Add the users that should belong to this group by checking the box next to each user name in the list. For example the following screenshot shows user john being added to the new accounts group:
Adding a user to an RHEL Group
Click on OK to add the user as a member of the new group.
To add a group from the command line, use the groupadd utility. For example:
su -
groupadd accounts
Modifying an RHEL Group
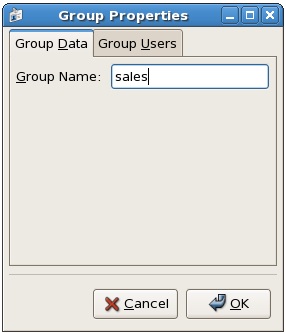
To modify an RHEL group select the group to modify from the list of groups in the User Manager (as outlined above) and click on Properties. The resulting Group properties dialog (shown below) allows basic settings such as the group name and group members to be changed.
To add an existing user to an existing group from the command-line:
su -
usermod -G accounts john
To add an existing user to a number of existing groups:
su -
usermod -G accounts,sales,support john
Note that the above commands remove the user from any supplementary groups which are not listed after the -G, but to which the user is currently a member. To retain any current group memberships, use the -a flag to append the new group memberships:
su -
usermod -a -G accounts,sales,support john
Deleting a Group from an RHEL System
A group may be deleted from a system using the groupdel utility:
su -
groupdel accounts
Note that if the group to be deleted is the primary group for any user it cannot be deleted. The user must first be deleted, or assigned a new primary group using the usermod command:
su -
usermod -g sales john
groupdel accounts


