Windows Server 2008 Terminal Services
| Previous | Table of Contents | Next |
| Configuring and Managing RAID 5 on Windows Server 2008 | Installing Applications for Windows Server 2008 Terminal Services |
| Purchase and download the full PDF and ePub versions of this eBook only $9.99 |
Terminal Services allows either individual applications or entire desktop sessions to be run on remote server systems, but displayed and interacted with on local client systems. In effect, while the applications and desktops appear to be running on the local machine they are actually running in virtual sessions on the remote server with only the display graphics and keyboard and mouse information passing between the two systems. This allows one or more Windows Server 2008 systems to provide the applications for any number of desktop systems. This has a number of advantages in terms of ensuring that all users have the same version of a particular application and also in terms of reducing administrative overheads. With terminal services, for example, if an application needs to be upgraded it only needs to be upgraded on the terminal server, not on every desktop in the enterprise.
There are a number of different Terminal Services configuration options, many of which will be covered in subsequent chapters. In this chapter, however, the configuration of the basic Terminal Services role and installing applications for use by Terminal Services users will be covered.
Installing Terminal Services
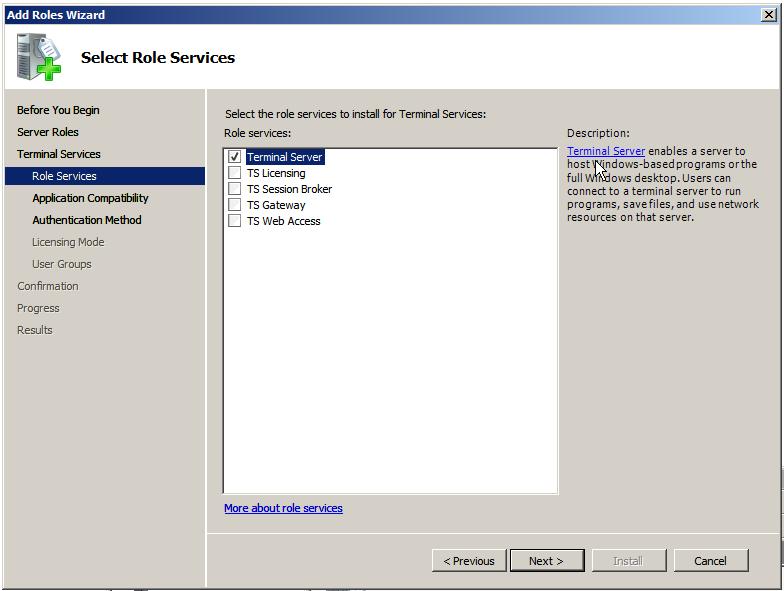
Terminal Services may be installed from the Server Manager. Within Server Manager, click on Roles in the left hand pane and click on Add Roles in the resulting screen to invoke the Add Roles Wizard. If the introductory screen appears, click on Next to list the available roles. On the Select Server Roles screen, select Terminal Services and click on Next to select the specific Terminal Services required. For the purposes of this chapter just the basic Terminal Server option needs to be selected (the other options will be covered in subsequent chapters):
After clicking Next a warning screen will appear recommending that any applications intended to be accessed by terminal services users not be installed until the Terminal Services role has been installed. In fact, the installation of applications for Terminal Services requires some special steps which will be covered in detail later in this chapter. Having read this information, click Next to proceed to the authentication selection screen. Selecting Require Network Level Authentication will prevent users running on older operating systems without Network Level Authentication from accessing Terminal Services. Network Level Authentication essentially performs authentication before the remote session is established. If less strict authentication is acceptable or some users are running older operating systems then the Do not require Network level Authentication option will need to be selected before clicking Next to proceed.
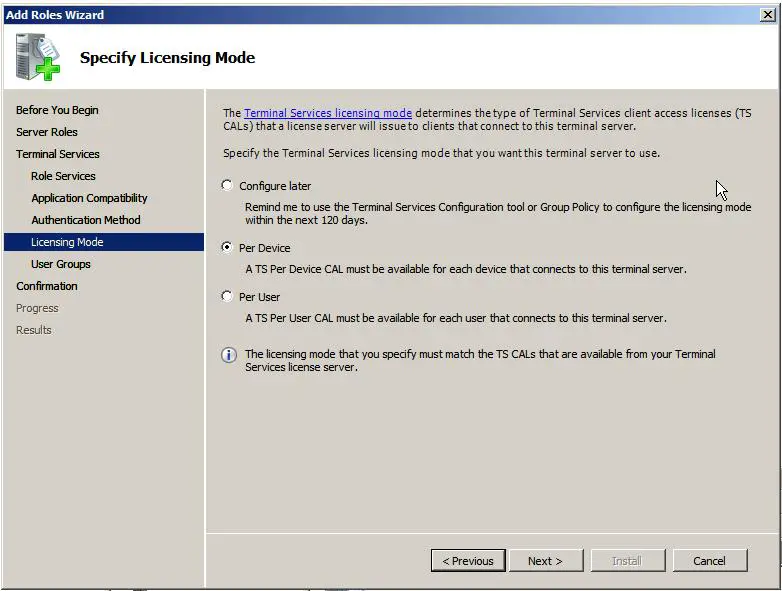
The Specify Licensing Mode screen allows the licensing method to be defined. If Configure later is selected a 120 day grace period allows the system to be used without providing licenses. If this option is selected the licensing must be configured using the Group Policy Editor or Terminal Services Configuration Tool within 120 days. In the case of Per Device mode, this allows a specified number of devices to connect to the service at any one time regardless of who the users are. On the other hand, Per user restricts access to specified uses, regardless of the device from which they are connecting.
Finally, the users and groups allowed to access the terminal server need to be specified, although users may be added and removed at any time by changing the members of the Remote Desktop Users Group. Click on Add... to add any users. Clicking Next proceeds to the Confirmation screen. Read carefully any warnings that are displayed. Typically the wizard will recommend any currently installed applications should be re-installed before remote access is provided to users (steps to achieve this are outlined below). Click Install to begin the installation process. Partway through the installation it will be necessary to restart the Windows Server 2008 system. Once rebooted, be sure to log in as the same administrative user to complete the Terminal Services configuration process.
Adding Users to the Remote Desktop Users Group
The default configuration for Remote Desktop Users Group is to allow all members of the Administration group to connect remotely. Active Directory also contains a Remote Desktop Users group to which users may be added to provide Remote Desktop access privileges. To provide users with remote desktop and application access through terminal services, open the Control Panel -> System and Maintenance -> System -> Remote settings and click on the Select Users button to invoke the Remote Desktop Users dialog illustrated in the following figure:
<google>ADSDAQBOX_FLOW</google>
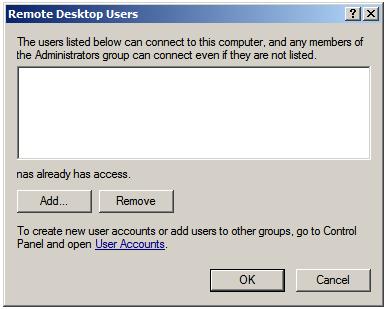
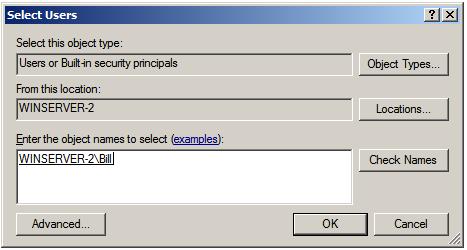
Note that users with administrative privileges do not need to be added to this list, by default they already have Remote Desktop access. To add additional users click on the Add... button to display the Select Users dialog. Enter the name of the user in the text box entitled Enter object names to select and click on Check names to list names that match the name entered. Select the appropriate name from the list. The following example shows user Bill on server winserver-2:
Click on OK to apply the change. The new user will now appear in the list of users with Remote Desktop access on the Remote Users screen. Click OK to close this screen and click on Apply in the System Settings screen. The specified user will now have remote Terminal Services access to the system.
Accessing Terminal Services from the Client
With Terminal Services installed and configured on the server, the next step is to ensure the services can be accessed from a remote client. Terminal services provides both remote desktop and remote application access. Under remote desktop access an entire desktop session running on the server is displayed on the client. The user then interacts with the desktop to launch and interact with applications (details on installing applications for use with Terminal Services is covered in the chapter entitled Installing Applications for Windows Server 2008 Terminal Services. In the case of remote applications, the remote application running on the server appears in its own window on the client desktop, to all intends and purposes looking like a local application to the user. Remote applications are covered in detail in Configuring RemoteApps on Windows Server 2008.
With the appropriate configuration tasks completed on the remote system the next step is to launch the Remote Desktop Client on the local system.
To invoke the Remote Desktop Client select Start -> All Programs -> Accessories -> Remote Desktop Connection or enter the following in the Run dialog or at a command prompt:
mstsc
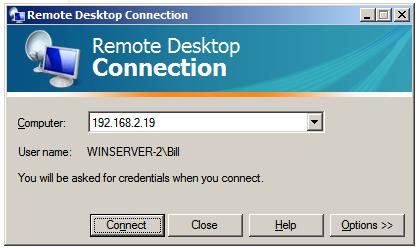
Once launched, the following initial screen will appear requesting details of computer to which the client is to connect: <google>WIN28BOX</google>
This can either be an IP address or a computer name. If previous connections have been established the User name field will be populated with the user name used in the preceding session. If you need to log in as a different user this option will be provided on the next screen which appears after the Connect button is pressed:
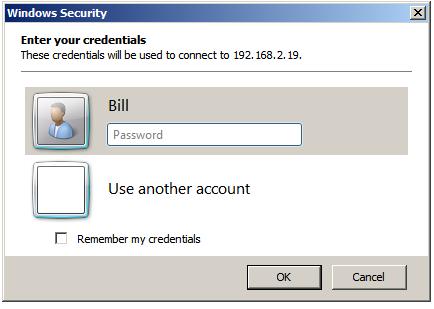
In this screen enter the password for the selected user (note that remote desktop access is only available for user accounts which are password protected). If a user other than the one displayed is required, simply click on the Use another account link and enter the necessary details. Click on OK to establish the connection. After a short delay the remote desktop will appear on the local computer screen.
Remote Desktop Client Configuration Options
The Options>> button displayed on the initial screen of the Remote Desktop Client provides six tabs, each containing a range of configuration options:
- General - Allows login credentials to be configured and session information to be saved.
- Display - Configures the resolution and color settings to be used when displaying the remote desktop on the local system.
- Local Resources - Specifies which local resources (sound, disk drives, printers etc) are to be made accessible to the remote system during the Remote Desktop session. This page also provides options to control the situations under which special key combinations such as Ctrl-Alt-Del are interpreted by the local or remote systems.
- Programs - Allows specified programs to be automatically invoked each time a remote sessions is established.
- Experience - Controls which desktop features are enabled or disabled for the Remote Desktop session. For example, over a slow dial-up connection it is unwise to have the desktop background displayed and font smoothing enabled. Either select the connection type and speed to see recommended settings, or use Custom to configure you own settings. This particular screen also provides the option to have connected automatically re-established in the event that a session is dropped.
- Advanced - Enables and disables remote server verification. This ensures that the remote server to which you are connected is indeed the server you wanted. Also available are TS Gateway settings. By default the Remote Desktop Client is configured to automatically detect TS Gateway settings.
Logging out from a Remote Desktop Session
When the Remote Desktop Client is exited by pressing the 'X' on the control panel the remote session continues to run on the server even though no client is connected. Next time the user connects the desktop session will appear exactly as it was left before.
To end the session select Start in the remote desktop session, click on the right arrow button in the bottom right hand corner of the menu and select Log Off. This will close down the remote desktop session and close the remote desktop client.
Running Multiple Remote Desktops
Multiple concurrent remote desktops can be run and managed within a single window using the MMC Remote Desktops snap-in. This may either be snapped into the MMC or launched from the command-line or a Run dialog by typing:
tsmmc.msc
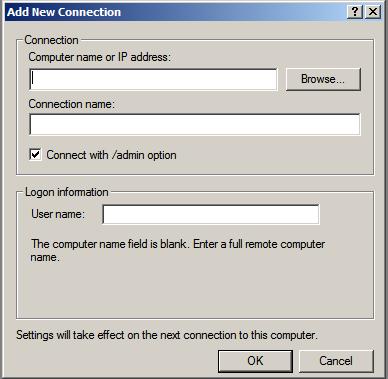
Once launched, right click on the Remote desktops item in the tree in the left hand panel and select Add a new connection from the menu. Once selected the Add New Connection dialog will be displayed as follows:
In this dialog enter either the IP address or the computer name of the remote system to which the connection is to be established, together with the User name and the name to be assigned to this connection (this is essentially the name by which this connection will be listed and administered from this point on inside the Remote Desktops snap-in). For an administrative session (as opposed to a virtual session) set the Connect with /admin box. Click OK to add the session to the snap-in. Once added, the session will appear in the left hand panel under Remote Desktops. Repeat these steps to add connections to any additional remote systems required.
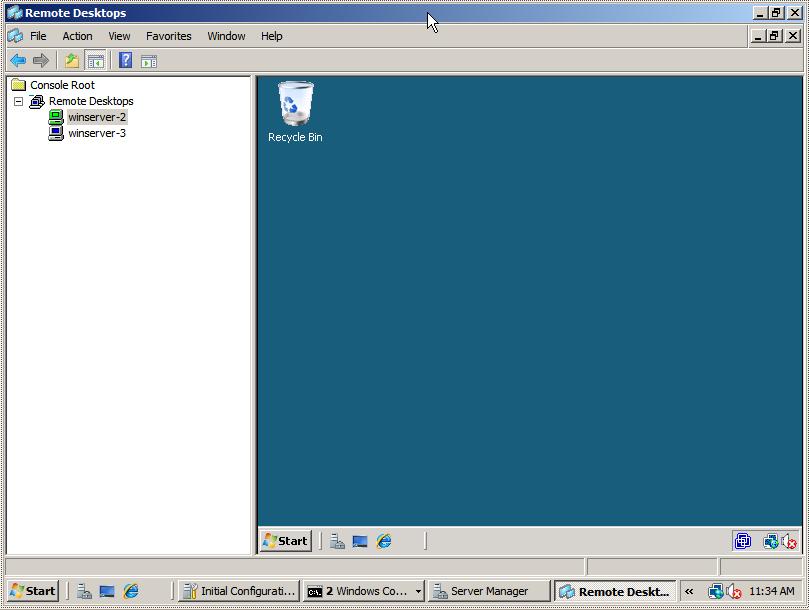
To establish a remote desktop connection, simply right click on the name of the session on the left panel and select the Connect option from the popup menu. The remote session will subsequently appear in the main window. To start another session right click on the required session name and once again select Connect. To switch between sessions simply click on the name of the session in the left hand panel and the corresponding desktop will be displayed. The following figure illustrates two sessions running in Remote Desktops:
To change configuration options for each session right click on the desired session in the left hand panel and select Properties. This panel has a number of tabs which enable credentials, screen size and program start properties to be defined.
Having configured Terminal Services on a Windows Server 2008 system, the next step is to install applications suitable for remote access as outlined in the next chapter.
| Purchase and download the full PDF and ePub versions of this eBook only $9.99 |


