PHP and HTML Forms
| Previous | Table of Contents | Next |
| An Overview of HTML Forms | PHP and Cookies - Creating, Reading and Writing |
| Purchase and download the full PDF and ePub versions of this PHP eBook for only $8.99 |
In this chapter will create a simple HTML form to gather information from the user and then create a PHP script to process that data once it has been submitted to the server. This chapter assumes an understanding of HTML forms. See the An Overview of HTML Forms chapter for a basic overview of this topic.
Creating the Form
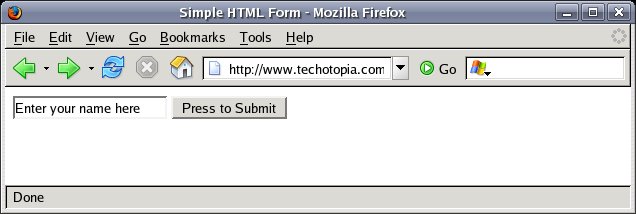
The first step involves creation of an HTML page to contain our form. The form will be very simple in that it will contain only a text area for the user to enter data and a submit button with which to send it to the server. We will use the POST method of transmitting the data to the server and specify "subscribe.php" as the server side script to handle the data:
<html>
<head>
<title>Simple HTML Form</title>
</head>
<body>
<form action="submit.php" method="post">

   <input type="text" name="customerName" value="Enter your name here" />
   <input type="submit" name="submit_button" value="Press to Submit" />

</form>
</body>
</html>
Processing Form Data Using PHP
Now that we have created a form we need to understand how to process the data entered by the user in our server side PHP script. There are two mechanisms for transmitting the data from an HTML form to the server, GET and POST. In our example above we specified POST, but in either case the task of reading this data in our PHP script is equally simple.
Essentially PHP places the data from the form into an associative array (for information on PHP arrays see PHP Arrays) which can be accessed from within the server side PHP script. For POST and GET the array variable names are $_POST and $_GET respectively.
For our example HTML form we can write a simple subscribe.php script to output the content of the $_POST method when the form is submitted it to our web server:
<?php
echo 'Data submitted:<br>';

print_r($_POST);
?>
When a name is entered and the submit button pressed the following output is generated by our subscribe.php script:
Data submitted:
Array ( [customerName] => Neil [submit_button] => Press to Submit )
You will recall we mentioned this is an associative array, so each element is accessible by a named index key. You may also have noticed that we gave our text input a name value of 'customerName' when we defined it in our form:
<input type="text" name="customerName" value="Enter your name here" />
This name is used as the key into our GET and POST associative arrays so that we can access each data element individually by the name used in the form. Let's extend both our HTML form and PHP scripts to handle more test fields and also include a toggle button:
<html>
<head>
<title>Simple HTML Form</title>
</head>
<body>
<form action="subscribe.php" method="post">
Name: <input type="text" name="customerName" value="" /><br>
Email: <input type="text" name="emailAddress" value="" /><br>
Send Email Newsletter: <input type="checkbox" name="sendNews" checked /><br>
<input type="submit" name="submit_button" value="Press to Submit" />

</form>
</body>
</html>
We can now modify our subscriber.php script to read the additional information from the $_POST array variable. Before we do this, however, there is an important issue to address. Data about the sendNews check box will only be included in the POST data if the check box is set. If it is not set then no entry for it will be included in the $_POST array. We need, therefore, to use the array_key_exists() or isset() functions to verify if the check box was set or not. This is considered to be good practice in general for validating array elements in POST or GET arrays:
<?php

        echo "Your name is " . $_POST['customerName'] . "<br>";
        echo "Your email address is " . $_POST['customerName']  . "<br>";

        if (array_key_exists ('sendNews', $_POST))
        {
                 echo "You have requested our newsletter<br>";
        } else {
                echo "You have declined our newsletter<br>";
        }


?>
Now, when we reload the web page, enter a name and email address and check the toggle, submitting the form gives us the following output:
Your name is Neil
Your email address is [email protected]
You have requested our newsletter
Processing Multiple Selections with PHP
In An Overview of HTML Forms we covered the HTML Select input and described the steps required to configure the object for multiple selection. For example, the following HTML fragment creates a Select input in which multiple car types may be selected by the user:
<select name="carBrands" size=5 multiple>
<option value="Ford" SELECTED>Ford Motor Company
<option value="GM">General Motors
<option value="Honda">Honda Motor Company
<ottion value="Toyota">Toyota Motor Company
<option value="Ford">Jaguar
<option value="Mazda">Mazda
<option value="Volvo">Volvo
</select>
Up until now we have only concerned ourselves with data which only holds one value (the text in a text field for example). Clearly, in this case there is the potential for multiple data values to be associated with a single form element. The way PHP handles this is to place the multiple selections in an array. Before that happens, however, we need to make a small modification to our declaration of the HTML Select element. All we need to do to turn this data into an array is to place [] after the element name:
<select name="carBrands[]" size=5 multiple>
Now, in our server side PHP script we can extract the selected items from this array:
print_r($_POST['carBrands']);
Assuming we selected GM and Ford the output would read:
Array ( [0] => Ford [1] => GM )
Summary
This chapter has provided a detailed overview of handing HTML forms in PHP.
| Purchase and download the full PDF and ePub versions of this PHP eBook for only $8.99 |


