Downloading and Installing Visual Studio
| Previous | Table of Contents | Next |
| About Visual Basic Essentials | Creating a New Visual Basic Project |
Everything you need to build Visual Basic applications is included with Microsoft Visual Studio. At the time of publication of this book the latest release of Visual Studio is Visual Studio 2008. The first step in learning Visual Basic is, therefore, to obtain a copy of Visual Studio.
Getting Visual Studio
There are a number of options in terms of getting a copy of Visual Studio. If you work for a company which has Visual Studio licenses available then the first step is to talk to your IT department to see if they can provide you with a license, or purchase one for you.
If you do not have access to a purchased Visual Studio license, or lack the funds to buy a copy the best option, and actually the ideal option for those learning Visual Basic, is to download a trial version from Microsoft's web site. This will give you a 90 day trial period to use all the features of Visual Studio. Given that this book will teach you everything you need to know to program in Visual Basic the 90 day trial period will give you plenty of time to learn Visual Basic with time to spare to decide if you want purchase a fully licensed copy of Visual Studio.
In this chapter of Visual Basic Essentials we will assume that you are downloading and installing the trial version of Visual Studio.
Downloading a Visual Studio Trial
<google>ADSDAQBOX_FLOW</google> To work through the examples in this book, Visual Studio Professional Edition is recommended.
Trial copies of Microsoft Visual Studio Professional Edition are available from the trials page of the Microsoft web site. From this page, you can choose to download a trial, or order a trial DVD.
The download is approximately 3GB in size so will take quite a while to download. Also, the download is an ISO image of the Visual Studio installation DVD so a DVD burner will be needed to write the image to a disk before it can be used for installation. Alternatively the image may be mounted as a virtual CD using a tool such as Virtual Clone Drive, or the ISO image may be unpacked using WinZip.
If you do not have a high speed internet connection or a DVD writer, Microsoft will ship you a free DVD (although they will charge you a small fee to cover the shipping costs).
Once you have either downloaded and burned a DVD, or received the copy shipped to you by Microsoft the next step is to install Visual Studio.
Installing Visual Studio
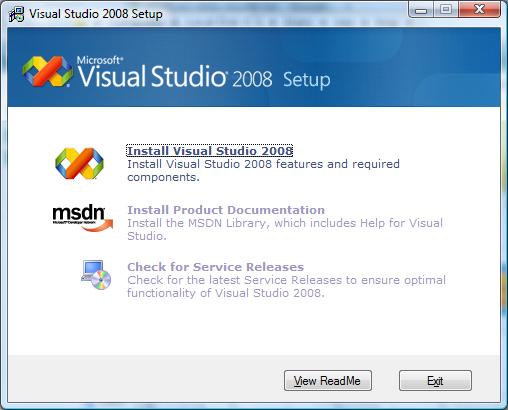
To install Visual Studio, place the DVD in the DVD drive of your system or navigate to the directory where the ISO image has either been mounted or unpacked. If your system is configured to autorun when a CD or DVD is inserted into the drive, then the installation screen should appear. Alternatively, manually execute the vs_setup installer.
When the installer has started the following window should appear:
Click on the Install Visual Studio link to begin the installation process. Visual Studio supports a number of different programming languages in addition to Visual Basic (such as C#, J# and C++). If you only plan to use Visual Basic then choose the custom installation option and uncheck the boxes for the other languages. This will speed up the installation process and reduce the amount of space required to install Visual Studio. If you need to work with the other programming languages at a later date you can re-insert the installation DVD. The installer will then start in Maintenance Mode and allow you to add and remove support for other languages.
Starting Visual Studio for the First Time
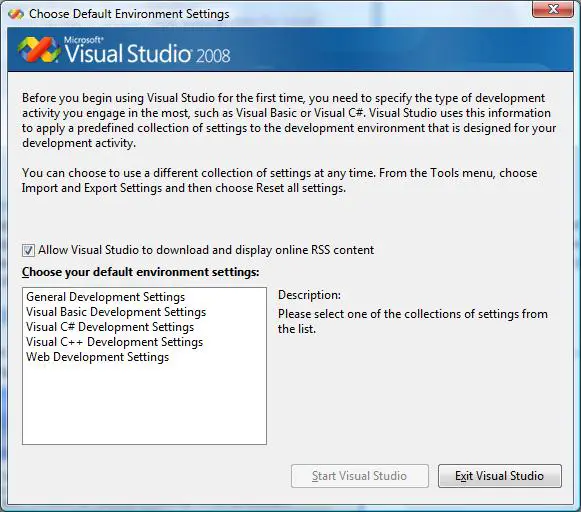
Once the Visual Studio installation is complete you are ready to start it up. Find Visual Studio in the Windows Start menu and select it. The first time Visual Studio is run it will ask you which programming language you would like to use as the default:
Select Visual Basic Development Settings from the list and click on the Start Visual Studio button. The main Visual Studio window should appear and you are now ready to start learning Visual Basic.

