The MySQL Administrator Tool
| Previous | Table of Contents | Next |
| The mysql Command-Line Tool | The MySQL Query Browser |
The MySQL Administrator is a powerful graphical client tool designed to ease the administration and monitoring of the MySQL database server. Once installed, the MySQL Administrator connects to the specified database server and allows tasks such as adding users, monitoring the server performance and server connections and the backup and restoration of databases to be performed quickly and easily.
Getting and Installing MySQL Administrator
The MySQL Administrator is not supplied with the basic MySQL installation and must be downloaded and installed separately. Both pre-built versions of the tool for Windows, Linux and Mac OS and the source code for this tool can be obtained from:
http://dev.mysql.com/downloads
The Windows version of the GUI tools are supplied as an installer executable. To perform the installation, simply launch the installer once the download is complete.
The Linux version of the tools can be downloaded using RPM (note that the filenames may change for later releases or different Linux versions of the software):
su -
rpm -ihv mysql-gui-tools-5.0r12-1rhel4.i386.rpm
rpm -ihv mysql-administrator-5.0r12-1rhel4.i386.rpm
On Windows, the MySQL Administrator can be launched from the Desktop Start menu. On Linux, the tool is launched as follows:
mysql-administrator
Connecting to the Database Server
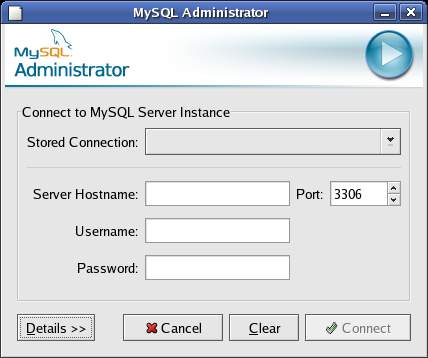
Once MySQL Administrator starts, the login screen will appear as follows:
<google>ADSDAQBOX_FLOW</google>

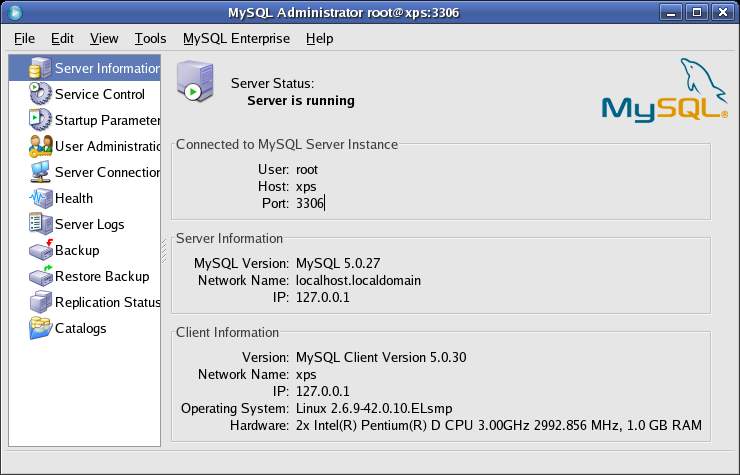
Enter the IP address or the name of the host on which the database server is running together with the database user login name and password and click connect. The MySQL Administrator should connect to the designated database server and display the "Server Information" screen:
If the database server is running on a remote host it is possible the connection will fail with a message similar to the following:
Could not connect to the specified instance.

MySQL Error Number 1045
Access denied for user 'username'@'192.168.2.11'(using passowrd: YES)
The reason for this is that the specified user has not been granted permission to access the database server from a remote system. This problem can be resolved on the server using the MySQL Administrator. Simply launch the MySQL Administrator tool on the system hosting the database server, select the User Administration option and select the required user from the list of users in the bottom left hand corner of the window. Once selected, click with the right mouse button on the user name and select Add Host. In the resulting Add Host dialog add the host name or IP address of the remote host to which you wish to allow connections and click on OK. Once the user has the appropriate privileges to connect from the specified host it should be possible to connect the MySQL Administrator client to the database server.
Using the MySQL Administator
Once the Administrator tool is connected to a database server the following options are available:
- Server Information - displays information about the server and client systems including the version of MySQL client and server software, the client operating system and hardware and the IP addresses of both hosts.
- Service Control - When connected to the server from a client on the server host and with appropriate privileges, the server may be stopped and started from this screen. In addition, this option displays the server startup logs.
- Startup Parameters - Allows a wide range of server startup options to be specified.
- User Administration - Allows new users to be added and existing users to be deleted. In addition, a wide range of access privilege settings for each user may be configured using this screen including controlling database access and limiting the number of queries a user may perform in a given time period.
- Server Connections - Provides a list of the current connections to the database server. The user name, remote location and activity are listed for each connection. In addition, any connected may be killed by selecting it in the list and pressing the Kill User button.
- Health - This screen allows a wide range of server metrics such as database queries, connections, traffic and memory usage to be monitored in real-time graph form.
- Backup - Provides a user friendly mechanism for backing up the databases maintained by the current server. The Advanced backup screen allows Backups to be scheduled on a regular basis.
- Restore - Restores one or more databases from a backup session.
- Replication - Provides a visual overview of the replication master and slaves. Icons beside each machine indicate which slave machines are connected to the master and which are currently off-line.
- Catalogs - Allows catalogs, tables, schemata and tables to be viewed. Also allows new databases and tables to be created. A list of existing catalogs and schema is located in the bottom left corner of the screen, enabling an existing entry to be selected and edited. This screen is not only a good way to create databases and tables, it is also invaluable as a tool for learning about the layout of existing databases and tables. This topic is covered in detail in Creating New Databases and Tables with MySQL Administrator.
Summary
The MySQL Administrator provides an easy to use and user friendly way to administer many aspects of a MySQL server and related databases. A description of the full capabilities of this tool are beyond the scope of this chapter, but given intuitive nature of the tool, simply exploring the different screens will quickly bring the user up to speed.
| Previous | Table of Contents | Next |
| The mysql Command-Line Tool | The MySQL Query Browser |
