Configuring Windows Server 2008 File Sharing
Given that Windows Server 2008 is a server operating system is not surprising that a primary function of this operating system is to serve files to users on other systems on a network. The primary focus of this chapter, therefore, is the sharing of files and folders on Windows Server 2008
Standard and Public File Sharing
Windows Server 2008 supports two types of file sharing, referred to as public file sharing and standard file sharing.
In the case of public file sharing any files to be shared must be copied to the server's Public folder located at %SystemDrive%\Users\Public. Once placed in this folder the files are accessible to any users logged locally onto the machine and, if enabled, to any network users. Public sharing provides some control over access to the files. For example, when the server belongs to a workgroup the public folder can be password protected. In addition, network access to files within the public folder can be restricted to reading and executing only or given permission to read, write, create and delete files.
Standard file sharing, which is only permitted on NTFS volumes, allows individual folders files and volumes to be shared to specific users. This provides far greater levels of security over network access through a combination of NTFS permissions and share permissions, and avoids the necessity to move files from their existing location in order to share them.
Enabling Windows Server 2008 File Sharing
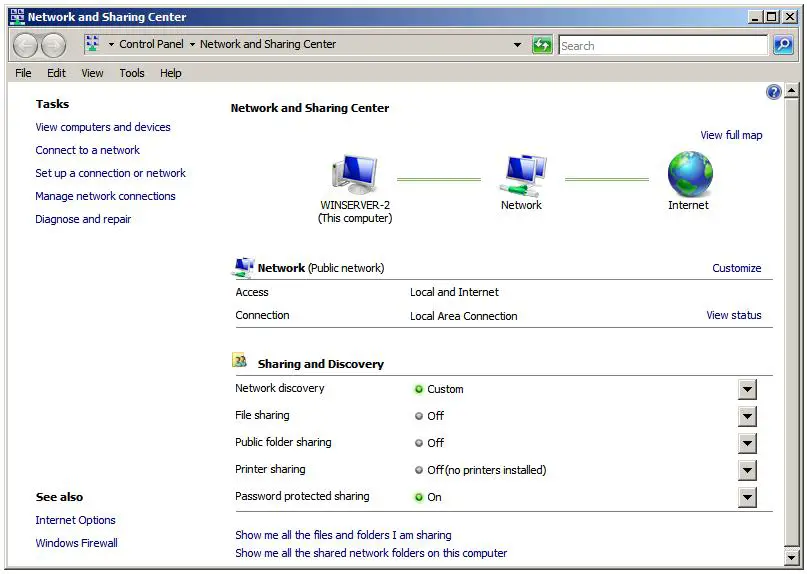
File sharing in Windows Server 2008 is managed from the Network and Sharing Center, accessed by selecting Start -> Network and clicking on the Network and Sharing Center button in the toolbar. Once invoked, the Network and Sharing Center will list the current file sharing configuration and options as illustrated in the following figure:
To enable public file sharing, click on the down arrow next to the Public folder sharing in the section entitled Sharing and discovery. This will provide the following list of public folder sharing options:
- Turn on sharing so anyone with network access can open files - Allows network users to open, but not delete, modify or create files in the server's public folder.
- Turn on sharing so anyone with network access can open, change and create files - Allows network users to open, modify, delete and create files in the public folder.
- Turn off sharing (people logged on to this computer can still access this folder) - Allow public folder access only to those users locally logged on to the server. Network users are denied access.
Similarly, standard file sharing can be configured by click the down arrow next to File sharing. When unfolded, this panel provides the option to either enable or disable standard file sharing on this server. When enabled, a dialog will appear providing the option to make the shared folders available only to the private network on which the system resides, or to make sharing available to public networks. The choice here depends on the requirements of the organization but for security purposes it is typically best to limit sharing to the private network unless external access is required.
The Network and Sharing Center also allows password access to shared folders to be configured. When the arrow next to Password protected sharing is selected the options to enable or disable password protection sharing are provided. When enabled on workgroup servers, only users with user accounts and passwords on the server will be able to access shared files and folders.
