Enhance your openSUSE Desktop with gDesklets
| Previous | Table of Contents | Next |
| openSUSE Desktop Visual Effects | Browsing My Computer, Files and Folders on the openSUSE Desktop |
If you've spent any time with Windows Vista you may have seen the small applets that run on the desktop, things such as a clock and a weather widget. It will probably come as no surprise to you that Linux had feature like this long before Windows Vista came along. In fact, if you have used the KDE Linux desktop extensively you may have come across a similar feature called SuperKaramba. On the openSUSE GNOME desktop this functionality is provided by technology called gDesklets. The creators of the gDesklets technology call it Eye candy for the desktop, and once you've had a change to see them in action you will understand why.
Installing gDesklets
The gDesklets packages are not installed by default with openSUSE Linux so a few steps need to be followed before gDekslets can be used.
The first step is to configure the openSUSe package management system so that it access the repository containing the gDesklets packages. This is currently the openSUSE Builde Service GNOME:STABLE repository. To add this to the list of active repositories click on Computer in the panel at the bottom of the desktop and select Control Center from the panel. In the Control Center scroll down the list of options until you reach the YaST option. Click on this to invoke the YaST tool. In YaST scroll down to the Community Repositories option in the Software group and click on it. In the Community Repositories set the check box next to openSUSE Builde Service GNOME:STABLE and click Finish. The new repository will be added to the system.
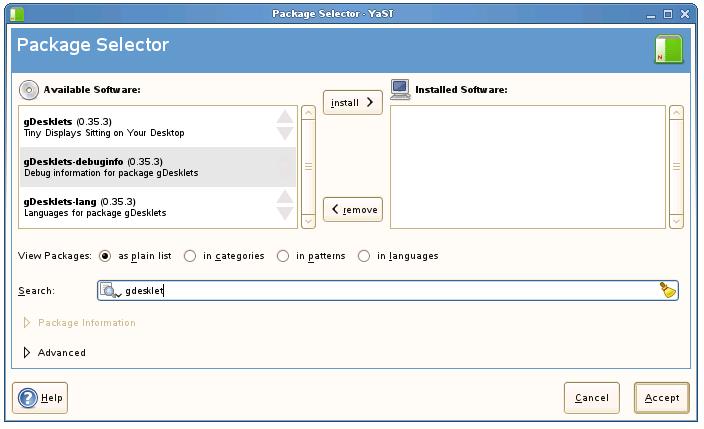
The second step is to install the gDesklet packages. To select Manage Software from the YaST control center and enter gdesklet into the search box. The gDesklet packages should now be listed as follows:
Select each package in turn and press the Install button to move the package to the Installed Software list. Click on Accept and follow the instructions to initiate the installation process.
Launching gDesklets
Once the gDesklet packages are installed, the next task is to invoke the gDesklet Shell configuration tool. After installation the tool will be listed under Utilities in the Applications Browser (accessed by pressing the Computer button on the desktop panel and pressing More Applications...). Enter gDesklet into the Filter field to locate the utility. If you plan to access this utility right click on it and select Add to Favorites so that it appears on the main Computer panel. Click on it to launch it.
The gDesklets Shell dialog will appear with a list of categories of desklets currently installed and available for use. Browse through the options and select a gDesklet to run. To run a desklet either double click on the entry in the list or select the desklet and choose the File->Run Selected Desklet menu option. The desklet will start up and appear on the desktop. Move the desklet to the desired location and click with the left hand mouse button to fix the position.
Moving a Desklet
Once you have positioned a desklet it can be moved to a new location either by clicking the middle mouse button and dragging the desklet, or by clicking on it with the right hand mouse button and selecting Move Desklet. Move the mouse around until the desklet is in the desired position and click to set the location.
Setting the Properties of a Desklet
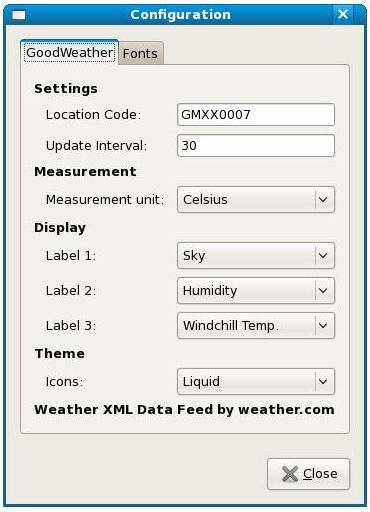
Most desklets can be configured. For example the Weather desklets allow the location for which the weather is being reported to be changed. To access a desklet's configuration page, click with the right mouse button and select the Configure desklet option. The following figure shows a typical properties dialog for a weather desklet:
Raising Desklets to the Front of the Desktop
At any one time it is likely your desktop will contains all kinds of windows and dialogs. This means that most of the time any desklets you have installed and running will be obscured by your other windows. Recent versions of gDesklet have implemented a feature which allows any desklets to be brought in front of any windows on the desktop. By default this is triggered by pressing the Shift and F12 keys simultaneously. To send the desklets back to the back of any windows simply press Shift+F12 a second time.
Install New gDesklet Packages
By default openSUSE does not install all the currently available desklets. A more complete list of available desklets can be found at [http://www.gdesklets.de/index.php?q=desklet/browse/alphabetical/].
Any of these desklets can be downloaded for free and added to your desktop. To do so simply download your chosen desklets and start the gDesklet shell (Applications->Accessories->gDesklets). If you have saved the package file to your desktop, simply click and drag the package icon into the gDesklet Shell to install it. Alternatively, in the gDesklet Shell, select File->Install Package and in the file selection dialog navigate to the downloaded package, select it and click on the Open button. A dialog will appear informing you that the package has been installed. Browse the desklets in the gDesklet Shell window until you find the new desklet. Select it and launch it from the File menu.
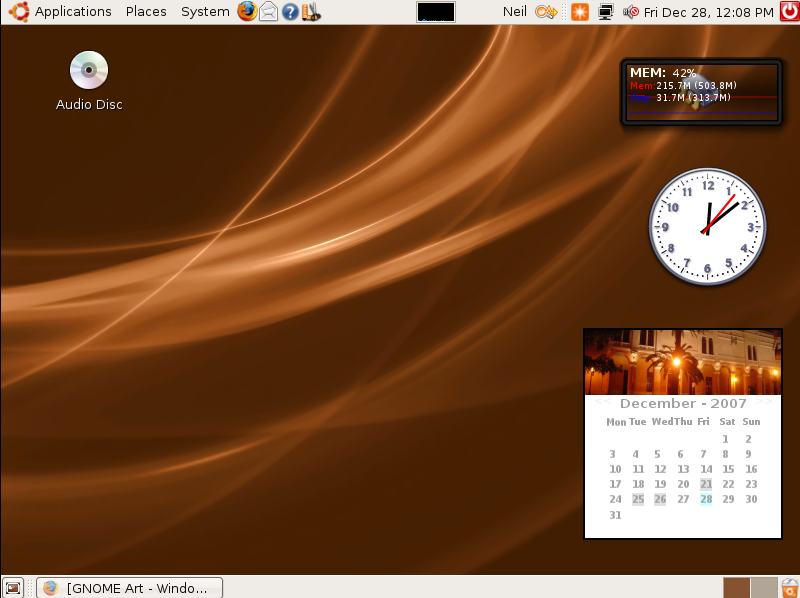
The following figure shows an openSUSE Desktop with the clock and memory monitoring desklets installed:
| Previous | Table of Contents | Next |
| openSUSE Desktop Visual Effects | Browsing My Computer, Files and Folders on the openSUSE Desktop |


