Configuring openSUSE Workspaces
| Previous | Table of Contents | Next |
| Configuring the openSUSE Desktop Panels | OpenSUSE Desktop Visual Effects |
If you have used Windows for any length of time before moving to Linux you are probably familiar with the concept of a single desktop area on which to run your applications. The openSUSE GNOME desktop, on the other hand, supports multiple desktop workspaces (these are essentially individual screens which the user can switch between to avoid having to have all applications cluttered onto one screen).
OpenSUSE is a little unusual in that by default it has only one workspace configured. Fortunately, adding as many workspaces as you like and then switching between them is extremely easy.
Adding the Workspace Switcher to an openSUSE Desktop Panel
The first step in configuring workspaces to your openSUSE desktop environment involves adding the Workspace Switcher to a desktop panel. The Workspace Switcher is a small panel applet that displays how many workspaces are available and allows the user to switch between them.
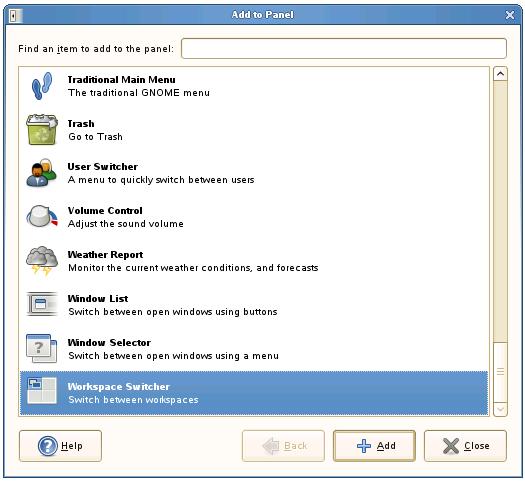
To add a Workspace Switcher to a panel begin by clicking on a blank area of a desktop panel and select Add Item from the resulting menu. The Add to Panel dialog will subsequently appear. Scroll down the list of items until you find the Workspace Switcher:
With the Workspace Switcher selected in the list, click the Add button to add the item to the panel and then close the dialog. There should now be a new item in the panel which by default shows four different work spaces with the currently selected workspace shaded in blue similar to the following figure:
To switch between workspaces, simply click on a different workspace area in the panel. Another option, if you have a scroll wheel on mouse is to move the mouse pointer over the Workspace Switcher and scroll the wheel to move through the workspaces.
Changing the Number of openSUSE Desktop Workspaces
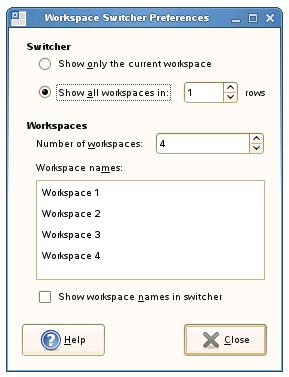
By default, openSUSE configures four workspaces when the Workspace Switcher is added to a desktop panel. To increase or reduce the number of available workspaces, right click with the mouse on the Workspace Switcher in the panel and select Preferences. Simply increase the Number of workspaces value to the desired number. The name of each workspace may also be changed by double clicking on the default name in the list (Workspace 1, Workspace2 2 etc) and typing in a new name:
If a large number of workspaces are configured it may be necessary to increase the number of rows displayed in the Workspace Switcher using the Show All Work Spaces: ... rows setting on the Preferences screen.
| Previous | Table of Contents | Next |
| Configuring the openSUSE Desktop Panels | OpenSUSE Desktop Visual Effects |

