An Android Instant App Tutorial
| Previous | Table of Contents | Next |
| An Android Studio App Links Tutorial | A Guide to the Android Studio Profiler |
The previous chapter has introduced Android Instant Apps and provided an overview of how these are structured and implemented. Instant Apps can be created as part of a new Android Studio project, or added retroactively to an existing project. This chapter will focus on including instant app support in a new project. The chapters that follow will outline how to add instant app support to an existing project.
Creating the Instant App Project
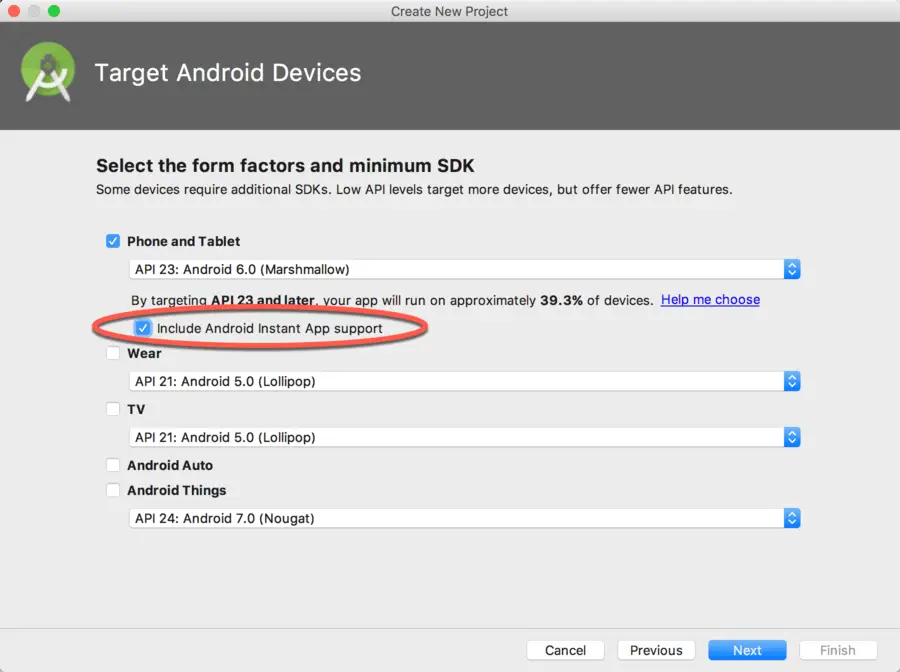
Launch Android Studio, select the option to create a new project and name the project InstantAppDemo before clicking on the Next button. On the subsequent screen, select the Phone and Tablet option and change the SDK setting to API 26: Android 8.0 (Oreo). Before clicking the Next button, enable the Include Android Instant App support option as highlighted in Figure 84-1 below:
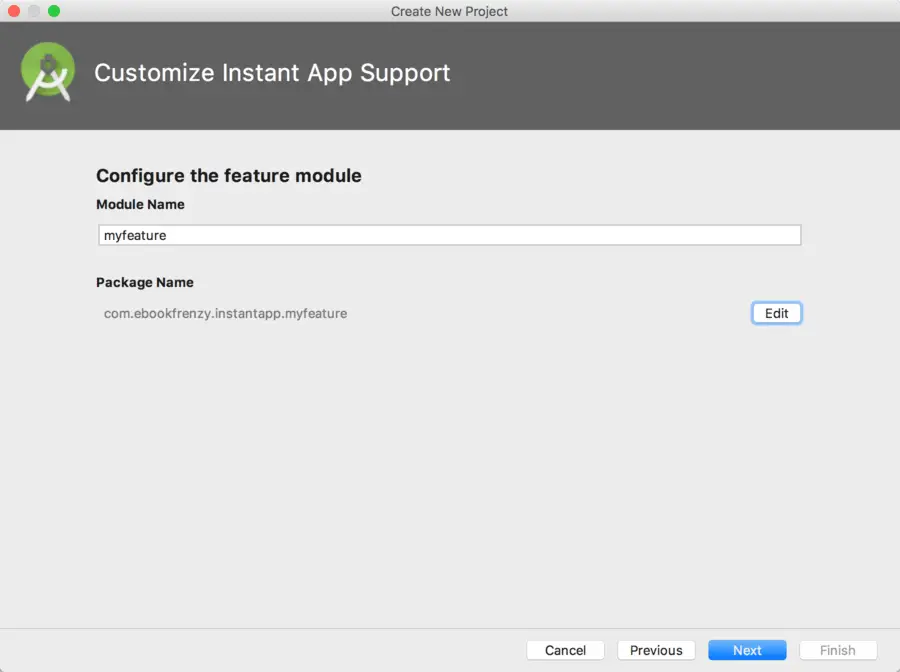
Click Next and, on the instant app customization screen, name the feature myfeature:
On the next screen, select the Empty Activity template before proceeding to the final screen. Since the Instant App option was selected, the activity configuration screen will provide fields within which to specify an app link for this activity. Activate these options by enabling the Associate a URL with this Activity option. Specify example.com as the Instant App URL Host, select the Path option from the Instant App URL Route Type and enter /home as the route URL. Name the activity InstantAppActivity and the layout activity_instant_app before clicking on the Finish button to create the new project.
Reviewing the Project
Based on the selections made, Android Studio has actually completed all of the work necessary to support both installed and instant app builds of the project. All that would be required to complete the app is to implement the functionality in the main activity and to add other feature modules if needed.
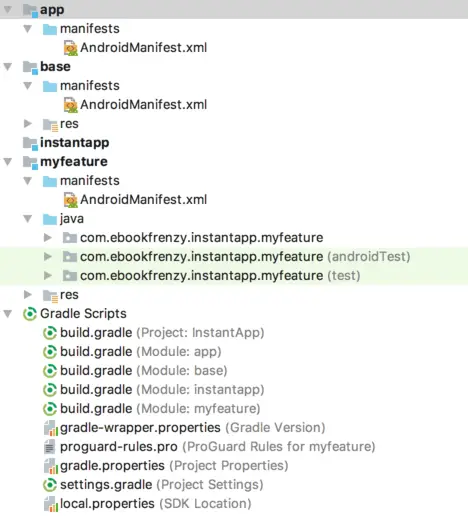
Before testing the app, it is worthwhile taking some time to review the way in which the project has been structured. At this point, the project structure within the Project Tool window should match that shown in Figure 84-3:
The project now consists of an installed app module (app), an instant app module (instantapp), a base feature module (base) and an additional feature module (myfeature). Each of these modules has associated with it a build.gradle file that defines how the module is to be built and the other modules on which it is dependent. The build.gradle (Module: app) file, for example, uses the com.android.application plugin to build the installed app version of the project and declares both the base and myfeature modules as dependencies:
apply plugin: 'com.android.application'
.
.
.
dependencies {
    implementation project(':myfeature')
    implementation project(':base')
}
The Gradle build file for the instantapp module also declares the base and myfeature modules as dependencies, but this time the com.android.instantapp plugin is used to build the instant app version of the project:
apply plugin: 'com.android.instantapp'

dependencies {
    implementation project(':myfeature')
    implementation project(':base')
}
A review of the build file for the base module will reveal the use of the com.android.feature plugin, a declaration that this is the base class and the app and myfeature dependencies:
apply plugin: 'com.android.feature'

android {
    compileSdkVersion 28
    baseFeature true
.
.
.
}

dependencies {
    application project(':app')
    feature project(':myfeature')
    api 'com.android.support:appcompat-v7:26.0.2'
    api 'com.android.support.constraint:constraint-layout:1.0.2'
}
The myfeature module contains both the layout and class file for the main activity. Although not necessary for the purposes of this tutorial, any change to the activity would be made within these module files.
In addition to the build files and module structure, Android Studio has also placed the appropriate intent filter for the app link to the AndroidManifest.xml file belonging to the instantapp module.
Testing the Installable App
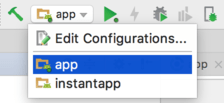
Test the installable app by selecting the app entry in the toolbar run configuration selection menu as shown in Figure 84-4 and then clicking on the run button:
Select a suitable deployment target and verify that the APK installs and the app launches.
Testing the Instant App
Before the instant app can be tested, the installed app must first be removed from the device or emulator being used for testing. Launch the Settings app and navigate to the Apps & notifications screen. Locate and select the InstantAppDemo app then click on the Uninstall button.
Once the installed app has been removed, return to Android Studio and select the instantapp module in the run configuration menu. Before running the app, open the menu once again and select the Edit configurations… option. In the Run/Debug Configurations dialog, note that Android Studio has automatically configured the module to launch using the previously declared app link URL:
Close the configuration dialog and click on the run button to launch the instant app. As the app is launching the following output will appear in the Run Tool window confirming the instant app is being launched:
07/17 10:12:11: Launching instantapp
INFO - Analyzing files...

INFO - Checking device...

INFO - Pushing instant app to device...

INFO - Launching app...

INFO - Instant app started
The instant app may also be launched from the command line using the following adb commands:
$ adb shell setprop log.tag.AppIndexApi VERBOSE
$ adb shell am start -a android.intent.action.VIEW -c android.intent.category.BROWSABLE -d https://example.com/home
Aside from the different output, the instant app feature should launch just as it did for the installable app.
A review of the installed app on the device within the Settings app will now display the app icon with a lightning bolt to indicate that this is an instant app:
Reviewing the Instant App APK Files
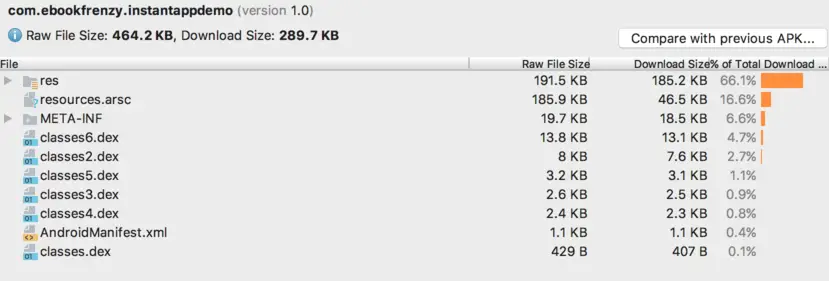
The previous chapter explained that the installable app APK file contains the basic components that make up an app. To see this in practical terms, select the Android Studio Build -> Analyze APK… menu option and navigate to, select and open the InstantApp -> app -> build -> outputs -> apk -> debug -> app-debug.apk file. Once selected, the APK Analyzer panel will open and display the content of the APK file. As shown in Figure 84-7 below, this file contains the class dex files and the associated resources for the entire app:
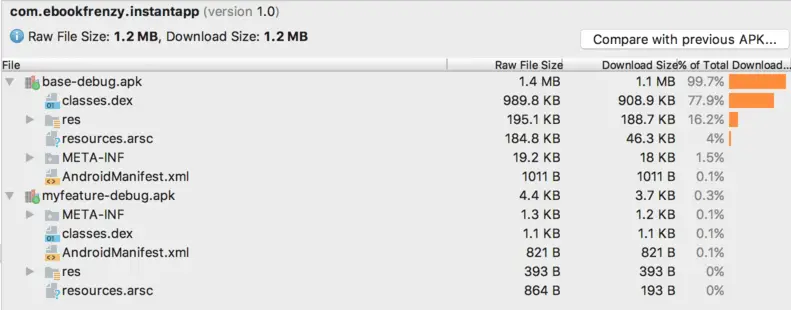
Repeat this step, this time navigating to the InstantApp -> instantapp -> build -> outputs -> apk -> debug -> instantapp-debug.zip file. Note that this file contains two APK files, one for the base module and the other for the myfeature module, each containing its own dex and resource files:
Summary
This chapter has outlined the steps to creating a new Android Studio project including Android Instant App support. As revealed in this chapter, much of the work involved in structuring the project to build both installable and instant apps is performed automatically by Android Studio. Having created the example app, this chapter also outlined how to test instant apps and demonstrated the use of the APK Analyzer to review the difference between the APK files for installable and instant app projects.
| Previous | Table of Contents | Next |
| An Android Studio App Links Tutorial | A Guide to the Android Studio Profiler |


