A Firebase Cloud Functions Tutorial
| Previous | Table of Contents | Next |
| Installing the Firebase CLI | A Cloud Functions and Firebase Cloud Storage Example |
This chapter will demonstrate the creation of Firebase Cloud Functions designed to be triggered in response to Realtime Database and Authentication related events.
About the Example Project
Practical implementation of Firebase Cloud Functions will be demonstrated using a pre-existing Android Studio app project named CloudFunctions. This project is a simple app that uses Firebase Authentication to allow users to create accounts and sign into and out of the app. In addition to these features, the app also uses a Firebase Realtime Database to keep track of the users that are currently logged in. When a user signs into the app, an entry is added to the realtime database. The database entry is then removed when the user signs out.
When the app is launched it makes a call to the subscribeToTopic() method of the FirebaseMessaging instance to subscribe the app to a topic named “OnlineUsers”. This topic will be used to send out notifications later in the chapter.
The app has also been configured to handle incoming Firebase messages both when in the foreground and background. When the app is in the foreground, a Firebase Messaging Service instance is used to display the incoming notification to the user in the form of a Toast message.
The objective of the tutorial in this chapter is to implement cloud functions that will perform the following tasks:
• Detect when a new user account has been created and notify all users of this via a Firebase notification.
• Detect changes to the Realtime Database and notify all users when a user signs in or out of the app.
For the purposes of this tutorial, the app is considered to be functionally complete. All of the above requirements, therefore, will be implemented entirely using Firebase Cloud Functions without making any changes to the project code.
Loading and Configuring the App
The Android Studio project files for the app can be found in the CloudFunctions folder of the sample code download available from the following URL:
http://www.ebookfrenzy.com/web/firebase_android
Once the project has been located, load it into Android Studio. Although the app in its current form has all of the necessary Firebase library dependencies configured, the project will need to be connected to your Firebase account before it can be run. Within Android Studio, select the Tools -> Firebase menu option and, within the resulting Firebase assistant panel, select the Authentication option and click on the Email and password authentication link. In the Authentication panel click on the Connect to Firebase button and select the Firebase Examples project from the list of existing projects before clicking on the Connect to Firebase button.
Before running the app, open the Firebase console in a browser window, select the Firebase Examples project and click on the Database option in the navigation panel. Within the Database screen, select the Rules tab and modify the rules to allow access only to authenticated users:
{
  "rules": {
    ".read": "auth != null",
    ".write": "auth != null"
  }
}
Trying out the App
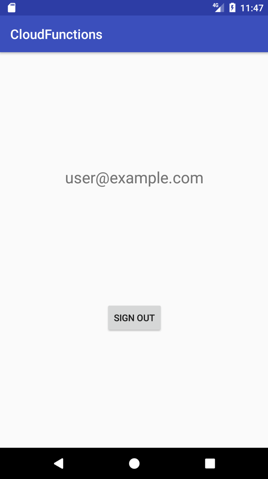
With the project configured, it is worth taking a few minutes to check that it works correctly by running the app on a device or emulator. Once the app has loaded, return to the Firebase console, this time selecting the Data tab of the Realtime Database screen. To avoid confusion, delete any previous test data contained within the database. Keeping the Database screen visible in the browser window, create a new account within the running app. Note that once the account has been created, a second screen appears displaying the email address for the account and a button for logging out:
Figure 54‑1
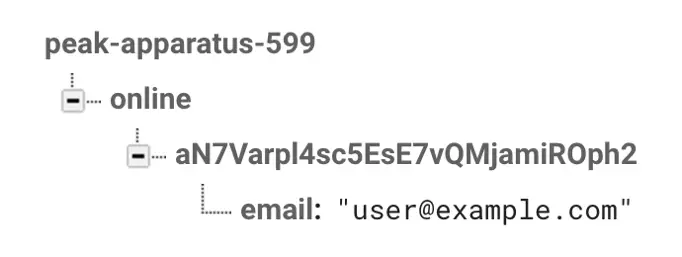
Refer to the Firebase console and verify that an entry has been added indicating that the new user is signed into the app:
Figure 54‑2
Sign out of the app by clicking the Sign Out button and confirm that the database entry for the user has been deleted from the database.
Having made sure that the app works as expected, the next step is to write and deploy some cloud functions to be triggered when a new user account is created and when users sign in and out of the app.
Writing the Authentication Cloud Function
A cloud function now needs to be written to detect when a new user account is created. Within a terminal or command-prompt window, log into Firebase using the Firebase CLI as follows:
firebase login
After logging in, change directory to the MyCloudFunctions/functions folder created in the previous chapter, edit the index.js file and remove the example HTTP cloud function so that the file only contains the following lines:
const functions = require('firebase-functions');
const admin = require('firebase-admin');
admin.initializeApp(functions.config().firebase);
The first cloud function will need to be triggered whenever a new user account is created within the app. This will involve the use of the functions.auth.user().onCreate event handler. Within the index.js file, add the code for this function:
 exports.newUserAdded = functions.auth.user().onCreate(event => {

	const user = event.data;
        const email = user.email;

        var payload = {
          notification: {
            title: "New User",
            body: "New user " + email + " just joined."
          }
        };

        var topic = "OnlineUsers";

        return admin.messaging().sendToTopic(topic, payload)
          .then(function(response) {
            console.log("Successfully sent message:", response);
          })
          .catch(function(error) {
            console.log("Error sending message:", error);
          });
});
The code begins by extracting the user data from the event object and then accessing the email address. A message payload is then created consisting of a title and a body, where the body is constructed to include the new user’s email address. The function then calls the messaging sendToTopic() function to send the message to the OnlineUsers topic. Since this action will be performed asynchronously, the function returns a Promise in the form of the result from the sendToTopic() call. This ensures that the send operation will continue to run asynchronously until completion.
Writing the Realtime Database Function
The Cloud Function Authentication event handlers do not provide a way to trigger a function when a user signs in or out of an account. To get around this limitation, the app maintains realtime database entries for users that are currently signed in. The following cloud function designed to trigger when changes are made to the database reference now needs to be added to the index.js file:
exports.userStatusChange = functions.database.ref('/online/{userId}/email')
    .onWrite(event => {

      const original = event.data.val();
      const previous = event.data.previous.val();

      if (!event.data.exists()) {
        var title = "User Signed Out";
        var body = "User " + previous + " signed out";
      } else {
        title = "User Signed In";
        body = "User " + original + " signed in";
      }

      var payload = {
          notification: {
            title: title,
            body: body
          }
        };

        var topic = "OnlineUsers";

        return admin.messaging().sendToTopic(topic, payload)
          .then(function(response) {
            console.log("Successfully sent message:", response);
          })
          .catch(function(error) {
            console.log("Error sending message:", error);
          });
});
Since this function is slightly more complicated, it is worthwhile reviewing the code in more detail. The code makes use of the functions.database.ref event handler to detect when a write operation is performed at the database location referenced by /online/<userId>/email:
exports.userStatusChange = functions.database.ref('/online/{userId}/email')
    .onWrite(event => {
Next, the event data is accessed to obtain both the new data being written (original) and the value of the data prior to the write operation (previous):
const original = event.data.val();
const previous = event.data.previous.val();
If the new data is empty then it can be safely assumed that the entry is being deleted and that the user is signing out. Otherwise, the user is clearly signing into the app. Based on this information, custom strings are built and included in the message payload:
if (!event.data.exists()) {
        var title = "User Signed Out";
        var body = "User " + previous + " signed out";
} else {
        title = "User Signed In";
        body = "User " + original + " signed in";
}
Finally, the payload is sent to all users subscribed to the OnlineUsers topic:
var topic = "OnlineUsers";

return admin.messaging().sendToTopic(topic, payload)
     .then(function(response) {
         console.log("Successfully sent message:", response);
     })
     .catch(function(error) {
         console.log("Error sending message:", error);
     });
Deploying the Cloud Functions
All that remains before testing the app again is to deploy the functions to the cloud. Using the Firebase CLI, run the following command to deploy the functions:
firebase deploy --only functions
Assuming that the functions deploy without error they are ready to be tested.
Testing the Cloud Functions
Return to the running app and experiment with adding new accounts and signing in and out of the app. On completion of each action, a Toast message should appear containing the message text from the corresponding cloud function:
Figure 54‑3
Open the Firebase console in a browser window and select the Firebase Examples project followed by the Cloud Functions link. Within the Functions screen, the two new functions should now be listed within the dashboard:
Figure 54‑4
Clicking on the Logs tab will display the full log details for the functions:
Figure 54‑5
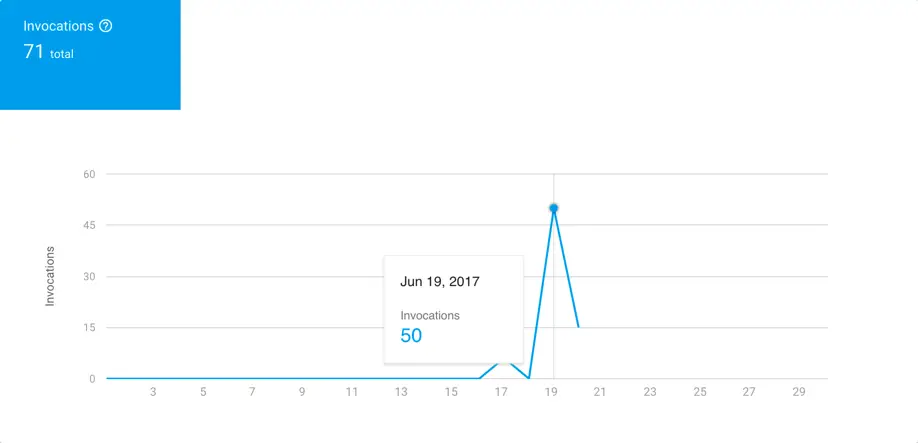
When selected, the Usage tab will display statistics on the number of function invocations over a given period of time. This is useful for tracking function usage and in calculating potential costs:
Figure 54‑6
As an alternative to viewing the logs within the Firebase console, run the following Firebase CLI command to view the log output within the terminal or command-prompt window:
firebase functions:log
Summary
This chapter has combined a number of different Firebase services to add functionality to an app using Firebase Cloud Functions. Without having to make any changes to the Android project code, cloud functions have been used to detect when user’s create, login into and out of accounts and to trigger when changes are made to a branch of a realtime database. The example also demonstrated the use of Firebase Messaging within cloud functions.
| Previous | Table of Contents | Next |
| Installing the Firebase CLI | A Cloud Functions and Firebase Cloud Storage Example |


