Google Authentication using the Firebase SDK
| Previous | Table of Contents | Next |
| Handling Firebase Authentication Errors and Failures | Facebook Authentication using the Firebase SDK |
Having covered Firebase SDK email and password authentication and error handling in the previous chapters, this chapter will focus on the use of the Google Play Services Sign In API to validate a user’s identity via a Google account in order to create a matching Firebase user account.
The chapter will begin with an overview of the Google sign-in process and the way it integrates into the Firebase authentication process. An example project will then be created that demonstrates the practical steps involved in implementing this within an Android app.
Firebase Authentication with the Google Sign-In API
The Google Play Services library includes a set of APIs that provide access to a range of Google services. One such API is the Google Sign-In API which, as the name suggests, allows app developers to provide users the ability to sign into Google accounts from with an Android app. Once a user has successfully signed into a Google account, the ID token for that Google account can then be used to register the user via the Firebase authentication system. In effect this connects the user’s Google account with a corresponding Firebase authentication account, allowing the user to continue signing into the app as a Firebase registered user using the Google account details.
The core elements of Google sign-in are the GoogleSignInOptions and GoogleApiClient classes. GoogleSignInOptions is used to configured the way in which the Google sign-in operation is handled, and specifies the Google account information that is required by the Android app. GoogleApiClient provides a convenient interface for working with Google Play Services APIs without having to write extensive code and error handling logic. A GoogleApiClient instance is initialized with a suitably configured GoogleSignInOptions instance and then used to launch the Google sign-in activity. This activity takes the user through the Google sign-in process and returns the result to the app.
If the user successfully signed into a Google account using the Google user sign-in activity, the resulting data returned to the app will include the user’s Google account ID token. The Firebase SDK is then used to exchange this ID for a Firebase credential object which is, in turn, used to register the user within the Firebase authentication system and subsequently sign into the app.
Creating the GoogleAuth Project
The first step in this exercise is to create the new project. Launching Android Studio, select the Start a new Android Studio project quick start option from the welcome screen and, within the new project dialog, enter GoogleAuth into the Application name field and your domain as the Company Domain setting before clicking on the Next button. On the form factors screen, enable the Phone and Tablet option and set the minimum SDK to API 16: Android 4.1 (Jellybean). Proceed through the setup screens, requesting the creation of an Empty Activity named GoogleAuthActivity and a corresponding layout named activity_google_auth.
Connecting the Project to Firebase
As usual, the project will need to be connected to Firebase. Within Android Studio, use the Tools -> Firebase menu to display the Firebase Assistant panel, locate and click on the Authentication category, select the Email and password authentication link and then click on the Connect to Firebase button to display the Firebase connection dialog. Choose the option to store the app in an existing Firebase project and select the Firebase Examples project created at the beginning of the book.
With the project’s Firebase connection established, refer to the Firebase assistant panel once again, this time clicking on the Add Firebase Authentication to your app button. A dialog will appear outlining the changes that will be made to the project build configuration to enable Firebase authentication. Click on the Accept Changes button to commit the changes to the project configuration.
Configuring the SHA-1 Fingerprint Key
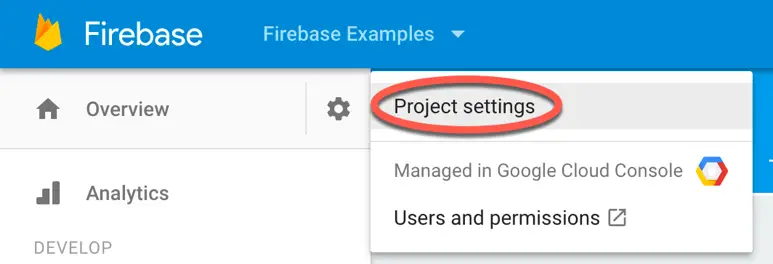
It is likely that the SHA-1 fingerprint will already be configured for all apps within the Firebase Examples project. Verify this is the case for the current project by navigating to the Firebase console within a browser window, clicking on the gear icon next to the Overview item and selecting Project Settings from the menu:
Figure 13-1
Within the resulting panel, select the General tab, locate the GoogleAuth app from the list and scroll to the SHA1 certificate fingerprints section. If the SHA-1 fingerprint is not already configured for the app, use the steps outlined in the chapter entitled Google Sign-In Authentication using FirebaseUI Auth to extract the SHA-1 Fingerprint key for your development environment and add it within the console.
Before returning to Android Studio, display the Authentication page within the Firebase console, select the Sign-in Method tab and verify that the Google provider is enabled.
Adding the Google Play Authentication Library
The Google authentication provider makes use of the Google Play Services authentication library. To avoid undefined symbols later in this tutorial, this library must be added to the Gradle configuration. Within the Android Studio project tool window, locate and open the build.gradle (app: module) build file (located under Gradle Scripts) and add the library to the dependencies section of the file:
apply plugin: 'com.android.application'
.
.
dependencies {
    compile fileTree(dir: 'libs', include: ['*.jar'])
    androidTestCompile('com.android.support.test.espresso:espresso-core:2.2.2', {
        exclude group: 'com.android.support', module: 'support-annotations'
    })
    compile 'com.android.support:appcompat-v7:25.3.1'
    compile 'com.android.support.constraint:constraint-layout:1.0.2'
    compile 'com.google.firebase:firebase-auth:11.0.1'
    compile 'com.google.android.gms:play-services-auth:11.0.1'
    testCompile 'junit:junit:4.12'
}
.
.
Designing the User Interface Layout
The user interface layout is going to consist of an ImageView, two TextViews and two Buttons. Begin by loading the activity_google_auth.xml file into the layout editor tool and turning off Autoconnect mode.
Select and delete the “Hello World” TextView object and drag and drop an ImageView component from the Palette onto the layout canvas. When the ImageView is released onto the layout, a resources dialog will appear providing a list of images available to be displayed on the ImageView object. Addition of the Google libraries to the project build configuration has provided access to a range of Google related images for use within the project. Within the resources dialog locate the common_google_signin_btn_icon_dark image (Figure 13-2):
Figure 13-2
With the image selected, click on the OK button to apply the image to the ImageView and dismiss the resources dialog.
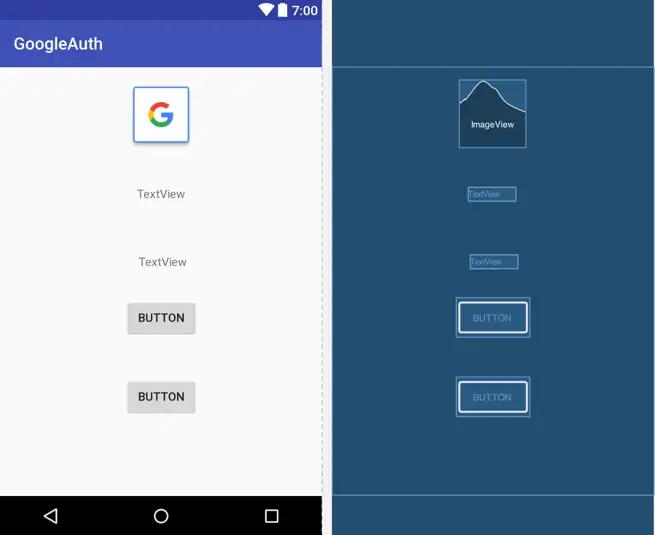
Remaining within the layout editor, add the TextView and Button widgets to the layout so that it resembles the layout shown in Figure 13-3. Shift-click on the TextView buttons so that both are selected and increase the textSize attribute in the properties window to 18sp:
Figure 13-3
Select the ImageView and, using the properties tool panel, change the ID to profileImage. Also change the IDs of the two TextView objects to emailText and statusText. Change the text on the two buttons to Google Sign-in and Sign Out and configure onClick properties so that the buttons are configured to call methods named signIn and signOut respectively.
With the view components added to the layout it is now time to add some constraints. Click in the upper right-hand corner of the layout canvas and drag the resulting rectangle until it encompasses all of the widgets. On releasing the mouse button, all four widgets should now be selected. Right-click on the ImageView object and, from the resulting menu, select the Center Horizontally menu option. Repeat this step once again, this time selecting the Center Vertically menu option.
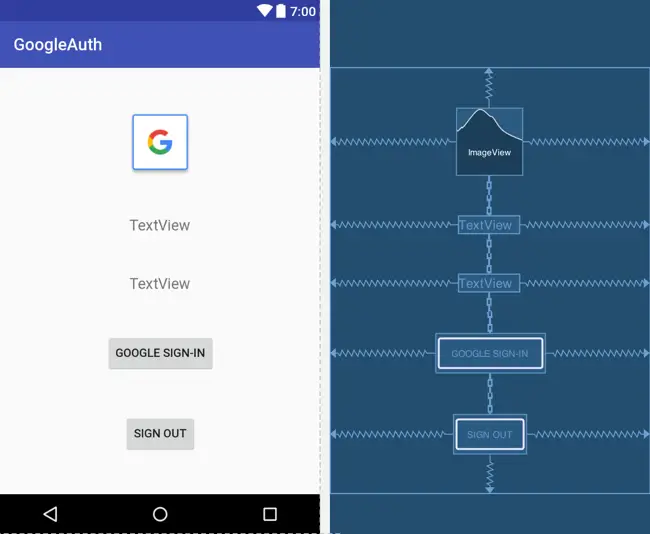
At this stage, appropriate constraints should have been added such that the layout will be responsive to different screen sizes and device orientations:
Figure 13-4
Adding a User Notification Method
A method named notifyUser() will once again be used to display Toast messages from within the app. Implement this method as follows in the GoogleAuthActivity.java file: import android.widget.Toast;
.
.
.
private void notifyUser(String message) {
    Toast.makeText(GoogleAuthActivity.this, message,
            Toast.LENGTH_SHORT).show();
}
Accessing the FirebaseAuth Instance
As with all forms of Firebase SDK authentication, the two key components are the FirebaseAuth instance and the authentication state listener. The next step in implementing Firebase authentication for the Google provider is to obtain a reference to the FirebaseAuth instance. Within Android Studio, edit the GoogleAuthActivity.java file to obtain a reference to the FirebaseAuth instance and to perform some basic initialization tasks:
package com.ebookfrenzy.googleauth;

import android.support.v7.app.AppCompatActivity;
import android.os.Bundle;
import android.widget.Toast;
import android.widget.ImageView;
import android.widget.TextView;

import com.google.android.gms.tasks.OnCompleteListener;
import com.google.android.gms.tasks.Task;
import com.google.firebase.auth.AuthResult;
import com.google.firebase.auth.FirebaseAuth;
import com.google.firebase.auth.FirebaseUser;
import android.support.annotation.NonNull;

public class GoogleAuthActivity extends AppCompatActivity {

    private ImageView profileImage;
    private TextView emailText;
    private TextView statusText;
    private FirebaseAuth fbAuth;
    private FirebaseAuth.AuthStateListener authListener;

    @Override
    protected void onCreate(Bundle savedInstanceState) {
        super.onCreate(savedInstanceState);
        setContentView(R.layout.activity_google_auth);

        profileImage = (ImageView) findViewById(R.id.profileImage);
        emailText = (TextView) findViewById(R.id.emailText);
        statusText = (TextView) findViewById(R.id.statusText);

        emailText.setText("");
        statusText.setText("Signed Out");

        fbAuth = FirebaseAuth.getInstance();
    }
.
.
}
Adding the Authentication State Listener
With the GoogleAuthActivity.java file still open in the Android Studio code editor, further modify the onCreate() method to declare the authentication state listener method:
@Override
protected void onCreate(Bundle savedInstanceState) {
    super.onCreate(savedInstanceState);
    setContentView(R.layout.activity_google_auth);

    emailText = (TextView) findViewById(R.id.emailText);
    statusText = (TextView) findViewById(R.id.statusText);

    emailText.setText("");
    statusText.setText("Signed Out");

    fbAuth = FirebaseAuth.getInstance();

    authListener = new FirebaseAuth.AuthStateListener() {
        @Override
        public void onAuthStateChanged(@NonNull FirebaseAuth firebaseAuth) {

            FirebaseUser user = firebaseAuth.getCurrentUser();

            if (user != null) {
                emailText.setText(user.getEmail());
                statusText.setText("Signed In");
                if (user.getPhotoUrl() != null) {
                    displayImage(user.getPhotoUrl());
                }
            } else {
                emailText.setText("");
                statusText.setText("Signed Out");
                profileImage.setImageResource(
                        R.drawable.common_google_signin_btn_icon_dark);

            }
        }
    };
}
The listener method begins by getting a reference to the FirebaseUser object for the current user. If the user object is not null then the code assumes that a user has just successfully signed into the app. The user’s email address is accessed and displayed on the emailText TextView object. The text displayed on the statusText object is then changed to indicate that the user is currently signed in and the user’s profile photo is passed to a method named displayImage() which needs to be added to the Java class file as follows:
.
.
import android.net.Uri;
import android.graphics.Bitmap;
import android.os.AsyncTask;
import android.graphics.BitmapFactory;

import java.io.InputStream;
.
.
void displayImage(Uri imageUrl) {
    new DownloadImageTask((ImageView) findViewById(R.id.profileImage))
            .execute(imageUrl.toString());
}

private class DownloadImageTask extends AsyncTask<String, Void, Bitmap> {
    ImageView bmImage;

    public DownloadImageTask(ImageView bmImage) {
        this.bmImage = bmImage;
    }

    protected Bitmap doInBackground(String... urls) {
        String urldisplay = urls[0];
        Bitmap bitmap = null;
        try {
            InputStream in = new java.net.URL(urldisplay).openStream();
            bitmap = BitmapFactory.decodeStream(in);
        } catch (Exception e) {
            e.printStackTrace();
        }
        return bitmap;
    }

    protected void onPostExecute(Bitmap result) {
        bmImage.setImageBitmap(result);
    }
}
A null value assigned to the user object, on the other hand, indicates the authentication change involved the user signing out of the app. The email address is removed from the email text view, the status text is updated to reflect that the user has signed out and the ImageView updated to once again display the Google icon.
Adding and Removing the Listener
At this point, the authentication state listener has been declared but has not yet been added to the FirebaseAuth instance. Without this vital step, the method will never be called in response to changes in the authentication state. Once again, the standard onStart() Android lifecycle method will be overridden and used to add the listener. The onStart() method is called immediately after the call to the onCreate() method and before the activity is to become visible to the user. Within the GoogleAuthActivity.java file, add this method so that it reads as follows:
@Override
public void onStart() {
    super.onStart();
    fbAuth.addAuthStateListener(authListener);
}
In addition to adding the listener, it is equally important to remove the listener when it is no longer needed. To achieve this, the onStop() method will be used:
@Override
public void onStop() {
    super.onStop();
    if (authListener != null) {
        fbAuth.removeAuthStateListener(authListener);
    }
}
Initializing the Google API Client
Before a Google authentication can be performed, a GoogleSignInOptions instance needs to be created and used to initialize a GoogleApiClient object. This object is configured with options that define how the authentication will be handled and the types of user information required by the app. The GoogleSignInOptions class includes a builder method which is used to create an instance of the class. For example:
GoogleSignInOptions signInOptions = new
    GoogleSignInOptions.Builder(GoogleSignInOptions.DEFAULT_SIGN_IN)
        .requestIdToken(getString(R.string.default_web_client_id))
        .requestEmail()
        .requestProfile()
        .build();
The above example builds a GoogleSignInOptions instance using the default configuration for performing a Google sign in operation. The instance is also configured to request the user’s Google account ID token, email address and profile information. The ID token will be used later in exchange for a Firebase authentication credential.
In order to request the ID token the value assigned to the default_web_client_id resource was passed through to the builder. This resource is generated automatically based on the content of the google-services.json file added to the project during the Firebase setup.
Once the GoogleSignInOptions instance has been created, it can be used in the creation of a GoogleApiClient object, once again using the builder provided with the class:
GoogleApiClient googleApiClient = new GoogleApiClient.Builder(this)
        .enableAutoManage(this, this)
        .addApi(Auth.GOOGLE_SIGN_IN_API, signInOptions)
        .build();
GoogleApiClient is a class designed specifically to make it easier for app developers to use the many APIs provided by the Google Play Services library. In this case, a GoogleApiClient instance is being created in order to access the Google Sign-In API using the configuration parameters previously assigned to the signInOptions object.
The enableAutoManage setting indicates that the Google API client should automatically handle all aspects of the connection to the Google sign-in services, including automatically resolving any non-fatal errors. While this greatly simplifies the implementation of Google services features, it does require that a handler be designated to act as the listener for unresolvable failures. This handler must, in turn, implement the GoogleApiClient OnConnectionFailedListener interface. For this example, this role will be performed by the GoogleAuthActivity class.
With the GoogleAuthActivity.java file loaded into the Android Studio code editor, modify the class to perform these initialization tasks as follows:
.
.
import com.google.android.gms.auth.api.Auth;
import com.google.android.gms.auth.api.signin.GoogleSignInOptions;
import com.google.android.gms.common.api.GoogleApiClient;
.
.
import com.google.android.gms.common.ConnectionResult;
.
.
public class GoogleAuthActivity extends AppCompatActivity implements
        GoogleApiClient.OnConnectionFailedListener {
.
.
    private GoogleApiClient googleApiClient;
    private static final int RC_SIGN_IN = 1001;
.
.
    @Override
    protected void onCreate(Bundle savedInstanceState) {
        super.onCreate(savedInstanceState);
        setContentView(R.layout.activity_google_auth_sdk);

        emailText = (TextView) findViewById(R.id.emailText);
        statusText = (TextView) findViewById(R.id.statusText);
        emailText.setText("");
        statusText.setText("Signed Out");

        GoogleSignInOptions signInOptions =
		new GoogleSignInOptions.Builder(
			GoogleSignInOptions.DEFAULT_SIGN_IN)
                .requestIdToken(getString(R.string.default_web_client_id))
                .requestEmail()
                .requestProfile()
                .build();

        googleApiClient = new GoogleApiClient.Builder(this)
                .enableAutoManage(this, this)
                .addApi(Auth.GOOGLE_SIGN_IN_API, signInOptions)
                .build();
.
.
Having declared that the GoogleAuthActivity class implements the OnConnectionFailedListener interface, the onConnectionFailed() method now needs to be overridden within the class to notify the user that an unresolvable error occurred:
@Override
public void onConnectionFailed(@NonNull ConnectionResult connectionResult) {
    notifyUser("Google Play Services failure.");
}
Implementing the Sign In Method
With both the Firebase and Google initialization tasks completed, the next step is to begin adding the code to perform the user sign-in. During the design of the user interface layout, the sign-in button was configured to call a method named signIn() when clicked. Remaining within the GoogleAuthActivity class file, add this method now so that it matches the following:
.
.
import android.content.Intent;
import android.view.View;
.
.
import com.google.android.gms.auth.api.signin.GoogleSignInAccount;
import com.google.android.gms.auth.api.signin.GoogleSignInOptions;
import com.google.android.gms.auth.api.signin.GoogleSignInResult;
.
.
public void signIn(View view) {
    Intent signInIntent =
		Auth.GoogleSignInApi.getSignInIntent(googleApiClient);
    startActivityForResult(signInIntent, RC_SIGN_IN);
}
The above method creates a new Google sign-in Intent object based on the Google Client API object built during the initialization phase. This intent is then used to launch the Google sign-in activity. Since the activity is launched using the startActivityForResult() method, the onActivityResult() method will also now need to be added in order to receive the results of the activity:
@Override
public void onActivityResult(int requestCode, int resultCode, Intent data) {
    super.onActivityResult(requestCode, resultCode, data);

    if (requestCode == RC_SIGN_IN) {
        GoogleSignInResult result =
		Auth.GoogleSignInApi.getSignInResultFromIntent(data);

        if (result.isSuccess()) {
            GoogleSignInAccount account = result.getSignInAccount();
            authWithFirebase(account);
        } else {
             this.notifyUser("Google sign-in failed.");
        }
    }
}
The code begins by comparing the result code to the one provided when the sign-in activity was started. If the code matches, the result of the sign-in operation is obtained from the result data in the form of a GoogleSignInResult object. The isSuccess() method of the result object is called to identify whether the user’s attempt to sign in using a Google account succeeded. If the sign-in was successful, the GoogleSignInAccount object for the user is extracted from the result object and passed to a yet to be implemented method named authWithFirebase(). It is within this method that the user’s Google account ID needs to be exchanged for a Firebase authentication credential.
Registering the User with Firebase
With the user successfully signed into a Google account, it is now time to obtain the ID token for the user’s Google account and pass it to Firebase in return for a corresponding Firebase AuthCredential object. This credential will then be used to sign the user into the app using Firebase authentication. These steps will be performed within the authWithFirebase() method as follows:
.
.
import com.google.firebase.auth.AuthCredential;
import com.google.firebase.auth.GoogleAuthProvider;
.
.
private void authWithFirebase(GoogleSignInAccount acct) {

    AuthCredential credential = GoogleAuthProvider.getCredential(
			acct.getIdToken(), null);

    fbAuth.signInWithCredential(credential)
            .addOnCompleteListener(this,
			new OnCompleteListener<AuthResult>() {
                @Override
                public void onComplete(@NonNull Task<AuthResult> task) {
                    if (!task.isSuccessful()) {
                        notifyUser("Firebase authentication failed.");
                    }
                }
            });
}
The code extracts the user’s Google ID token from the GoogleSignInAccount object and uses it to request a Firebase AuthCredential object from the Google authentication provider. The credential object is then used to sign into Firebase, including the creation of a new account if one does not already exist. A completion listener is attached to the request and used to notify the user of a failure should one occur.
Signing Out
All that remains before testing the app is to implement the signOut() method to be called when the user clicks the Sign Out button in the user interface:
.
.
import com.google.android.gms.common.api.ResultCallback;
import com.google.android.gms.common.api.Status;
.
.
public void signOut(View view) {
    fbAuth.signOut();

    Auth.GoogleSignInApi.signOut(googleApiClient).setResultCallback(
            new ResultCallback<Status>() {
                @Override
                public void onResult(@NonNull Status status) {

                }
            });
}
After successfully completing the sign-in process, the user is actually signed in using both Google and Firebase authentication. When it comes to signing out, therefore, the user must be signed out of both accounts. In the method outlined above, the signOut() method of the FirebaseAuth instance is called to sign out of the app via Firebase. The signOut() method of the Google SignIn API is then called and passed a reference to the GoogleApiClient object in order to sign out of the Google account. The call is assigned a callback where code may be added to verify that the sign out operation completed successfully.
Testing the Project
Log into the Firebase console within a browser window, select the Authentication option in the left-hand navigation panel followed by the Users tab on the Authentication screen. If a user already exists for the Google account you intend to use for testing purposes, delete it from Firebase before proceeding.
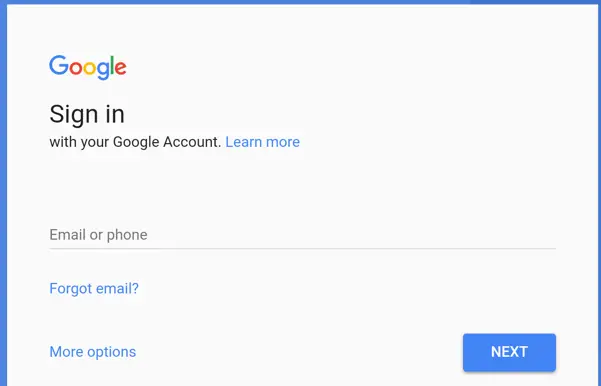
Compile and run the app on a physical Android device or emulator session and tap the Sign In button to launch the Google sign-in activity. If the device or emulator already has Google accounts configured, a dialog will appear providing a list of known accounts from which to choose. In the absence of previously configured Google accounts, the Google sign-in activity will instead provide the option either to add an existing account to the device or create a new one:
Figure 13-5
After successfully signing in to the app using a Google account the user interface should update to reflect the user’s email address and profile image. Return to the Firebase console browser window and verify both that the corresponding account has been created, and that it is listed as using the Google provider:
Figure 13-6
Summary
This chapter has outlined the use of the Google Sign API, part of the Google Play Services library, to allow users to create and sign into Firebase authentication accounts using Google accounts. This involves the use of the GoogleSignInOptions and GoogleApiClient classes to initiate the sign-in process. Once the user has successfully signed into a Google account, the ID token for that account is then exchanged for a Firebase authentication credential which is then used to register the user with Firebase and sign into the app using Firebase authentication.
| Previous | Table of Contents | Next |
| Handling Firebase Authentication Errors and Failures | Facebook Authentication using the Firebase SDK |


