Designing Forms in Visual Studio
The primary purpose of Visual Basic is the development of graphical Windows applications. Given this fact, it is not surprising that an important part of developing with Visual Basic involves the design of Windows Forms. In this chapter of Visual Basic Essentials we will cover in great detail the design of Forms using Visual Studio.
Visual Basic Forms and Controls
The form object is essentially a container for holding the controls that allow the user to interact with an application. Controls are individual objects such as Buttons and TextBoxes. In Visual Basic and Forms we looked at the many options for configuring a Windows Form. We have also looked briefly at adding controls to a form in earlier chapters. In this chapter, however, we will take a much closer look at the steps involved in laying out controls on a Form in Visual Studio.
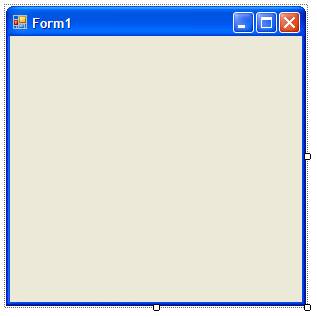
When a new Windows Application project is created in Visual Studio the first object you will see is a form. Typically it will appear in the design area as follows:
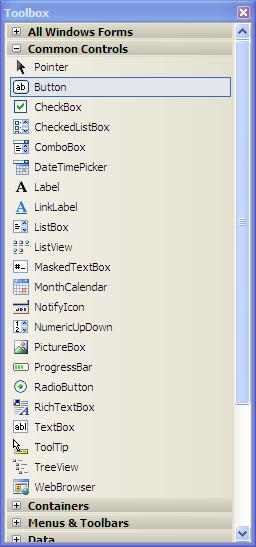
Controls are added to the form using the Toolbox. The Toolbox is usually accessed by clicking on the Toolbox tab to the left of the Visual Studio main window. The Toolbox can be pinned in place so that it no longer auto-hides by clicking on the push pin in the title bar. It can also be detached and allowed to float anywhere on the desktop by clicking and dragging on the title bar after applying the push pin. When detached, the Toolbox appears as follows:
Visual Studio provide three methods for added new controls to a form. In this chapter we will cover each of these different approaches.
Double Clicking the Control in the Toolbox
The Toolbox contains all of the controls available to be added to a form. One way to add a control to form is to simply double click on the control in the Toolbox. The control is then automatically added to the current form. The advantage of this approach is that it is very quick to add multiple controls to a form. The downside is that Visual Studio does not know where you want the control positioned in the form and consequently positions the controls near to the top left hand corner of the form. Once the control is added to the form you will need to click drag it to the desired location.
Dragging a Dropping Controls onto the Form
Another approach to adding controls to a form is to click on the control in the Toolbox and drag it onto the form. When the control is in the required location release the mouse button to drop the control into place. The position of the control can subsequently be refined using the mouse or arrow keys to move the location of the control.
Drawing a Control on the Form
The most precise mechanism for adding a control to a form is to draw it. This is achieved by first selecting the desired control in the Toolbox. Once the control is highlighted, move the mouse pointer to the location on the form where you would like the top left hand corner of the new control to appear. Click and hold down the left hand mouse button a drag the pointer. A box will be drawn as you drag the pointer. When the box reaches the required size for the new control, release the mouse button. The new control will appear position and sized according to the size and location of the box.
Positioning and Sizing Controls Using the Grid
When adding controls to a form it is possible to configure how controls are positioned and sized by activating a grid. When the grid is active, controls "snap" to the nearest grid position when added to a form.
There are a number of ways to configure the granularity and behavior of the Visual Studio grid. These settings are global in that, once defined, they apply to all forms and projects, not just to the current form or project. Note, also that for some reason, changes to the grid to not immediately take effect in forms in which you are already working.
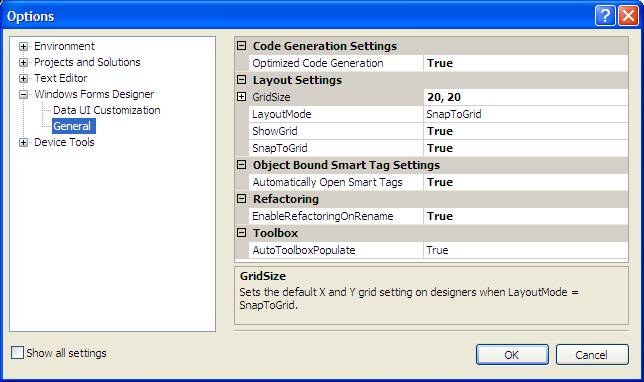
Grid settings are changed using the Visual Studio Options screen. To access this screen, select Options... from the Tools menu. When the dialog appears, click on Windows Forms Designer in the left hand tree. Once selected the dialog should appear as follows:
The settings available here require some explanation:
- GridSize - This setting controls the vertical and horizontal distances between the grid points on the form. This essentially controls the granularity of the grid. The smaller the gaps between grid points, the greater control over control size and position.
- ShowGrid - Controls whether the grid dots are visible in the form. Note that this setting control only whether the grid is visible, not whether controls snap to the grid locations. Snapping is controlled by the SnapToGrid setting.
- SnapToGrid - This setting determines whether the grid is used when controls are added. When set to True new controls will "snap" to the nearest grid location when added. When set to False the grid is ignored and controls will appear where they are dropped or drawn.
- LayoutMode - Controls whether controls are laid out by snapping to a grid location, or are aligned with other controls in the form. Aligning with other controls is achieved using "Snap Lines" which are covered in detail in the next section of this chapter.


