Creating New Databases and Tables with MySQL Administrator
| Previous | Table of Contents | Next |
| The MySQL Query Browser | Creating Databases and Tables Using SQL Commands |
| Purchase and download the full PDF and ePub versions of this MySQL eBook for only $9.99 |
Unless a database already exists, very little can be done with MySQL until a database with at least one table has been created. Databases and tables can either be created using SQL commands (typically using the mysql tool) or using a graphical administration tool such as MySQL Administrator. In this chapter we will cover the creation of databases and tables using MySQL Administrator. If you prefer to use SQL commands to perform these tasks refer to Creating Databases and Tables Using SQL Commands.
This chapter assumes you have an understanding of databases, tables and columns and have the MySQL Administrator installed, running and connected to a database server (see The MySQL Administrator Tool for details).
Creating a New Database
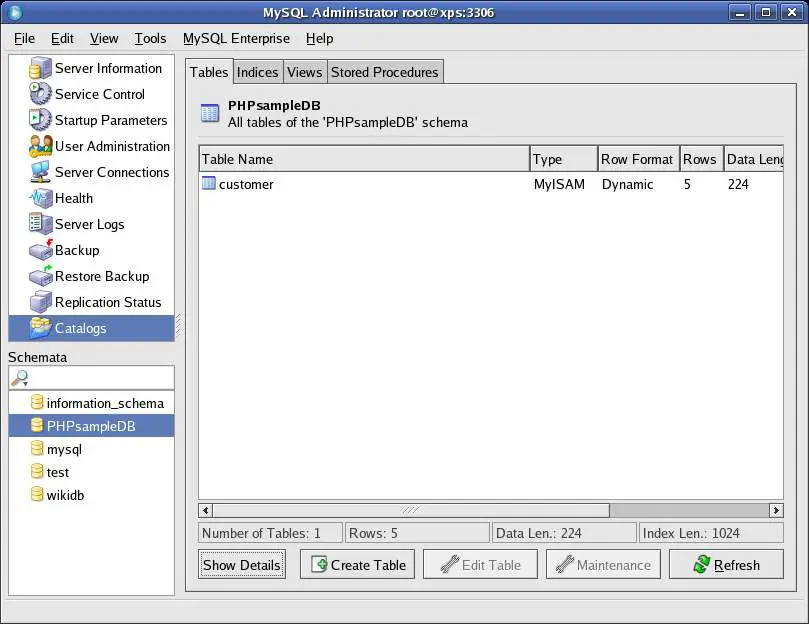
Once MySQL Administrator is running and connected to a database server, the first task is to create a new database. Begin by clicking on the Catalog option on the left hand side of the MySQL Administrator main window. The Catalog screen will then appear as follows:
The columns in the table may be viewed and modified by selecting the desired table in the list and clicking the Edit Table button.
In order to create a new database, simply move the mouse pointer to any area of the Schemata list, click with the right hand mouse button and select Create Schemata from the popup menu. In the resulting Create Schema dialog, enter a name the new database. For the purposes of this tutorial we will use the name myDBase. Click on OK to initiate the schema creation.
If the new database is not currently selected in the Schemata list, select it and note that the view area now changes and shows no tables. The next task, therefore, is to create a table in our new database.
Creating New Tables
Although the MySQL Administrator makes the creation of tables extremely easy, an understanding of the fundamentals of database tables, columns and datatypes is recommended. If you are new to these concepts, it is worth first reading the Database Basics section of this book.
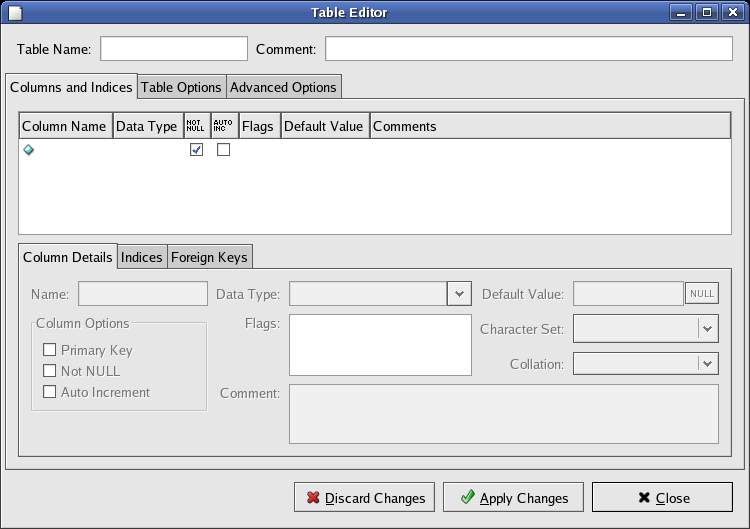
To begin the table creation process, first verify that the appropriate schema is selected in the Schemata section of the MySQL Administrator Catalogs page. With the correct schema selected, click on the Create Table button to display the Table Editor dialog shown in the following figure:
Begin by entering the name of the table (which we will call customer) in the Table name: field and, optionally, a comment to describe the purpose of the table. The next task is to begin adding columns.
To add a column, click on the diamond icon in the Column Name column of the table so that the various fields in the Column Details area of the screen enables. Enter customer_id as the name of the first column. Select Numeric from the Data Type drop down menu. The customer ID will be our primary key (see Database Basics for a description of primary keys) and also automatically be generated for us as rows are added to the database. Select the Primary Key and Auto Increment check boxes to reflect this. When completed the Column Details should appear as follows:
Click on the second row of the Columns and Indices table to add a second column with the following values:
| Name: | customer_name |
| Data Type: | TEXT |
Finally, add another column as follows:
| Name: | customer_address |
| Data Type: | TEXT |
Once these columns are configured, click on the Apply Changes button to create the table. At this point, it is important to appreciate that all MySQL Administrator is doing is providing a user friendly way to generate and run SQL commands. At this point, therefore, the tool displays the SQL that will be executed to create the table and columns specified. If you are new to SQL take some time to review the SQL commands - these will be covered in more detail later in this book. The SQL commands to create our table should read as follows:
CREATE TABLE `myDBase`.`customer` (
  `customer_id` NUMERIC  NOT NULL,
  `customer_name` TEXT  NOT NULL,
  `customer_address` TEXT  NOT NULL,
  PRIMARY KEY (`customer_id`)
)
ENGINE = MyISAM;
Click the Execute button and wait for the Table Created dialog to appear. Dismiss this dialog and return to the MySQL Administrator Catalog screen and note the myDBase database now contains a table called customer with 0 rows (i.e. no data has been entered into the database yet). You have now completed the creation of a database and a table.
| Purchase and download the full PDF and ePub versions of this MySQL eBook for only $9.99 |
| Previous | Table of Contents | Next |
| The MySQL Query Browser | Creating Databases and Tables Using SQL Commands |


