Performing a Windows Server 2008 Upgrade
| Previous | Table of Contents | Next |
| Performing a Clean Windows Server 2008 Installation | Windows Server 2008 Command-line Tools |
| Purchase and download the full PDF and ePub versions of this eBook only $9.99 |
In the previous chapter of Windows Server 2008 Essentials we looked at performing a clean installation of Windows Server 2008. Whilst this approach is acceptable in some instances, it is probably more common that Windows Server 2008 will be installed as an upgrade to a previously installed version of Windows (specifically Windows Server 2003, Windows 2000 or a lesser edition of Windows Server 2008).
In this chapter the steps involved in performing an upgrade to Windows Server 2008, together with supported upgrade paths will be covered in detail.
Windows Server 2008 Upgrade Paths
Before performing an upgrade to Windows Server 2008 the key prerequisite is that the currently installed operating system provides an upgrade path to the chosen edition of Windows Server 2008. It is not, for example, possible to upgrade to Windows Server 2008 from Windows XP. In addition, it is vital that the target hardware be of a suitably high specification to support Windows Server 2008. For details of the system requirements refer to Windows Server 2008 Editions and System Requirements.
Upgrades are possible from a number of older Windows Server versions as outlined in the following table:
| Operating System | Upgrade Options |
|---|---|
|
Windows Server 2003 R2 Standard Edition |
Windows Server 2008 Standard |
|
Windows Server 2003 R2 Enterprise Edition |
Windows Server 2008 Enterprise |
|
Windows Server 2003 R2 Datacenter Edition |
Windows Server 2008 Datacenter |
|
Windows Server 2008 Standard |
Windows Server 2008 Enterprise |
|
Windows Server 2008 Enterprise |
Windows Server 2008 Datacenter |
How an Upgrade to Windows Server 2008 Works
During the Windows Server 2008 upgrade process the files, folders and applications associated with the previously installed Windows version are relocated to a windows.old folder and all user settings stored. Once this task is complete, a clean installation of the new operating system is performed and the saved user settings migrated to the new environment. Upon completion of a successful upgrade the Windows Server 2008 system will include all applications, settings and user files from the previous operating system installation.
Performing the Upgrade
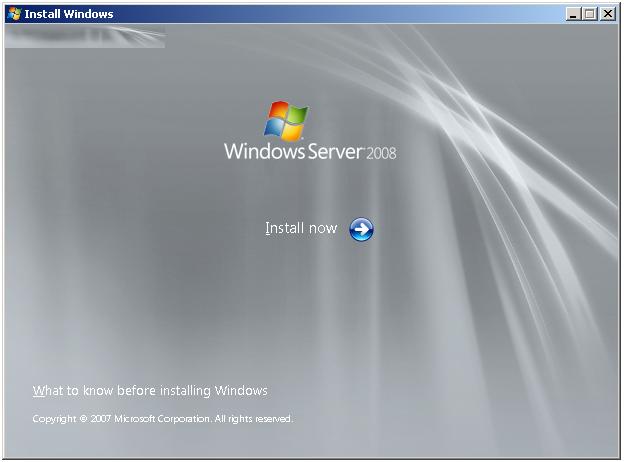
<google>WIN28BOX</google> An upgrade to Windows Server 2008 can only be performed by launching the installation process from within the currently installed operating system. It is not possible to perform an upgrade by booting from the installation media. To initiate the upgrade process, therefore, boot the existing Windows installation (if not already running), log into an account with administrative privileges and insert the installation DVD. If the system is configured to do so, the setup process on the DVD will autorun once it is mounted displaying the Windows Server 2008 installation screen:
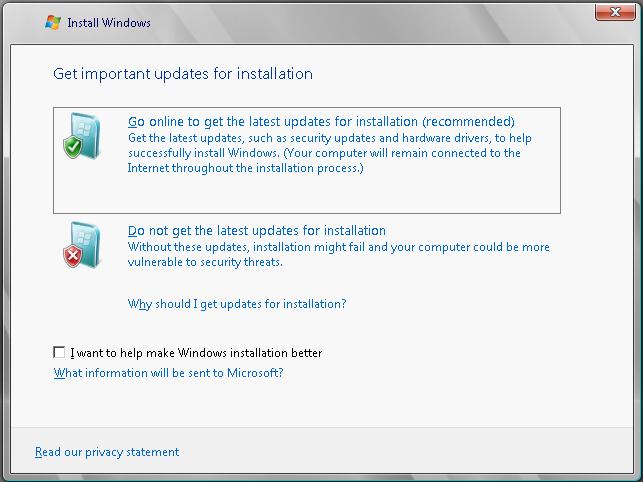
From this screen the installation may be started by clicking on the Install now button. Alternatively, the What To Know Before Installing Windows Server 2008 link will provide information of system requirements and advice about issues such as application and driver compatibility. Clicking on Install now proceeds to the next screen. If the setup program detects an internet connection on the host operating system the next screen displayed will provide the option to have the installation process download any available updates and incorporate them into the installation. The recommended course of action at this point is to accept the default here and install the latest updates:
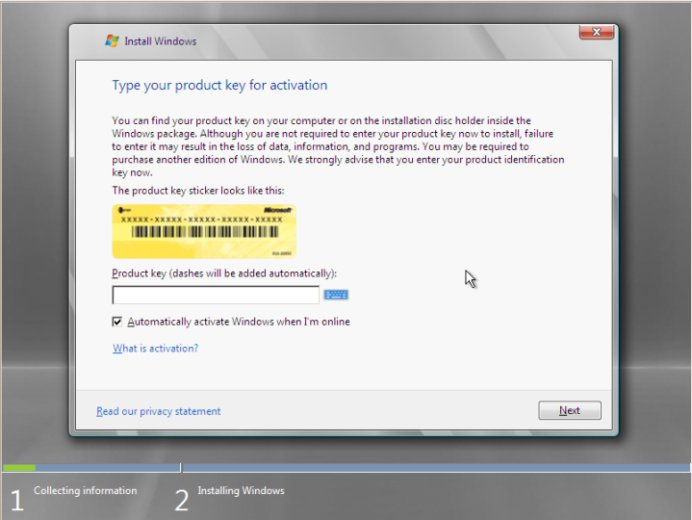
After Setup has searched for, and downloaded any available updates the Product Key Activation screen shown in the following figure will appear:
Windows Server 2008 Activation
As mentioned previously it is not necessary to enter a key at this point in order to run Windows Server 2008. Failure to enter an activation key simply means that the operating system will run in trial mode which can only be extended for a total of 270 days. If you have an activation key enter it here. Alternatively click on the Next button to proceed to the next stage of the installation. If an activation key was not entered a warning dialog will appear stating that it may be necessary to re-install Windows at a later date (i.e. when the trial ends) resulting in lost data. In practice it is possible to perform the activation before the trial ends without the need to re-install. If presented with this dialog click "No" to proceed.
If an activation key was not entered the next screen will ask that the required Windows Server 2008 Edition be selected. Select the desired edition, check the box to confirm the selection and click Next to proceed. If an activation key was entered the installer already knows which edition to install. Note that Core versions of each edition are available. The core installation is a minimal installation of the operating system with no GUI interface and only a subset of services available by default. This configuration is intended for headless servers and situations where the smallest possible attack surface is required.
Read and agree to the license terms and proceed to the next screen where the options to upgrade or perform a clean installation are provided. If the installer was invoked by booting from the DVD, or the host operating system is not suitable for upgrade only the clean installation option will be provided.
Windows Server 2008 Compatibility Report
Assuming that the installation was launched from within a compatible operating system, the Upgrade option will be provided. Click on this option to proceed and carefully read the Compatibility Report to get information about any potential problems that may be encountered after the upgrade. Having read the report click Next to proceed.
At this point the installation will begin and continue until completed.
Accessing the Command Prompt during Installation
At any point during the setup process (except when the installation is actually being performed) Shift+F10 may be pressed to gain access to the command-prompt. From within this command prompt window most of the standard Windows Server 2008 command-line tools are available allowing tasks to be performed that might otherwise not be possible from within the setup interface. A full list of available commands and respective descriptions can be found in the chapter entitled Windows Server 2008 Command-line Tools.
| Purchase and download the full PDF and ePub versions of this eBook only $9.99 |


