Firebase Cloud Messaging
Firebase Cloud Messaging (FCM) provides a platform for sending messages to and from client apps and web sites. This platform is ideal for sending notifications to users and implementing realtime instant messaging solutions with minimal coding effort.
This chapter will walk through the addition of Firebase Cloud Messaging support to an Android Studio app project and then make use of the Firebase console to test the sending and receiving of notification messages targeted at specific Android devices and user segments. The app created in this chapter will be extended in later chapters as more aspects of the Firebase Messaging system are introduced including message topics, device groups and both upstream and server-side messaging.
An Overview of Firebase Cloud Messaging
FCM provides an environment for sending and receiving messages from within mobile apps and web sites. The simplest form of messaging involves the transmission of notifications to app users. This can be achieved either using the Firebase console, or programmatically from a trusted server environment via HTTP, XMPP or Node.js code. Notifications can take the form of informational messages, a data payload or a combination of both. Messages can be targeted to individual devices or specific groups of users.
Two way messaging is possible through the implementation of upstream messaging support. This allows messages to be sent from client devices, through a message server for delivery to other devices.
Creating the Firebase Messaging Project
Launch Android Studio and select the Start a new Android Studio project quick start option from the welcome screen. Within the new project dialog, enter Messaging into the Application name field and your domain as the Company Domain setting before clicking on the Next button.
On the form factors screen, enable the Phone and Tablet option and set the minimum SDK to API 16: Android 4.1 (Jellybean). Continue to proceed through the screens, requesting the creation of an Empty Activity named MessagingActivity with a corresponding layout named activity_messaging.
Adding Firebase Messaging Support to the Project
To add Firebase Messaging support to the Android Studio project, select the Tools -> Firebase menu option and click on the Cloud Messaging entry in the Firebase assistant panel. Once selected, click on the Set up Firebase Messaging link. In the next panel, connect the project to Firebase using the provided connection button and select the Firebase Examples project from the list of existing projects. Once the project has been connected, click on the Add FCM to your app button.
A dialog will appear listing the changes that will be made to the project build files to add cloud messaging support to the project. Review these changes before clicking on the Accept Changes button.
Designing the User Interface
This example project will use the existing “Hello World” TextView in the activity layout to display the data associated with incoming messages. All that is required is to change the ID for the view. Load the activity_messaging.xml file into the Android Studio layout editor, select the TextView object and change the ID in the Properties tool window to myTextView.
Obtaining and Monitoring the Registration Token
When an app first makes use of cloud messaging, it is assigned a registration token which uniquely identifies the app and the device on which it is running. This allows messages to be sent that target a specific app running on a specific device.
The registration token takes the form of a string and may be accessed by implementing a service within the project that extends the FirebaseInstanceIdService class. This service needs to implement a method named onTokenRefresh() which is called when the app is first assigned a registration token, and then subsequently any time the token changes. Events that typically cause the token to change include the user uninstalling and then re-installing the app, the app being restored during a device recovery operation (or a move to a new device), or the user clearing the app data from the device. Given these possibilities it is important to ensure that the app is always using the current registration token.
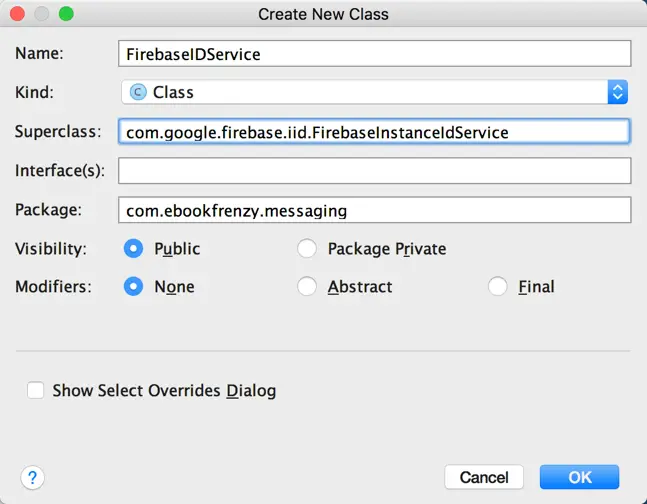
Add a new service to the project by right clicking on the app -> java -> <package name> entry in the project tool window and selecting the New -> Java Class… menu option. In the New Class dialog, enter FirebaseIDService into the Class Name field and select the FirebaseInstanceIdService class as the superclass before clicking on the OK button:
Figure 26-1
Edit the newly created FirebaseIDService.java file and modify it so that it reads as follows:
.
.
import android.util.Log;

import com.google.firebase.iid.FirebaseInstanceId;
import com.google.firebase.iid.FirebaseInstanceIdService;

public class FirebaseIDService extends FirebaseInstanceIdService {

    private static final String TAG = "FirebaseIDService";

    @Override
    public void onTokenRefresh() {

        String token = FirebaseInstanceId.getInstance().getToken();
        Log.d(TAG, "Registration Token: = " + token);

        sendRegistrationToServer(token);
    }

    private void sendRegistrationToServer(String token) {

    }
}
The service implements the onTokenRefresh() callback method and extracts the current token via a call to the getToken() method of the FirebaseInstanceId object. The token is then output to the Android Studio logcat panel. The onTokenRefresh() method also calls a method named sendRegistrationToServer(), passing through the token string as an argument. This method provides an opportunity for the token to be provided to an application server that may, for example, be maintaining a database of messaging clients and tokens. At the moment an empty version of this method is provided in the class, though code will be added to this method in later chapters when we look at the server side aspects of cloud messaging.
Now that the service has been added to the project, it needs to be declared within the project manifest file so that it will be triggered in the event of a change to the token. Within the Project tool window, locate the AndroidManifest.xml file, load it into the editor and add the service entry:
<?xml version="1.0" encoding="utf-8"?>
<manifest xmlns:android="http://schemas.android.com/apk/res/android"
    package="com.ebookfrenzy.messaging">

    <application
        android:allowBackup="true"
        android:icon="@mipmap/ic_launcher"
        android:label="@string/app_name"
        android:roundIcon="@mipmap/ic_launcher_round"
        android:supportsRtl="true"
        android:theme="@style/AppTheme">
        <activity android:name=".MessagingActivity">
            <intent-filter>
                <action android:name="android.intent.action.MAIN" />

                <category android:name="android.intent.category.LAUNCHER" />
            </intent-filter>
        </activity>

        <service
            android:name=".FirebaseIDService">
            <intent-filter>
                <action
		  android:name="com.google.firebase.INSTANCE_ID_EVENT"/>
            </intent-filter>
        </service>
    </application>
</manifest>
With the code and manifest changes completed, compile and run the app on a device or emulator and review the output in the logcat panel of the Android Monitor tool window to locate the registration token string. The output will resemble the following (though the token will, of course, be different):
Registration Token: = cxpKdykhQeY:APA91bEl3LnBTnEzaWTUoW7aGARytp2KeOMuE_lZ496msWhQ5EjRRH75WYFO4Fwq91Dp7_KGcK8B9mnwAJ2E2sF5QcoXTl5eQ7PCspfYkHSgWlEFQr91t2PxXMwgOyGdPQlFPa65dCIu
Take this opportunity to cut and paste the token string into a safe place so that it can be referenced in the next section.
Sending a Notification to the Device
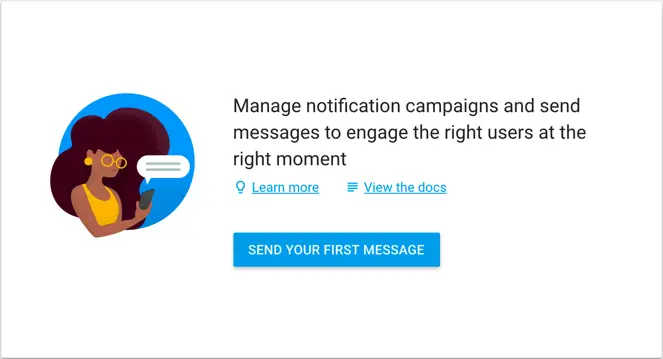
The next step is to use the registration token to send a message directly to the device. The quickest way to test this is to use the Notifications feature of the Firebase console. By default, notifications only appear when the target app is in the background. If the app is still in the foreground on the device or emulator session, tap the home button to place it into the background before taking the next steps. Open a browser window, navigate to the Firebase console and select the Notifications entry in the navigation bar.
Figure 26-2
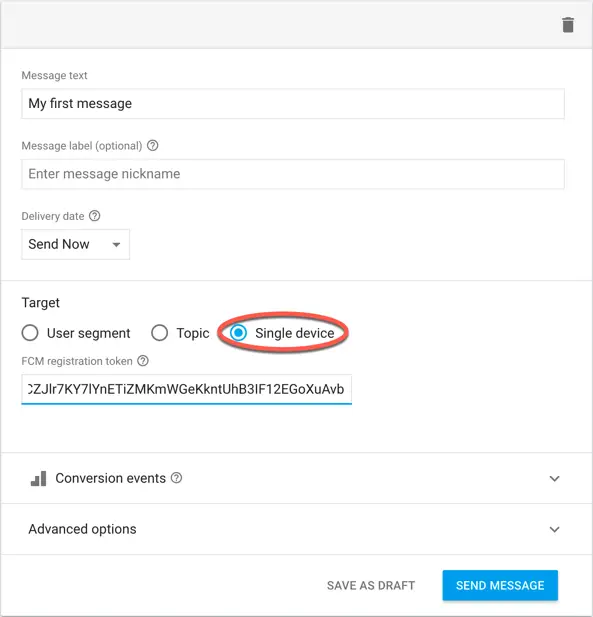
Click on the Send your First Message button to display the message composition screen. Enter some text into the Message text field and select the Single device option in the Target section (highlighted in Figure 26 3). Cut and paste the registration token obtained in the previous section into the FCM registration token box, leave the other settings unchanged and click the Send Message button.
Figure 26-3
Review the message in the resulting dialog then click on the Send button.
Receiving the Notification
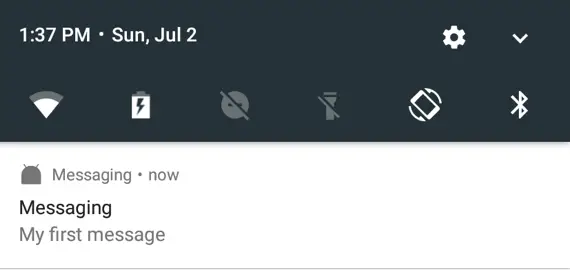
After the message has been sent, return to the device or emulator on which the app is running and look for a notification indicator in the top status bar (the indicator will take the form of an Android robot icon). Once the indicator appears, slide downward from the status bar to view the notification which will contain the message text entered when the notification was composed within the Firebase console:
Figure 26-4
Tapping the notification will launch the Messaging app.
Including Custom Data within the Notification
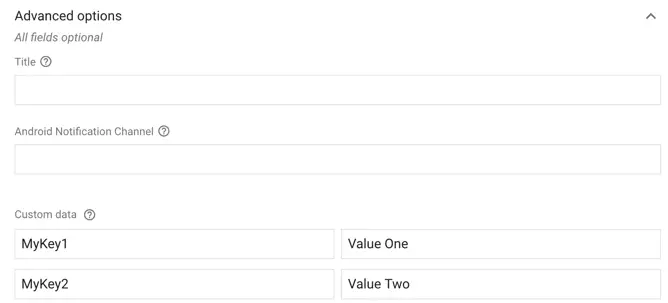
Firebase cloud messaging also provides the option to pass key-value based data within the message payload. This data can then be retrieved by the activity that is launched when the notification is selected on the device. The key-value data pairs to be included with the message are specified from within the Advanced options section of the Firebase console message composition screen. Figure 26 5, for example, shows two custom data pairs configured for a message:
Figure 26-5
Within the activity launched when the user taps the notification on the device, the getIntent() method may be used to obtain a reference to the Intent object that triggered the launch. Calling the getExtras() method on that Intent will return a Bundle object containing the custom data.
The value associated with each key may be accessed by passing through the key value to the getString() method of the Bundle object.
Edit the MessagingActivity.java file and modify the onCreate() method to extract the value for a key of “MyKey1” and display that value on the myTextView widget in the activity user interface layout:
.
.
import android.widget.TextView;
.
.
.
@Override
protected void onCreate(Bundle savedInstanceState) {
    super.onCreate(savedInstanceState);
    setContentView(R.layout.activity_firebase_notify);

    Bundle customData = getIntent().getExtras();

    if (customData != null) {

        TextView textView = (TextView) findViewById(R.id.myTextView);
        textView.setText(customData.getString("MyKey1"));
    }
}
Build and run the app and place it into the background. Using the Firebase console, compose a new message targeted at a single device using the registration token. Before sending the notification, open the Advanced options panel and enter MyKey1 as the key and a string of your choice as the corresponding value. Send the message, refer to the device on which the app is running and pull down the notification shade when the notification icon appears in the status bar. Tap the notification to launch the activity and note that the string entered into the value field is now displayed on the TextView widget. Custom data has successfully been passed from the Firebase console via a cloud message to the main activity of the app.
Foreground App Notification Handling
As previously outlined an app will not, by default, receive a Firebase message notification if it is currently the foreground app. In order for a foreground app to receive the message, it must implement a service that extends the FirebaseMessagingService class and override the onMessageReceived() callback method within that class.
Add a new service to the project by right clicking on the app -> java -> <package name> entry in the project tool window and selecting the New -> Java Class… menu option. In the New Class dialog, enter FirebaseMsgService into the Class Name field and select the FirebaseMessagingService class as the superclass before clicking on the OK button.
Edit the newly created FirebaseMsgService.java file and modify it so that it reads as follows:
.
.
import android.util.Log;

import com.google.firebase.messaging.FirebaseMessagingService;
import com.google.firebase.messaging.RemoteMessage;

public class FirebaseMsgService extends FirebaseMessagingService {

    private static final String TAG = "FirebaseMsgService";

    public FirebaseMsgService() {
    }

    @Override
    public void onMessageReceived(RemoteMessage remoteMessage) {

        Log.d(TAG, "From: " + remoteMessage.getFrom());

        if (remoteMessage.getNotification() != null) {
                Log.d(TAG, "Notification Title: " +
                        remoteMessage.getNotification().getTitle());

                Log.d(TAG, "Notification Message: " +
		        remoteMessage.getNotification().getBody());
        }

        if (remoteMessage.getData().size() > 0) {
            Log.d(TAG, "Message data payload: " +
			remoteMessage.getData().get("MyKey1"));
        }
    }
}
When the onMessageReceived() method is called, it is passed as an argument a RemoteMessage object containing the details of a Firebase cloud message.
In the above code, the getFrom() method of the RemoteMessage object is called to identify where the message originated. The getNotification() method of the RemoteMessage object is called to access the RemoteMessage.Notification object and used to obtain both the title and notification body.
Finally, the method checks whether a data payload was included in the message and, if so, extracts the value assigned to MyKey1 using the RemoteMessage getData() method. All of this information is sent to the Android Studio logcat panel.
The final task before testing the code is to add an entry within the AndroidManifest.xml file for the service:
<service android:name=".FirebaseMsgService">
    <intent-filter>
        <action android:name="com.google.firebase.MESSAGING_EVENT"/>
    </intent-filter>
</service>
Once the changes have been made, build and run the app and display the Android Monitor tool window so that the logcat output from the app is visible. Leaving the app in the foreground, and using the Firebase console, send a new message to the app using the steps outlined earlier in the chapter, making sure to include the text message, a title and a key/value data pair. Once the notification has arrived on the device, output should appear in the Android Monitor tool window containing the message data similar to the following:
D/FirebaseMsgService: Notification Title: This is an example title
D/FirebaseMsgService: Notification Message: This is some message text
D/FirebaseMsgService: Message data payload: Value One
Sending to Apps and User Segments
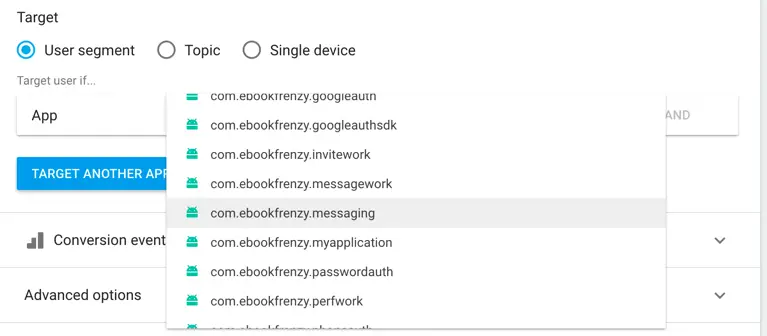
So far in this chapter, the Firebase console has been used to send messages to specific devices defined by registration token. It is also possible to send a message to all instances of a particular app by referencing the app’s package name. To target all instances of a specific app, compose a new message within the Firebase console and select the User Segment option located in the Target section of the composition screen. Once selected, choose the destination app from the drop down menu as shown in Figure 26-6:
Figure 26-6
To target more than one app, click on the Target Another App button and select the next app from the menu. Repeat this step until all the required target apps have been selected before sending the message.
Once at least one target app has been selected, a range of other user segments are available for fine tuning the message recipients. To view the full list of segmentation options, click on the AND entry next to the app package name as highlighted in Figure 26-7:
Figure 26-7
Clicking on the AND button will add an additional row to the list of segments from which other criteria may be selected:
Figure 26-8
Firebase currently supports the following segmentation options:
• Audience – A group of users that has been defined within the Firebase Analytics system.
• User Properties – Used in conjunction with Firebase Analytics, user properties allow specific groups of users to be identified.
• Version – Targets a specific version of an app. Useful when notifying users of an older app version that it is time to upgrade.
• Language – The language supported by the user’s device.
Conversion Events
Conversion events allow user engagement with notification messages to be evaluated. By default, Firebase will automatically track notifications sent and opened events. Additional events (for example tracking users who made an in app purchase in response to a notification) may be configured using Firebase Analytics, a topic which will be covered in the chapter entitled An Introduction to Firebase Analytics.
Summary
Firebase messaging allows notifications and messages to be sent to devices on which specific Firebase-enabled apps have been installed. Adding Firebase cloud messaging support to an app is a multistep process involving adding support to the Android Studio project, obtaining the registration token for the app on the device and implementing handlers to identify when a message has arrived for the app. Notification messages may be sent using the Firebase console which provides a range of targeting and user segmentation options. As will be demonstrated in the following chapters, greater messaging flexibility is available by implementing a server-based messaging system.
