Building a Visual Basic Toolbar
| Previous | Table of Contents | Next |
| Creating Context Menus in Visual Basic | Building a Visual Basic Status Bar |
<google>BUY_VISUAL_BASIC</google>
No Windows application would truly be complete without at least one toolbar. Toolbars provide a quick way for users to perform tasks without having to navigate the application's menu system. In this chapter of Visual Basic Essentials we will cover in detail the topic of creating toolbars in Visual Basic using Visual Studio.
Creating a Toolbar
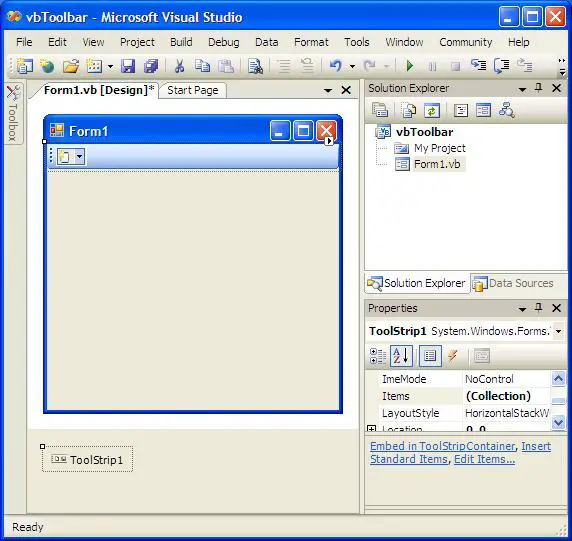
Toolbars are referred to in Visual Basic as ToolStrips. The first step in creating a toolbar is to add a ToolStrip control to the form. Begin by starting Visual Studio and creating a new Windows Application project named vbToolbar (for details on creating new project see Creating a New Visual Basic Project). When the new project has been created and the default form appears, display the Toolbox and double click on the ToolStrip control to add it to the form:
Various types of control can be added to a toolbar. To add a control, simply click on the down arrow of the button on the toolbar. A menu will appear listing the various types of control which may be added. Select a button control. Once the new button control has been added, right click on the button to display a menu containing various options for modifying the control (including setting a new image on the button).
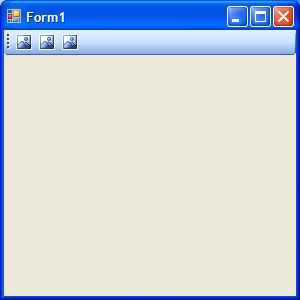
Using the above technique add two more buttons to the toolbar. Press F5 to build and run the application. The application should appear as follows:

Adding Tooltip Text to Toolbar Controls
Tooltips are small messages that are displayed when the mouse pointer moves over a control. They are intended to provide a brief description of the function of the control. Tooltips are especially useful for toolbar controls because such controls are typically small buttons that display only a small icon. This means it is often not clear exactly what a control does. By defining a Tooltip, it is possible to provide useful tips to the user as to what the control does.
Tooltips are specified via the Text property of the control in question. To add a Tooltip to the first button in our example toolbar, select the button in the form and change the Text property in the Properties panel to Displays Date and Time. Similarly change the Text property of the second control to Hides Date and Time.
Press F5 to build and run the application. When the application starts, move the mouse over each button. As the mouse hovers over each control the tooltip text should appear.
Programming Toolbar Controls
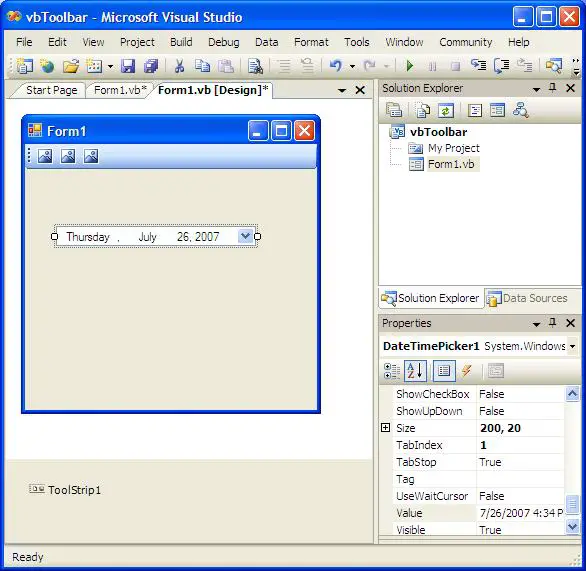
In order to make the toolbar controls useful we need to write some Visual Basic code in the event procedures. For the purposes of this example, we will program two of our toolbar controls to hide and show a DateTimePicker control. Open the Toolbox if it is not already visible and double click on the DateTimePicker control to add it to the form. Move the new control so that it appears as follows:
With the DateTimePicker control selected, change the Name property in the Properties panel to MyDateTime.
Finally, we need to write the Visual Basic code to hide and show the date and time control. Double click on the first button in the toolbar to display the Click event procedure for this control. The event procedure needs to call the Show() method of the MyDateTime object as follows:
Private Sub ToolStripButton1_Click(ByVal sender As System.Object, ByVal e As System.EventArgs)
             Handles ToolStripButton1.Click

        MyDateTime.Show()

End Sub
Similarly, we need to call the Hide() method of the MyDateTime object when the second button is pressed as follows:
Private Sub ToolStripButton2_Click(ByVal sender As System.Object, ByVal e As System.EventArgs)
             Handles ToolStripButton2.Click

        MyDateTime.Hide()

End Sub
Once the Visual Basic code has been written, press F5 to build and run the application. When the toolbar buttons are clicked the date and time control will appear and disappear accordingly.
Changing the Toolbar Position
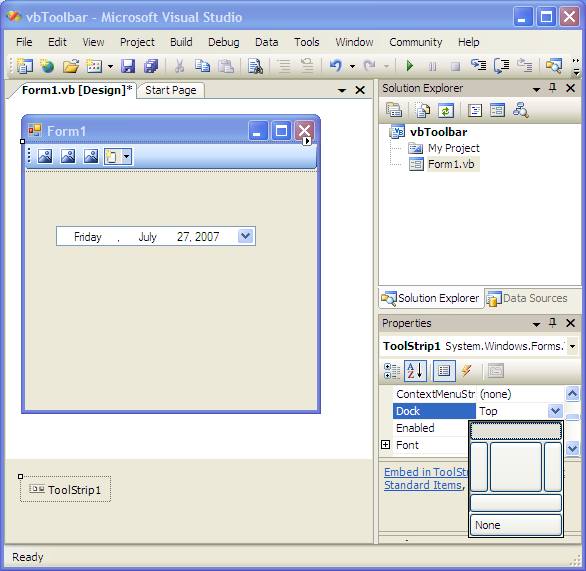
By default, the Visual Basic ToolStrip object will be positioned across the top edge of the form. Whilst this is the most common location for a toolbar, it can be positioned along the top, bottom, left or right edges of a form, or even in the center of the form using the Dock property. To modify this property, select the ToolStrip object in the form and look for the Dock property in the Properties panel. Click on the down arrow in the value field to display the location map:
Click on the new location and the toolbar will move to the new position.
<google>BUY_VISUAL_BASIC_BOTTOM</google>


