Android Studio Installation and Setup
Before any work can begin on the development of an Android application, the first step is to configure a computer system to act as the development platform. This involves a number of steps consisting of installing the Android Studio Integrated Development Environment (IDE) which also includes the Android Software Development Kit (SDK) and OpenJDK Java development environment.
This chapter will cover the steps necessary to install the requisite components for Android application development on Windows, macOS and Linux based systems.
System Requirements
Android application development may be performed on any of the following system types:
- Windows 7/8/10 (32-bit or 64-bit)
- macOS 10.10 or later (Intel based systems only)
- Linux systems with version 2.19 or later of GNU C Library (glibc)
- Minimum of 3GB of RAM (8GB is preferred)
- Approximately 4GB of available disk space
- 1280 x 800 minimum screen resolution
Downloading the Android Studio Package
Most of the work involved in developing applications for Android will be performed using the Android Studio environment. The content and examples in this book were created based on Android Studio version 3.2 which, at the time writing is the current version.
Android Studio is, however, subject to frequent updates so a newer version may have been released since this book was published.
The latest release of Android Studio may be downloaded from the primary download page which can be found at the following URL:
https://developer.android.com/studio/index.html
If this page provides instructions for downloading a newer version of Android Studio it is important to note that there may be some minor differences between this book and the software. A web search for Android Studio 3.2 should provide the option to download the older version in the event that these differences become a problem.
Installing Android Studio
Once downloaded, the exact steps to install Android Studio differ depending on the operating system on which the installation is being performed.
Installation on Windows
Locate the downloaded Android Studio installation executable file (named android-studio-ide-<version>-windows.exe) in a Windows Explorer window and double-click on it to start the installation process, clicking the Yes button in the User Account Control dialog if it appears.
Once the Android Studio setup wizard appears, work through the various screens to configure the installation to meet your requirements in terms of the file system location into which Android Studio should be installed and whether or not it should be made available to other users of the system. When prompted to select the components to install, make sure that the Android Studio, Android SDK and Android Virtual Device options are all selected.
Although there are no strict rules on where Android Studio should be installed on the system, the remainder of this book will assume that the installation was performed into C:\Program Files\Android\Android Studio and that the Android SDK packages have been installed into the user’s AppData\Local\Android\sdk sub-folder. Once the options have been configured, click on the Install button to begin the installation process.
On versions of Windows with a Start menu, the newly installed Android Studio can be launched from the entry added to that menu during the installation. The executable may be pinned to the task bar for easy access by navigating to the Android Studio\bin directory, right-clicking on the executable and selecting the Pin to Taskbar menu option. Note that the executable is provided in 32-bit (studio) and 64-bit (studio64) executable versions. If you are running a 32-bit system be sure to use the studio executable.
Installation on macOS
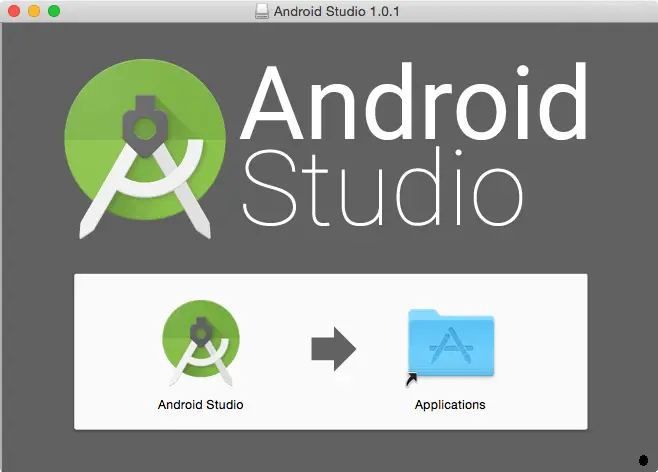
Android Studio for macOS is downloaded in the form of a disk image (.dmg) file. Once the android-studio-ide-<version>-mac.dmg file has been downloaded, locate it in a Finder window and double-click on it to open it as shown in Figure 2-1:
To install the package, simply drag the Android Studio icon and drop it onto the Applications folder. The Android Studio package will then be installed into the Applications folder of the system, a process which will typically take a few minutes to complete.
To launch Android Studio, locate the executable in the Applications folder using a Finder window and double-click on it.
For future easier access to the tool, drag the Android Studio icon from the Finder window and drop it onto the dock.
Installation on Linux
Having downloaded the Linux Android Studio package, open a terminal window, change directory to the location where Android Studio is to be installed and execute the following command:
unzip /<path to package>/android-studio-ide-<version>-linux.zip
Note that the Android Studio bundle will be installed into a sub-directory named android-studio. Assuming, therefore, that the above command was executed in /home/demo, the software packages will be unpacked into /home/demo/android-studio.
To launch Android Studio, open a terminal window, change directory to the android-studio/bin sub-directory and execute the following command:
./studio.sh
When running on a 64-bit Linux system, it will be necessary to install some 32-bit support libraries before Android Studio will run. On Ubuntu these libraries can be installed using the following command:
sudo apt-get install libc6:i386 libncurses5:i386 libstdc++6:i386 lib32z1 libbz2-1.0:i386
On Red Hat and Fedora based 64-bit systems, use the following command:
sudo yum install zlib.i686 ncurses-libs.i686 bzip2-libs.i686
The Android Studio Setup Wizard
The first time that Android Studio is launched after being installed, a dialog will appear providing the option to import settings from a previous Android Studio version. If you have settings from a previous version and would like to import them into the latest installation, select the appropriate option and location. Alternatively, indicate that you do not need to import any previous settings and click on the OK button to proceed.
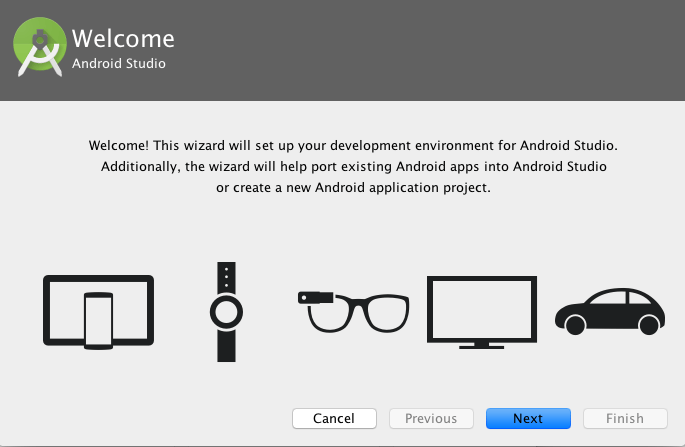
Next, the setup wizard may appear as shown in Figure 2-2 though this dialog does not appear on all platforms:
If the wizard appears, click on the Next button, choose the Standard installation option and click on Next once again.
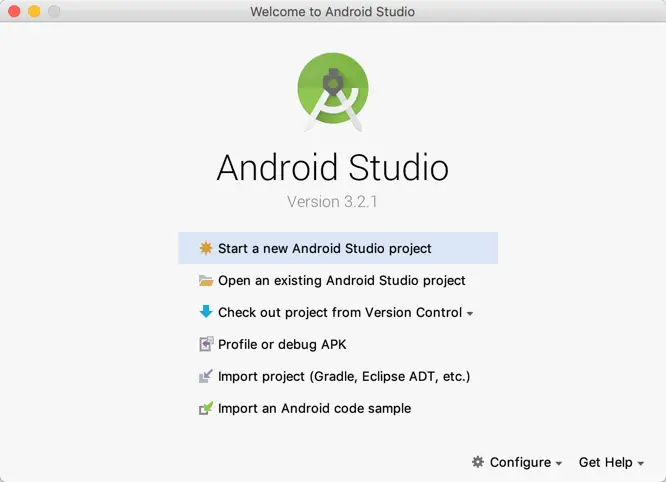
Android Studio will proceed to download and configure the latest Android SDK and some additional components and packages. Once this process has completed, click on the Finish button in the Downloading Components dialog at which point the Welcome to Android Studio screen should then appear:
Installing Additional Android SDK Packages
The steps performed so far have installed Java, the Android Studio IDE and the current set of default Android SDK packages. Before proceeding, it is worth taking some time to verify which packages are installed and to install any missing or updated packages.
This task can be performed using the Android SDK Settings screen, which may be launched from within the Android Studio tool by selecting the Configure -> SDK Manager option from within the Android Studio welcome dialog. Once invoked, the Android SDK screen of the default settings dialog will appear as shown in Figure 2-4:
Immediately after installing Android Studio for the first time it is likely that only the latest released version of the Android SDK has been installed. To install older versions of the Android SDK simply select the checkboxes corresponding to the versions and click on the Apply button.
It is also possible that updates will be listed as being available for the latest SDK. To access detailed information about the packages that are available for update, enable the Show Package Details option located in the lower right-hand corner of the screen. This will display information similar to that shown in Figure 2-5:
The above figure highlights the availability of an update. To install the updates, enable the checkbox to the left of the item name and click on the Apply button.
In addition to the Android SDK packages, a number of tools are also installed for building Android applications. To view the currently installed packages and check for updates, remain within the SDK settings screen and select the SDK Tools tab as shown in Figure 2-6:
Within the Android SDK Tools screen, make sure that the following packages are listed as Installed in the Status column:
- Android SDK Build-tools
- Android Emulator
- Android SDK Platform-tools
- Android SDK Tools
- Google Play Services
- Instant Apps Development SDK
- Intel x86 Emulator Accelerator (HAXM installer)
- ConstraintLayout for Android
- Solver for ConstraintLayout
- Android Support Repository
- Google Repository
- Google USB Driver (Windows only)
In the event that any of the above packages are listed as Not Installed or requiring an update, simply select the checkboxes next to those packages and click on the Apply button to initiate the installation process.
Once the installation is complete, review the package list and make sure that the selected packages are now listed as Installed in the Status column. If any are listed as Not installed, make sure they are selected and click on the Apply button again.
Making the Android SDK Tools Command-line Accessible
Most of the time, the underlying tools of the Android SDK will be accessed from within the Android Studio environment. That being said, however, there will also be instances where it will be useful to be able to invoke those tools from a command prompt or terminal window. In order for the operating system on which you are developing to be able to find these tools, it will be necessary to add them to the system’s PATH environment variable.
Regardless of operating system, the PATH variable needs to be configured to include the following paths (where <path_to_android_sdk_installation> represents the file system location into which the Android SDK was installed):
<path_to_android_sdk_installation>/sdk/tools
<path_to_android_sdk_installation>/sdk/tools/bin
<path_to_android_sdk_installation>/sdk/platform-tools
The location of the SDK on your system can be identified by launching the SDK Manager and referring to the Android SDK Location: field located at the top of the settings panel as highlighted in Figure 2-7:
Once the location of the SDK has been identified, the steps to add this to the PATH variable are operating system dependent:
Windows 7
1. Right-click on Computer in the desktop start menu and select Properties from the resulting menu.
2. In the properties panel, select the Advanced System Settings link and, in the resulting dialog, click on the Environment Variables… button.
3. In the Environment Variables dialog, locate the Path variable in the System variables list, select it and click on Edit…. Locate the end of the current variable value string and append the path to the Android platform tools to the end, using a semicolon to separate the path from the preceding values. For example, assuming the Android SDK was installed into C:\Users\demo\AppData\Local\Android\sdk, the following would be appended to the end of the current Path value:
;C:\Users\demo\AppData\Local\Android\sdk\platform-tools; C:\Users\demo\AppData\Local\Android\sdk\tools; C:\Users\demo\AppData\Local\Android\sdk\tools\bin
4. Click on OK in each dialog box and close the system properties control panel.
Once the above steps are complete, verify that the path is correctly set by opening a Command Prompt window (Start -> All Programs -> Accessories -> Command Prompt) and at the prompt enter:
echo %Path%
The returned path variable value should include the paths to the Android SDK platform tools folders. Verify that the platform-tools value is correct by attempting to run the adb tool as follows:
adb
The tool should output a list of command line options when executed.
Similarly, check the tools path setting by attempting to launch the AVD Manager command line tool (don’t worry if the avdmanager tool reports a problem with Java - this will be addressed later):
avdmanager
In the event that a message similar to the following message appears for one or both of the commands, it is most likely that an incorrect path was appended to the Path environment variable:
'adb' is not recognized as an internal or external command,
operable program or batch file.
Windows 8.1
1. On the start screen, move the mouse to the bottom right-hand corner of the screen and select Search from the resulting menu. In the search box, enter Control Panel. When the Control Panel icon appears in the results area, click on it to launch the tool on the desktop.
2. Within the Control Panel, use the Category menu to change the display to Large Icons. From the list of icons select the one labeled System.
3. Follow the steps outlined for Windows 7 starting from step 2 through to step 4.
Open the command prompt window (move the mouse to the bottom right-hand corner of the screen, select the Search option and enter cmd into the search box). Select Command Prompt from the search results.
Within the Command Prompt window, enter:
echo %Path%
The returned path variable value should include the paths to the Android SDK platform tools folders. Verify that the platform-tools value is correct by attempting to run the adb tool as follows:
adb
The tool should output a list of command line options when executed.
Similarly, check the tools path setting by attempting to run the AVD Manager command line tool (don’t worry if the avdmanager tool reports a problem with Java - this will be addressed later):
avdmanager
In the event that a message similar to the following message appears for one or both of the commands, it is most likely that an incorrect path was appended to the Path environment variable:
'adb' is not recognized as an internal or external command,
operable program or batch file.
Windows 10
Right-click on the Start menu, select Settings from the resulting menu and enter “Edit the system environment variables” into the Find a setting text field. In the System Properties dialog, click the Environment Variables... button. Follow the steps outlined for Windows 7 starting from step 3.
Linux
On Linux, this configuration can typically be achieved by adding a command to the .bashrc file in your home directory (specifics may differ depending on the particular Linux distribution in use). Assuming that the Android SDK bundle package was installed into /home/demo/Android/sdk, the export line in the .bashrc file would read as follows:
export PATH=/home/demo/Android/sdk/platform-tools:/home/demo/Android/sdk/tools:/home/demo/Android/sdk/tools/bin:/home/demo/android-studio/bin:$PATH
Note also that the above command adds the android-studio/bin directory to the PATH variable. This will enable the studio.sh script to be executed regardless of the current directory within a terminal window.
macOS
A number of techniques may be employed to modify the $PATH environment variable on macOS. Arguably the cleanest method is to add a new file in the /etc/paths.d directory containing the paths to be added to $PATH. Assuming an Android SDK installation location of /Users/demo/Library/Android/sdk, the path may be configured by creating a new file named android-sdk in the /etc/paths.d directory containing the following lines:
/Users/demo/Library/Android/sdk/tools
/Users/demo/Library/Android/sdk/tools/bin
/Users/demo/Library/Android/sdk/platform-tools
Note that since this is a system directory it will be necessary to use the sudo command when creating the file. For example:
sudo vi /etc/paths.d/android-sdk
Updating Android Studio and the SDK
From time to time new versions of Android Studio and the Android SDK are released. New versions of the SDK are installed using the Android SDK Manager. Android Studio will typically notify you when an update is ready to be installed.
To manually check for Android Studio updates, click on the Configure -> Check for Update menu option within the Android Studio welcome screen, or use the Help -> Check for Update menu option accessible from within the Android Studio main window.
Summary
Prior to beginning the development of Android based applications, the first step is to set up a suitable development environment. This consists of the Android SDKs and Android Studio IDE (which also includes the OpenJDK development environment). In this chapter, we have covered the steps necessary to install these packages on Windows, macOS and Linux.


