Configuring Ubuntu 10.x Printers
| Previous | Table of Contents | Next |
| Ubuntu 10.x Desktop Keyboard Shortcuts | Connecting an Ubuntu 10.x System to a DSL Modem |
Despite predictions to the contrary, we are still a long way from achieving the concept of the paperless office. It is quite common, therefore, to need to connect a printer to a computer system. With this in mind, this chapter will be devoted to covering the steps required to add printer access to an Ubuntu system. Printers may be connected directly to an Ubuntu system, accessed over a network or attached to a Windows system on the network.
As with many aspects of system administration, Ubuntu makes the installation of a printer straightforward and fast.
Installing a Directly Connected Printer
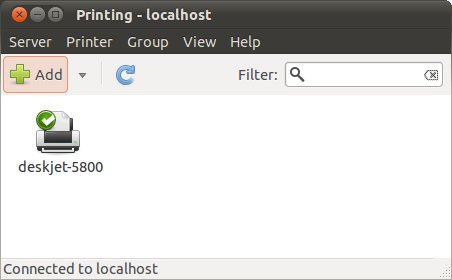
By far the easiest type of printer configuration is when the printer is attached directly to the system via a parallel, serial or USB port. To configure a locally attached printer, invoke the Printers dialog by selecting the System desktop menu and choosing Printing from the Administration menu. The tool will scan the system and display any selected printers. The following figure shows the Printer configuration dialog after the detection of a locally attached HP Deskjet 5800 printer:
If no printers are detected make sure the cable to the printer is securely connected, and that the printer is switched on. If the printer is still not detected the next step is to try to manually add it as outlined in the next section.
Manually Installing a New Locally Connected Printer and Printer Driver
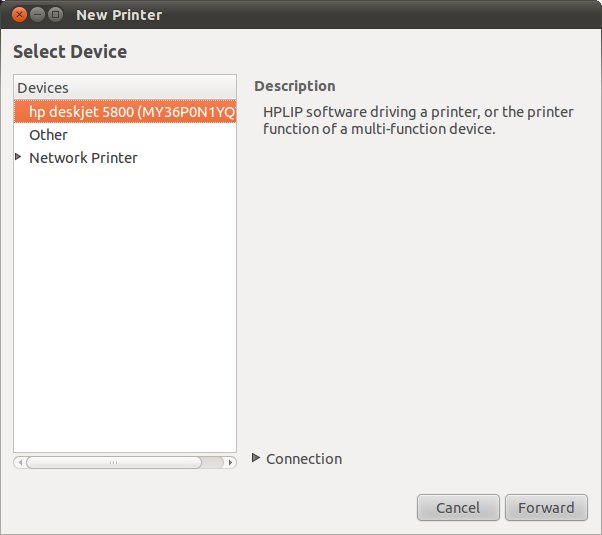
When Ubuntu detects a printer it will automatically select a driver if the printer is recognized and a driver is available. To manually add a printer, begin by clicking on the Add button in the Printer configuration toolbar. A Please Wait. Searching for Printers dialog will appear as the system is scanned for a locally attached printer. Once the search is complete, the New Printer Wizard dialog will appear including an entry for each detected printer. In the following figure, Ubuntu has detected an HP DeskJet printer connected to a USB port:
Select the desired locally connected printer from the list in the left hand panel and click the Forward button. The printer manager will search for and install the correct driver for the selected printer.
Once the driver is installed you are ready to try out the printer. In the Printers dialog select your printer, right click with the mouse to pop up the menu and select Properties. Click on Print Test Page to send a test page to the printer.
Adding a Network Printer
In addition to printers connected directly to a system, Ubuntu is also able to communicate with network based printers (for example a WiFi enabled printer present on the same network as the Ubuntu system). To add a network based printer, begin by launching the printer settings tool (System -> Administration -> Printing). When the tool appears, click on the Add button located in the toolbar and click on the Network Printer heading located in the Devices panel.
Ubuntu will list any network printers that have already been detected. If your desired network printer is not already listed, select the Find Network Printer option and enter the hostname or IP address of either the printer or the system to which the printer is connected before clicking on the Find button. If Ubuntu can locate the printer it will be listed in the Devices panel. Once located, select the device and click the Forward button to search and install the appropriate driver. Once a driver has been installed, click Forward once again to provide printer name, location and other descriptive details. Finally, click Apply to add the printer to the system and to print a test page if desired.
Configuring a Printer Connected to a Windows System
If you need to access a printer that is connected to a Windows system you can easily configure Ubuntu to support this. The first step is to visit the Windows system and make sure the printer is shared and, ideally, find out the share name (though the Ubuntu Printer configuration tool will allow you to browse the Windows network to find available printers if necessary). On Windows XP select Printers and Faxes from the Start menu and find your printer. Right click on the printer and select Sharing. In the properties dialog select Share this printer if it has not already been selected. Enter a Share name or note the name if one already exists.
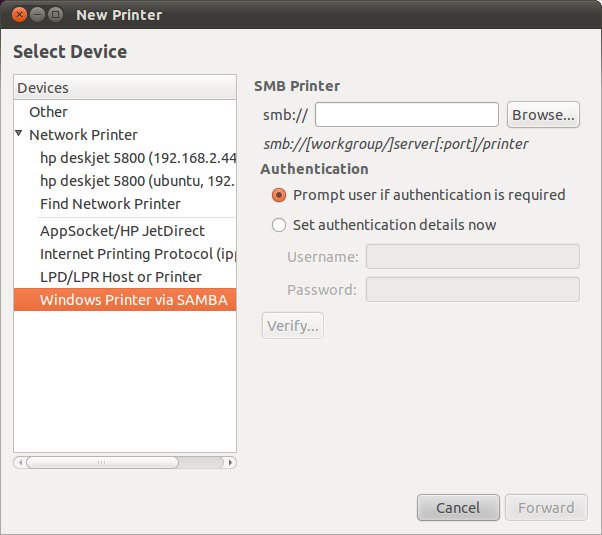
On Windows 7, select Devices and Printers from the Start menu, right click on the printer to be shared and select Printer Properties. In the properties dialog select the Sharing tab. In the properties dialog select Share this printer if it has not already been selected and Share name or note the name if one already exists. On the Ubuntu system, invoke the Printer configuration dialog (System -> Administration -> Printing), click on the Add button in the toolbar and select Windows Printer via SAMBA to display the following configuration panel:
If you already know the workgroup, computer name and printer share name of the device to be accessed enter this information using the following syntax:
[workgroup]/server[:port]/sharename
Note that the workgroup and :port values are optional. For example, to configure access to a printer with a share name of hp5850 connected to a Windows system named tahoe residing on the WORKGROUP network, the following would be entered into the smb:// text field:
WORKGROUP/tahoe/hp5850
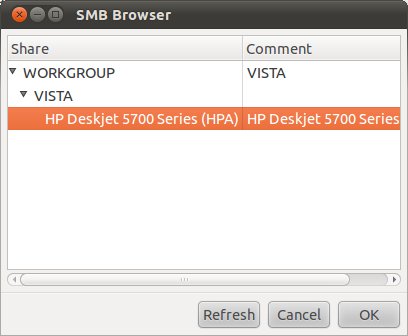
Alternatively use the Browse button to graphically locate the required printer using the SMB Browser:
If the shared printer requires authentication you can choose to be prompted for the login and password each time the printer is accessed, or to store these credentials in the Ubuntu printer manager so that they do not need to be manually entered for each print job.
Having selected the correct printer, click on Verify to confirm that the printer is accessible to Ubuntu. If the verification is successful, a message dialog will report Print Share Verified. Assuming a successful verification, click Forward and follow the steps outlined in the previous section to select an appropriate printer driver.
Once the SAMBA printer is configured, right click with the mouse on the new printer in the Printer configuration dialog, select Properties and click on the Print Test Page button. A test page should then appear on the printer.
Configuring a Printer Connected to a Remote System
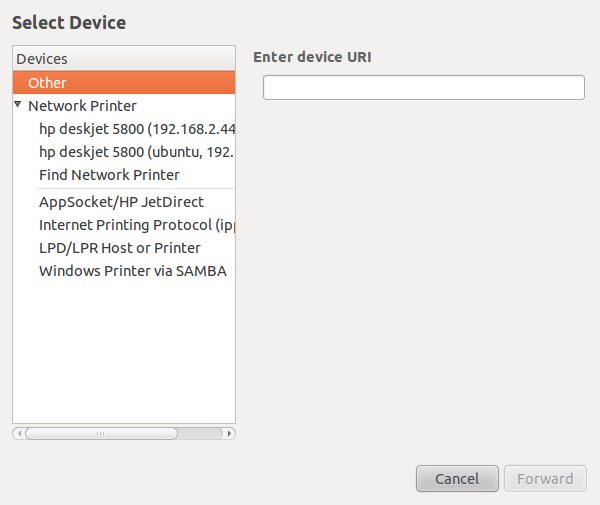
Ubuntu fully supports printing to printers connected to other remote Linux systems. To achieve such a configuration, invoke the Printers dialog (System -> Administration -> Printing'). Click on the Add toolbar button, select Other from the category list and enter the URI of the printer on the remote system. This will be something similar to:
ipp://hostname:631/printers/printername
Where hostname is the either the hostname or IP address of the remote system on which the printer is installed and printername is the name of the printer on that system. Click Forward and install the driver for the printer model.
Once installed, right click with the mouse on the new printer in the Printers dialog, select Properties and click on the Print Test Page button. Assuming a successful installation, a test page should subsequently appear on the remote printer.
| Previous | Table of Contents | Next |
| Ubuntu 10.x Desktop Keyboard Shortcuts | Connecting an Ubuntu 10.x System to a DSL Modem |


