Sharing Ubuntu 10.x Folders with Remote Windows Systems
| Previous | Table of Contents | Next |
| Sharing Ubuntu 10.x Folders with Remote Linux and UNIX Systems | Configuring an Ubuntu 10.x Mail Client (Evolution) |
<google>BUY_UBUNTU_10</google>
Although Linux is increasingly making inroads into the desktop market, its origins are very much server based. It is not surprising therefore that Linux has the ability to act as a file server. It is also extremely common for Linux and Windows systems to be used side by side both in home and business environments. It is a common requirement therefore that files on a Linux system be accessible to Linux, UNIX and Windows based systems over network connections. Similarly, shared folders residing on Windows systems must also be accessible from Ubuntu systems.
Windows systems share resources such as file systems and printers using a protocol called Server Message Block (SMB). In order for a Linux system to serve such resources over a network to a Windows system and vice versa it must, therefore, support SMB. This is achieved using Linux based technology called Samba. In addition to providing integration between Linux and Windows systems, Samba may also be used to provide folder sharing between Linux systems (as an alternative to NFS which was covered in the previous chapter).
In this chapter we will look at the steps necessary to share file system resources and printers on an Ubuntu system with remote Windows and Linux systems.
Samba and Samba Client
Samba allows both Ubuntu resources to be shared with Windows systems and Windows resources to be shared with Ubuntu systems. Ubuntu accesses Windows resources using a samba client. Ubuntu resources, on the other hand, are shared with Windows systems using a samba server. Typically, the samba client is installed and configured by default allowing you to browse available Windows resources without any additional work (this is covered later in the chapter). In order to allow an Ubuntu system to share resources with Windows systems, however, some more work is required.
Installing Samba Server on an Ubuntu System
The default settings used during the Ubuntu installation process do not install the Samba server. Unless you specifically requested that Samba be installed it is unlikely that you have Samba installed on your system. If the Samba server environment is not installed on your system it can be installed using the apt-get command-line tool:
sudo apt-get install samba
The above command will install both the samba package and the samba-common dependency package if it is not already installed and start the Samba smbd and nmbd services running.
Sharing Ubuntu Folders
Once the Samba File sharing is installed and running, the next step is to configure the filesystem directories (also known as folders) to be shared with the Windows systems.
The easiest way to achieve this is to use the Samba Server Configuration tool. As with the Samba server packages, it is likely that this tool was not installed by default on your Ubuntu system.
If the tool is not installed it may be installed as follows:
sudo apt-get install system-config-samba
Once installed, the Samba Server Configuration may be launched from the System -> Administration -> Samba desktop menu option, or from the command-line:
sudo system-config-samba
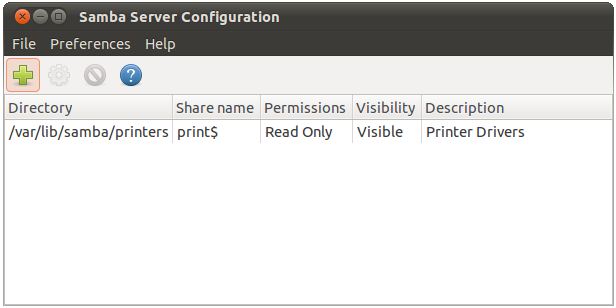
When loaded, the Samba Server Configuration tool will appear as follows:
Select Preferences -> Server Settings... and enter the name of the Windows Workgroup to which you wish this server to belong and click OK.
Select Preferences -> Samba Users... and select a user from the list which will be used to share folders with the Windows system. After selecting the user, click the Edit button and enter the corresponding Windows user name which will be mapped to the Linux user you just specified and provide a password to be used for share access. Click on OK.
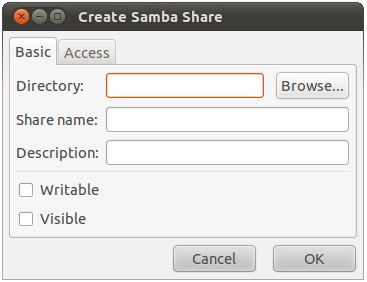
Click on the Add button in the toolbar to add a new folder to share. The following dialog will subsequently appear:
Type or browse to the path you wish to share and enter a share name if you do not like the one provided by the tool. Set the Writable and Visible toggles to your desired settings and click OK. Select the Access tab and either select a user added in the previous step, or allow access to all users.
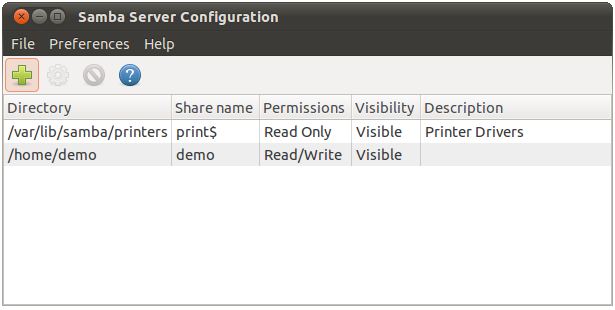
Click on OK when you have configured the information in this dialog. The main dialog should appear with the new share listed:
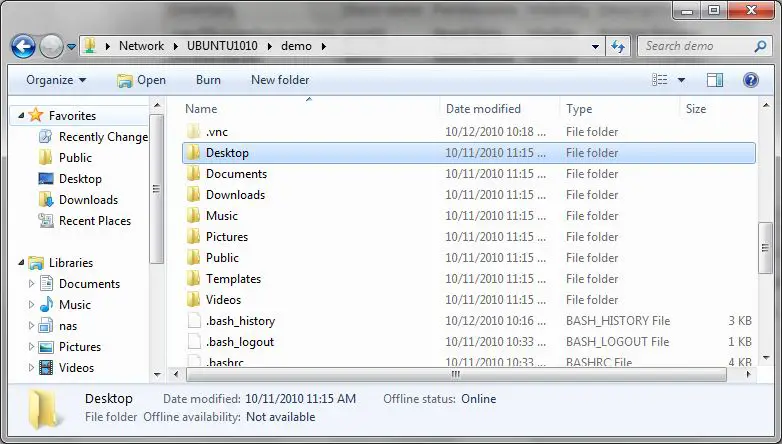
Once completed, the folder you specified will be visible from any Windows systems on the same network (and workgroup specified in the Server Settings page) as your Ubuntu system. You should now have remote access to your Linux folder from the Windows system:
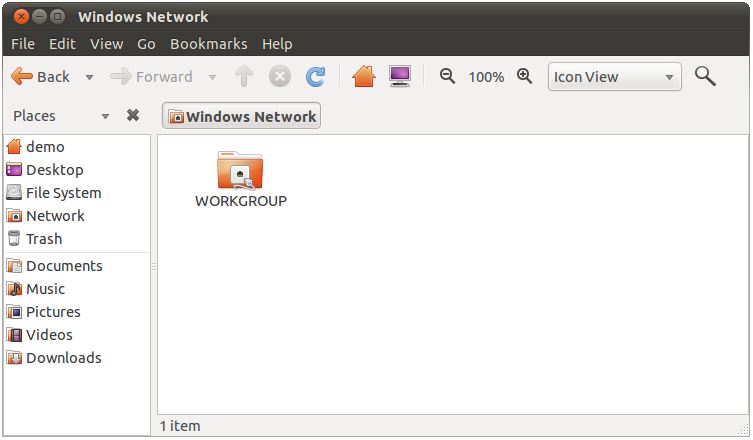
As previously mentioned, Samba is a two way street, allowing not only Windows systems to access files and printers hosted on an Ubuntu system, but also allowing the Ubuntu system to access shared resources on Windows systems. To access any shared resources on a Windows system, begin by selecting the Places -> Network desktop menu option. This will display the Network browser dialog including an icon for Windows Network as well as any other systems (including Windows systems) detected on the network. Double clicking on the Windows Network icon will display a list of Windows workgroups detected on the network:
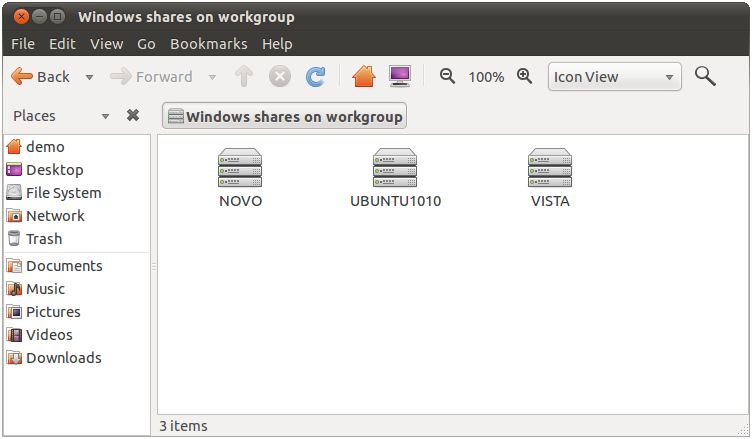
Double clicking on a Windows workgroup will, in turn, display a list of Windows systems present on that group (keep in mind that any Ubuntu systems configured to act as a Samba server on a Windows workgroup will also fit into this category):
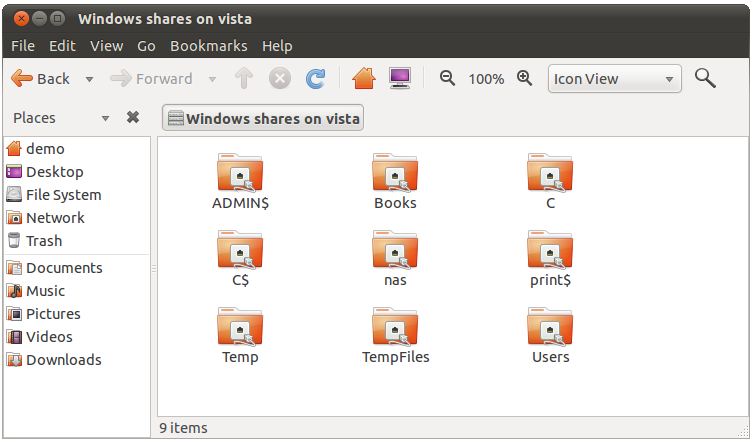
Finally, double clicking on a computer icon will list the shared resources on that system available for access from the Ubuntu client:
<google>BUY_UBUNTU_BOTTOM_10</google>
| Previous | Table of Contents | Next |
| Sharing Ubuntu 10.x Folders with Remote Linux and UNIX Systems | Configuring an Ubuntu 10.x Mail Client (Evolution) |
