Difference between revisions of "Configuring the Ubuntu GNOME Desktop Background and Themes"
m |
|||
| Line 87: | Line 87: | ||
| − | <google> | + | <google>BUY_UBUNTU_BOTTOM</google> |
Revision as of 18:17, 11 May 2009
| Previous | Table of Contents | Next |
| Configuring Ubuntu Linux Wireless Networking | Customizing the Ubuntu GNOME Desktop Panels |
<google>BUY_UBUNTU</google>
When you first install and run Ubuntu Linux the first thing you see when you log in is the default desktop. It has the Ubuntu brown color scheme and panels at the top and bottom of the screen. There are two predominant desktop environments available with Linux - the GNOME desktop and the KDE desktop. Which is the best desktop is matter of preference and heated disagreement in the Linux community. Both are excellent, feature rich desktops. The standard Ubuntu Linux distribution installs the GNOME desktop by default, and that is the desktop covered in this chapter of Ubuntu Linux Essentials.
The remarkable thing about the desktop is that just about everything you currently see can be changed in some way. This chapter will provide details on how to customize the desktop to your liking.
Changing the GNOME Desktop Background
The GNOME desktop allows the background to be changed either to a solid or graded color, or to any image you choose to specify. There are three methods for changing the background, either by clicking with the right hand mouse button on the actual desktop background and selecting Change Desktop Background, selecting the Administration->Preferences->Appearance menu option and selecting the Background tab of the Appearance Preferences dialog, or clicking with the right hand-mouse button on an image in the web browser and selecting Set As Desktop Background. The latter method allows you find images from one of the many web sites that provide them and quickly make it your background.
The desktop background properties panel appears as follows:
<google>ADSDAQBOX_FLOW</google>
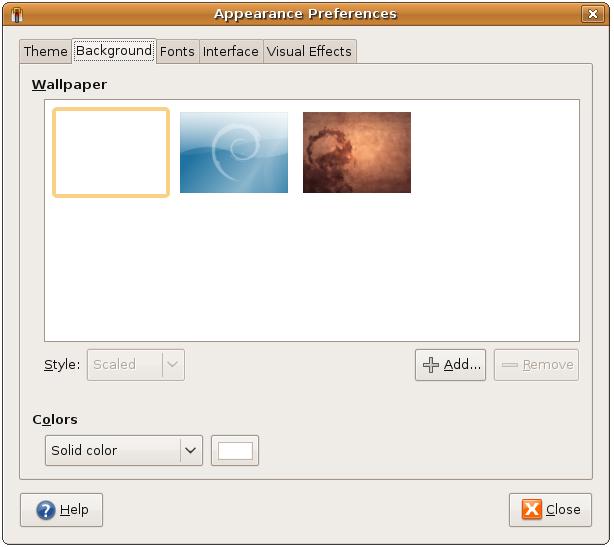
Select an image from the list or click on Add Wallpaper to browse your file system for an image of your own. Alternatively, select the blank wallpaper image and choose a color and grading style from the Colors section of the dialog. Click the Close button once the desired changes have been made.
Changing the GNOME Desktop Theme
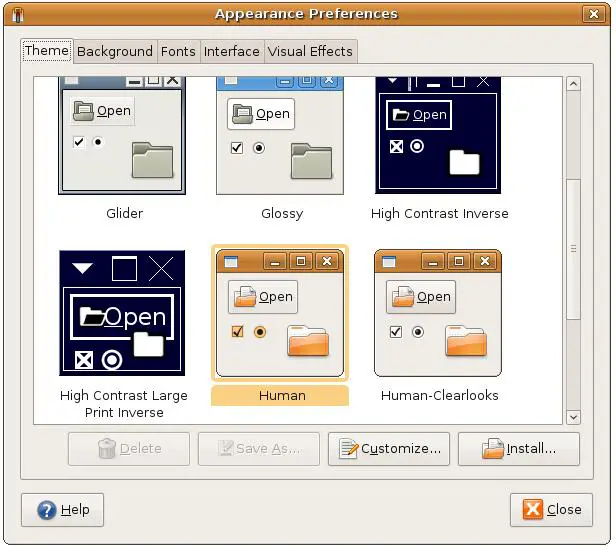
The desktop themes define the color and shape of the decorations around the Windows and the color schemes used for the foreground and background of dialog contents. By default Ubuntu uses the Human theme. This is essentially a theme called Clearlooks with earthy looking colors applied to it. A number of pre-installed themes are also available for selection, and many themes are available for download online.
Themes are controlled by the Theme Preferences panel accessed by selecting the Administration->Preferences->Appearance menu option and clicking on the Theme tab of the resulting dialog. Once selected, the panel appears as follows:
To install a new theme from the list simply select it and click on the Install Theme button. The desktop will immediately change to reflect the new theme.
Customizing a Desktop Theme
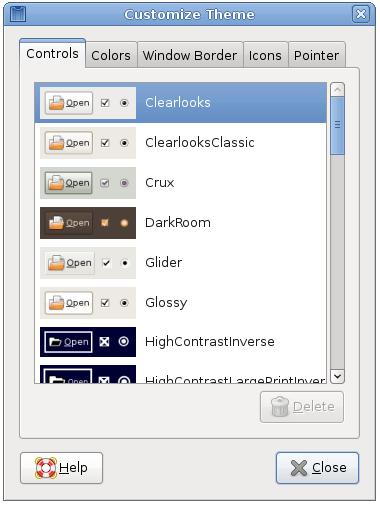
In addition to selecting a theme it is also possible to customize themes. For example, it is possible to change the colors and borders of the Clearlooks theme. To try this, select the Clearlooks theme from the main screen of the Theme Preferences dialog and click on the Customize button. The Customize Theme dialog will appear as follows:
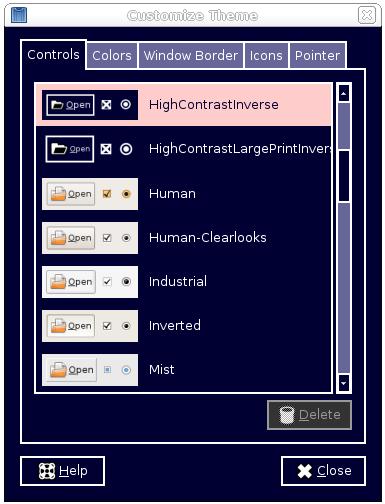
Any new selection from the list of Controls will immediately be reflected by the desktop. For example the following screenshot shows the Theme Details dialog with HighContrastInverse selected:
Colors can be changed by selecting the Colors tab of the Customize Theme dialog and changing the color settings for the window borders, text input fields and text selection highlighting.
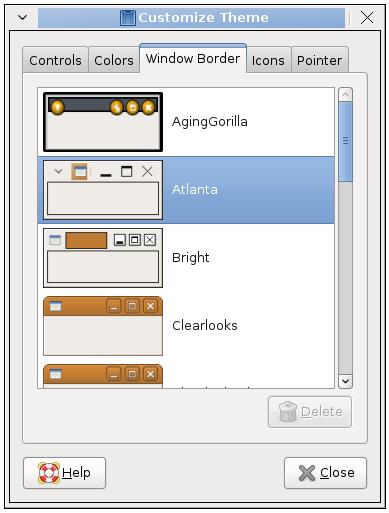
The window border can similarly be changed by selecting from a range of pre-designed styles using the Borders tab of the Customize Theme dialog. The following screen shows the Atlanta Window Border Theme:
Finally, the style of icons displayed in the desktop can be changed. By default Ubuntu uses the Human style of icons. The following image shows a portion of the desktop showing icons using the Human icon theme:
The following image shows the same desktop icons after the icon theme has been changed to Mist
Downloading and Installing Desktop Themes
If the selection of pre-installed themes does not provide a sufficiently broad selection of choices, there are many more themes available for download on the internet from http://art.gnome.org/themes/metacity. Both window border and icon themes are available.
To download a theme click on the theme on the web page and save it to your desktop. A new file should appear on your desktop containing the new theme. For example the following shows the MetaTivo theme on the desktop and ready to be installed:
To install the theme open the Theme Preferences dialog, click on the theme icon on the desktop with the left hand mouse button and drag the icon (keeping the mouse button depressed) onto the Theme Preferences dialog. Release the mouse button to drop the theme. The theme will now be installed into the list of themes as Custom Theme. You will be asked if you wish to apply the theme. To save the new theme select it in the list and click on the Save Theme button. In the resulting dialog enter a name for the new theme and press the Save button.
Once the theme is installed into the list of theme the file may be deleted from the desktop. Simply select the desktop icon and press the keyboard delete key.
<google>BUY_UBUNTU_BOTTOM</google>
