Difference between revisions of "Creating an iOS 8 Action Extension"
| Line 1: | Line 1: | ||
| − | {{#pagetitle: Creating an iOS 10 Action | + | {{#pagetitle: Creating an iOS 10 Action Extension }} |
<seo title="Creating an iOS 10 Action Extension" titlemode="replace" keywords="ios 10, swift 3, action extension, tutorial, xcode 8" description="A detailed guide and tutorial to creating an iOS Action extension."></seo> | <seo title="Creating an iOS 10 Action Extension" titlemode="replace" keywords="ios 10, swift 3, action extension, tutorial, xcode 8" description="A detailed guide and tutorial to creating an iOS Action extension."></seo> | ||
<table border="0" cellspacing="0" width="100%"> | <table border="0" cellspacing="0" width="100%"> | ||
Revision as of 21:02, 8 November 2016
| Previous | Table of Contents | Next |
| Creating an iOS 10 Photo Editing Extension | Receiving Data from an iOS 10 Action Extension |
Learn SwiftUI and take your iOS Development to the Next Level |
As with other extension types, the purpose of the Action extension is to extend elements of functionality from one application so that it is available for use within other applications. In the case of Action extensions, this functionality generally must fit the narrow definition of enabling the user to either transform the content within a host application, or view it in a different way. An application designed to translate text into different languages might, for example, provide an extension to allow the content of other applications to be similarly translated.
This chapter will introduce the concept of Action extensions in greater detail and put theory into practice through the creation of an example application and Action extension.
An Overview of Action Extensions
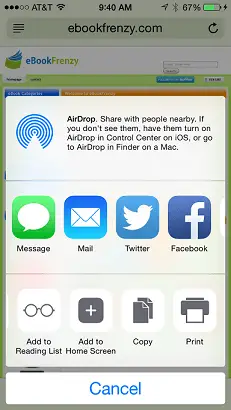
Action extensions appear within the activity view controller which is the panel that appears when the user taps the Share button within a running application. Figure 86 1, for example, shows the activity view controller panel as it appears from within the Safari web browser running on an iPhone. Action extensions appear within the action area of this panel alongside the built-in actions such as printing and copying of content.
Figure 86-1
When an Action extension is created, it must declare the types of content with which it is able to work. The appearance or otherwise of the Action extension within the activity view controller is entirely context sensitive. In other words, an Action extension that is only able to work with text based content will not appear as an option in the activity view controller when the user is currently working with or viewing image or video content within a host app.
Unlike other extension types, there are two sides to an Action extension. In the first instance, there is the Action extension itself. An Action extension must be bundled with a containing application which must, in turn, provide some useful and meaningful functionality to the user. The other possibility is for host apps to be able to move beyond simply displaying the Action extension as an option within the activity view controller. With the appropriate behavior implemented, a host app can receive modified content from an Action extension and make constructive use of it on the user’s behalf. In the remainder of this chapter and the next chapter, both of these concepts will be implemented through the creation of an example Action extension and host app.
About the Action Extension Example
The tutorial in the remainder of this and the next chapter is divided into two distinct phases. The initial phase involves the creation of an Action extension named “Change it Up” designed to display the text content of host apps in upper case and using a larger font so that it is easier to read. For the sake of brevity, the containing app will not provide any additional functionality beyond containing the extension, though it is important to remember that in the real world it will need to do so.
The second phase of the tutorial involves the creation of a host app that is able to receive modified content back from the Action extension and use it to replace the original content. This will be covered in the next chapter entitled Receiving Data from an iOS 10 Action Extension.
Creating the Action Extension Project
An Action extension is created by adding an extension target to a containing app. Begin by launching Xcode and creating a new Single View Application project named ActionDemo configured for universal device deployment and using Swift as the programming language.
Adding the Action Extension Target
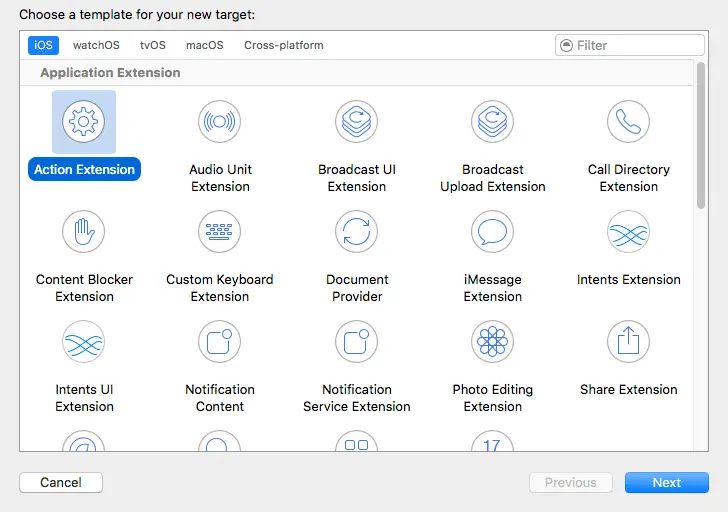
With the newly created project loaded into Xcode, select the File -> New -> Target… menu option and, in the template panel (Figure 86-2), select the options to create an iOS Application Extension using the Action Extension template:
Figure 86-2
With the appropriate options selected, click on the Next button and enter MyActionExt into the Product Name field. Leave the remaining fields set to the default values and click on Finish to complete the extension creation process. When prompted, click on the Activate button to activate the scheme created by Xcode to enable the extension to be built and run.
Once the extension has been added, it will appear in the project navigator panel under the MyActionExt folder. This folder will contain the Swift source code file for the extension’s view controller named ActionViewController.swift, a user interface storyboard file named MainInterface.storyboard and an Info.plist file.
Changing the Extension Display Name
An important configuration change concerns the name that will appear beneath the extension icon in the activity view controller. This is dictated by the value assigned to the Bundle display name key within the Info.plist file for the extension and currently reads “MyActionExt”. Select the Info.plist file located under MyActionExt in the Project Navigator panel, locate this key and change the value so that it now reads “Change it Up”.
Designing the Action Extension User Interface
The user interface for the Action extension is contained in the MyActionExt -> MainInterface.storyboard file. Locate this file in the project navigator panel and load it into Interface Builder.
By default, Xcode has created a template user interface consisting of a toolbar, a “Done” button and an image view. The only change necessary for the purposes of this example is to replace the image view with a text view. Select the image view in the storyboard canvas and remove it using the keyboard delete key. From the Object Library panel drag and drop a Text View object onto the storyboard and position and resize it so that it fills the space previously occupied by the image view.
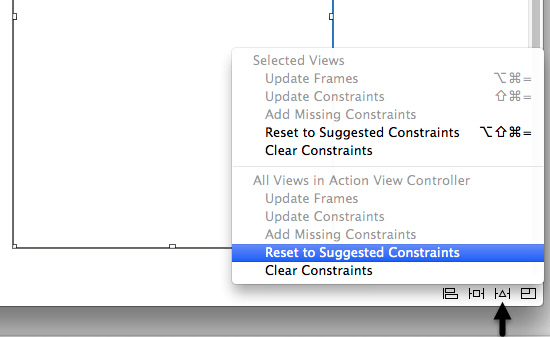
With the new Text View object still selected, display the Resolve Auto Layout Issues menu (indicated in Figure 86-3) and select the Reset to Suggested Constraints menu option.
Figure 86-3
Display the Attributes Inspector for the Text View object and delete the default Latin text and, in the Behavior section of the panel, turn off the Editable option. As previously outlined, one of the features of this extension is that the content is displayed in a larger font so take this opportunity to increase the font setting in the Attribute Inspector from System 14.0 to System 39.0.
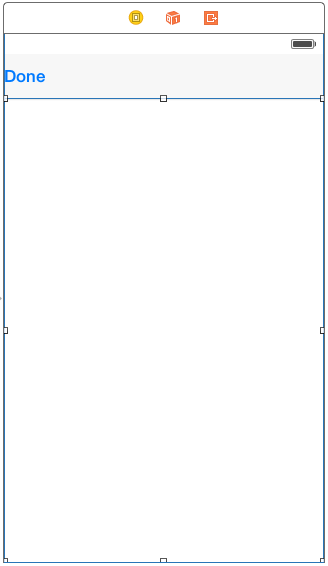
Finally, display the Assistant Editor panel and establish an outlet connection for the Text View object named myTextView. Remaining within the Assistant Editor, delete the line of code declaring the imageView outlet. With these changes made, the user interface for the Action extension view controller should resemble that of Figure 86-4:
Figure 86-4
Receiving the Content
The next step in the tutorial is to add some code to receive the content from a host app when the extension is launched. All extension view controllers have an associated extension context in the form of an instance of the NSExtensionContext class. A reference to the extension context can be accessed via the extensionContext property of the view controller.
The extension context includes a property named inputItems in the form of an array containing objects which provide access to the content from the host app. The input items are, in turn, contained within one or more NSExtensionItem objects.
Within the ActionViewController.swift file, locate the viewDidLoad method, remove the template code added by Xcode and modify the method to obtain a reference to the first input item object:
override func viewDidLoad() {
    super.viewDidLoad()

    let textItem = self.extensionContext!.inputItems[0]
			as! NSExtensionItem
}
Each NSExtensionItem object contains an array of attachment objects. These attachment objects are of type NSItemProvider and provide access to the data held by the host app. Once a reference to an attachment has been obtained, the hasItemConformingToTypeIdentifier method of the object can be called to verify that the host application has data of the type supported by the extension. In the case of this example, the extension supports text based content so the kUTTypeText uniform type identifier (UTI) is used to perform this test:
override func viewDidLoad() {
    super.viewDidLoad()

    let textItem = self.extensionContext!.inputItems[0]
		as! NSExtensionItem

    let textItemProvider = textItem.attachments![0]
		as! NSItemProvider

    if textItemProvider.hasItemConformingToTypeIdentifier(
                   kUTTypeText as String) {
    }
}
Assuming that the host app has data of the required type, it can be loaded into the extension via a call to the loadItem(forTypeIdentifier:) method of the attachment provider object, once again passing through as an argument the UTI content type supported by the extension. The loading of the data from the host app is performed asynchronously so a completion handler must be specified which will be called when the data loading process is complete:
override func viewDidLoad() {
    super.viewDidLoad()

    let textItem = self.extensionContext!.inputItems[0]
		as! NSExtensionItem

    let textItemProvider = textItem.attachments![0]
		as! NSItemProvider

    if textItemProvider.hasItemConformingToTypeIdentifier(
                   kUTTypeText as String) {
        textItemProvider.loadItem(forTypeIdentifier:
	   kUTTypeText as String,
                       options: nil,
			completionHandler: { (result, error) in
           })
    }
}
When the above code is executed, the data associated with the attachment will be loaded from the host app and the specified completion handler (in this case a closure) will be called. Clearly the next step is to implement this completion handler. Remaining within the ActionViewController.swift file, declare an optional variable named convertString and implement the handler code in the closure so that it reads as follows:
import UIKit
import MobileCoreServices

class ActionViewController: UIViewController {

    @IBOutlet weak var myTextView: UITextView!
    var convertedString: String?
.
.
.
    if textItemProvider.hasItemConformingToTypeIdentifier(
                   kUTTypeText as String) {
        textItemProvider.loadItem(forTypeIdentifier:
	   kUTTypeText as String,
                       options: nil,
			completionHandler: { (result, error) in

            self.convertedString = result as? String

            if self.convertedString != nil {
                self.convertedString = self.convertedString!.uppercased()

                DispatchQueue.main.async {
                    self.myTextView.text = self.convertedString!
                }
            }
       })
    }
The first parameter to the handler closure is an object that conforms to the NSSecureCoding protocol (in this case a string object containing the text loaded from the host app). Within the body of the method, this string is assigned to a new variable before being converted to upper case.
The converted text is then displayed on the Text View object in the user interface. It is important to be aware that because this is a completion handler, the code is being executed in a different thread from the main application thread. As such, any changes made to the user interface must be dispatched to the main thread, hence the DispatchQueue method wrapper.
Returning the Modified Data to the Host App
The final task in terms of implementing the Action extension is to return the modified content to the host app when the user taps the Done button in the extension user interface. When the Action extension template was created, Xcode connected the Done button to an action method named done. Locate this method in the ActionViewController.swift file and modify it so that it reads as follows:
@IBAction func done() {
    let returnProvider =
        NSItemProvider(item: convertedString as NSSecureCoding?,
                      typeIdentifier: kUTTypeText as String)

    let returnItem = NSExtensionItem()

    returnItem.attachments = [returnProvider]
        self.extensionContext!.completeRequest(
            returningItems: [returnItem], completionHandler: nil)
}
This method essentially reverses the process of unpacking the input items. First a new NSItemProvider instance is created, configured with the modified content (represented by the string value assigned to the convertedString variable) and the content type identifier. Next, a new NSExtensionItem instance is created and the NSItemProvider object assigned as an attachment.
Finally, the completeRequest(returningItems:) method of the extension context is called, passing through the NSExtensionItem instance as an argument.
As will be outlined later in this chapter, whether the host app does anything with the returned content items is dependent upon whether or not the host app has been implemented to do so.
Testing the Extension
To test the extension, begin by making sure that the MyExtAction scheme (and not the ActionDemo containing app) is selected in the Xcode toolbar as highlighted in Figure 86-5:
Figure 86-5
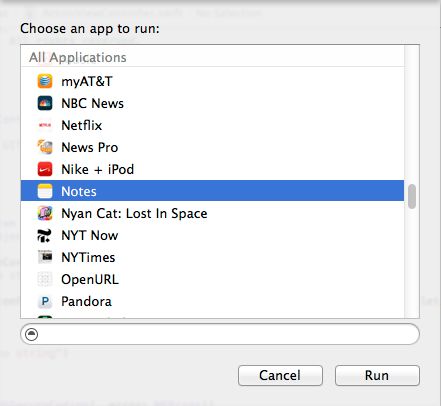
With a suitable device connected to the development system, build and run the extension. As with other extension types, Xcode will prompt for a host app to work with the extension. In order for the extension to be activated, an app that works with text content must be selected. Scroll down the list of apps installed on the device to locate and select the standard Notes app (Figure 86 6). Once selected, click on the Run button:
Figure 86-6
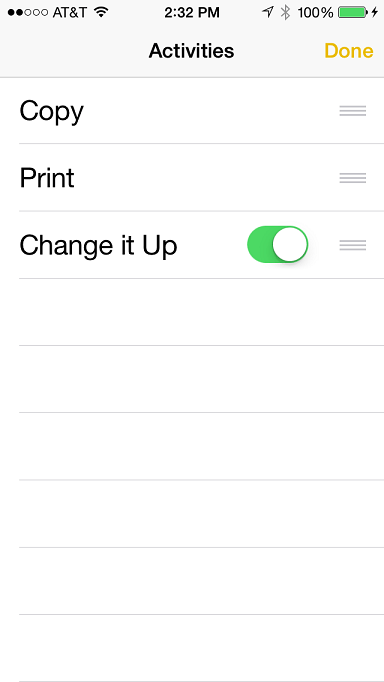
After the project has compiled and uploaded to the device, the Notes app should automatically load (manually launch it if it does not). Select an existing note within the app, or add a new one if none exist then tap the Share button located in the bottom toolbar. If the Action extension does not appear in the activity view controller panel, tap the More button and turn on the extension using the switch in the Activities list:
Figure 86-7
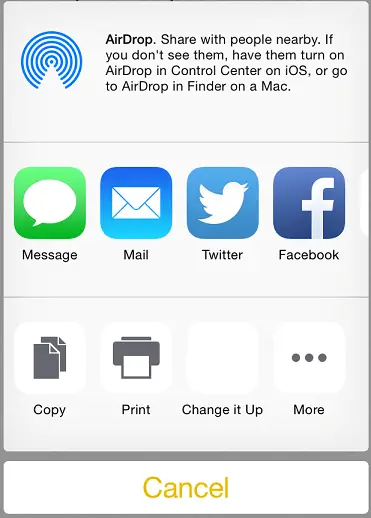
Once the extension has been enabled it should appear in the actions section of the activity view controller panel:
Figure 86-8
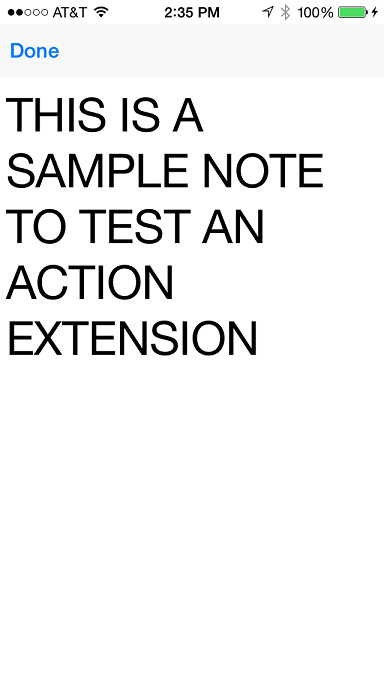
Once the extension is accessible, select it to launch the action, at which point the extension user interface should appear displaying the text from the note in uppercase using a larger font:
Figure 86-9
Note that there may be a delay of several seconds between selecting the Change it Up extension and the extension appearing. Having verified that the Action extension works, tap the Done button to return to the Notes app. Note that the content of the note did not change to reflect the content change to uppercase that was returned from the extension. The reason for this is that the Notes app has not implemented the functionality to accept modified content from an Action extension. As time goes by and Action extensions become more prevalent it will become more common for applications to accept modified content from Action extensions. This, of course, raises the question of how this is implemented, an area that will be covered in the next chapter entitled Receiving Data from an iOS 10 Action Extension.
Declaring the Supported Content Type
During creation and testing of the extension it may have come to your attention that a warning message was displayed within Xcode indicating that the embedded binary’s NSExtensionRule is TRUEPREDICATE. This is because an Action extension must declare the type of content with which it is able to work. This is achieved via key-value settings located in the extension’s Info.plist file. Select this file within the project navigator panel (MyActionExt -> Info.plist) and unfold the NSExtension -> NSExtensionAttributes -> NSExtensionActivationRule section of the file as shown in Figure 86-10:
Figure 86-10
The NSExtensionActivationRule defines the conditions under which the Action extension will appear as an option within the activity view controller of a host app. As currently configured, the extension will be activated under any circumstances and, as such, will cause a warning to appear during compilation indicating that the setting will need to be changed before the app will be accepted into the App Store.
Since the extension is intended to be used with text only, the rules need to be changed accordingly to remove the warning. Within the Info.plist properties, select the NSExtensionActivationRule line and change the value in the Type column from String to Dictionary as shown in Figure 86-11:
Figure 86-11
With the line still selected, click on the + button to add a new key-value pair to the rule dictionary. In the new item line, enter NSExtensionActivationSupportsText into the Key column, change the Type column to Boolean and select YES in the Value column. With this modification completed, the NSExtension section of the property list should match that shown in Figure 86-12:
Figure 86-12
Since the Notes app requires extensions that support both images and text, the extension will no longer be available from within the Notes app once this change has been made. It will, however, be available from within the app created in the next chapter.
Summary
An Action extension is narrowly defined as a mechanism to transform the content in a host app or display that content to the user in a different way. An Action extension is context sensitive and must declare the type of data with which it is able to work. There are essentially three key elements to an Action extension. First, the extension must load the content data from the host app. Second, the extension displays or transforms that content in some, application specific way. Finally, the transformed data is packaged and returned to the host app. Not all host apps are able to handle data returned from an Action extension and in the next chapter we will explore the steps necessary to add such a capability.
Learn SwiftUI and take your iOS Development to the Next Level |
| Previous | Table of Contents | Next |
| Creating an iOS 10 Photo Editing Extension | Receiving Data from an iOS 10 Action Extension |


