Difference between revisions of "Installing Ubuntu on a Windows System (Dual booting)"
m (Text replacement - "<google>ADSDAQBOX_FLOW</google>" to "<htmlet>adsdaqbox_flow</htmlet>") |
m (Text replacement - "<table border="0" cellspacing="0">" to "<table border="0" cellspacing="0" width="100%">") |
||
| (3 intermediate revisions by the same user not shown) | |||
| Line 8: | Line 8: | ||
| − | < | + | <htmlet>ubuntu10</htmlet> |
Ubuntu 10.10, just like most Linux distributions, will happily co-exist on a hard disk drive with just about any version of Windows. This is a concept known as dual-booting. Essentially, when you power up your PC you will be presented with a menu that provides the option to boot either Ubuntu or Windows. Obviously you can only run one operating system at a time, but it is worth noting that the files on the Windows partition of your disk drive will be available to you from Ubuntu regardless of whether your Windows partition was formatted using NTFS, FAT16 or FAT32. | Ubuntu 10.10, just like most Linux distributions, will happily co-exist on a hard disk drive with just about any version of Windows. This is a concept known as dual-booting. Essentially, when you power up your PC you will be presented with a menu that provides the option to boot either Ubuntu or Windows. Obviously you can only run one operating system at a time, but it is worth noting that the files on the Windows partition of your disk drive will be available to you from Ubuntu regardless of whether your Windows partition was formatted using NTFS, FAT16 or FAT32. | ||
| Line 88: | Line 88: | ||
In order to provide access to the Windows partition, Ubuntu has essentially mounted it as a Linux folder. Once mounted, the filesystem also appears as an icon on the Ubuntu desktop. In order to unmount this filesystem when you have finished accessing the Windows files you needed, simply click on the eject style button next to the filesystem in the left hand pane of the file manager window, or right click on the desktop icon and select Unmount from the resulting menu. | In order to provide access to the Windows partition, Ubuntu has essentially mounted it as a Linux folder. Once mounted, the filesystem also appears as an icon on the Ubuntu desktop. In order to unmount this filesystem when you have finished accessing the Windows files you needed, simply click on the eject style button next to the filesystem in the left hand pane of the file manager window, or right click on the desktop icon and select Unmount from the resulting menu. | ||
| − | < | + | <htmlet>ubuntu10</htmlet> |
<hr> | <hr> | ||
Latest revision as of 19:54, 27 October 2016
| Previous | Table of Contents | Next |
| Performing a Clean Ubuntu Installation | Installing Ubuntu 10.x on a Windows Disk with Wubi |
Ubuntu 10.10, just like most Linux distributions, will happily co-exist on a hard disk drive with just about any version of Windows. This is a concept known as dual-booting. Essentially, when you power up your PC you will be presented with a menu that provides the option to boot either Ubuntu or Windows. Obviously you can only run one operating system at a time, but it is worth noting that the files on the Windows partition of your disk drive will be available to you from Ubuntu regardless of whether your Windows partition was formatted using NTFS, FAT16 or FAT32.
During the installation process the Ubuntu installer will detect the Windows installation on the drive and give you the option of deleting it and using the entire disk for Ubuntu, or sharing the disk with Windows. In the latter case you will be able to specify the percentage of the disk to be used for Ubuntu. According to the Ubuntu documentation, a minimum of 2 GB of disk space is required for a full Ubuntu installation, and more space to store any files you may subsequently create. Experience suggests, however, that even with 3 GB of space allocated you will probably run out disk space during your first system update. Ideally, at least 8 GB of disk space should be allocated to the Ubuntu installation to avoid later problems. Once the disk space for Ubuntu has been selected, the installer will resize the Windows partition (without destroying any data) and use the remainder of the disk for Ubuntu.
Beginning the Ubuntu Installation
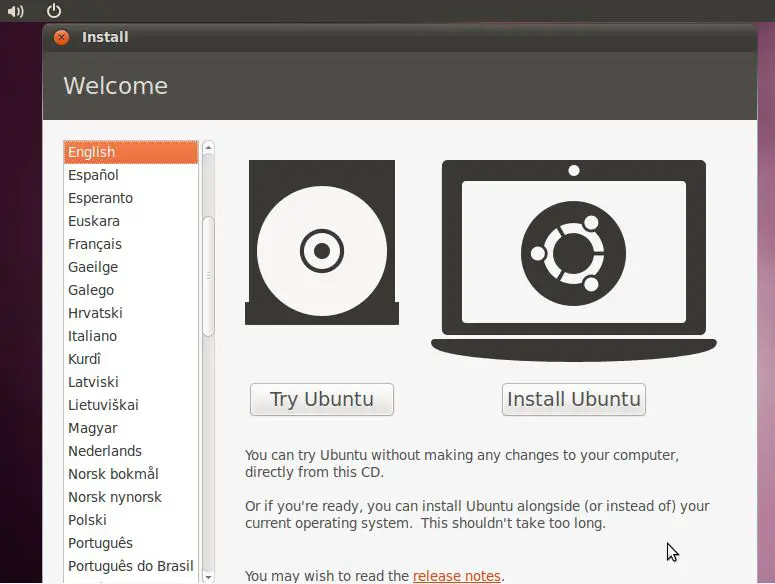
To start the installation, place the Ubuntu CD into the CD-ROM or DVD drive, or insert the USB flash drive and reboot your computer system. If the system loads Windows again you will need to change the boot order in your system BIOS so that the CD or DVD drive or USB device is checked for bootable media before the primary hard disk drive. To do this reboot again. Early in the boot process the BIOS will display a message indicating which key should be pressed to enter Setup. Press the key indicated so that the BIOS Setup menu appears. Navigate the menu system until you find the setting that indicates the boot order used by the BIOS. Change the order so that the drive containing the Ubuntu CDROM or USB drive is listed before the hard disk drive, then exit and save the settings. Reboot once more and you should find that Ubuntu loads. Once Ubuntu has loaded you will be presented with the following screen:
To begin the installation, click on the "Install Ubuntu" button. The installer will ask a couple of questions relating to the installation process. The first question provides the choice of whether to install 3rd party non-open source software to support the playback of MP3 files on the system. Some users object fervently to using any software to which the source code is not freely available. If you are one of those people then do not select this option. If, on the other hand, you just want the best experience from your Ubuntu installation then this option is recommended.
Secondly, the option is provided to update the software packages that comprise the Ubuntu distribution during the installation. Ubuntu, just like most other operating systems, continues to be updated with bug fixes and security patches long after it has been released to the public. If this option is selected, the installer will download any updates issued since the Ubuntu installation image was released and applies them to the system. If you choose not to perform this update during the installation process these updates can still be applied at any time after the installation completes.
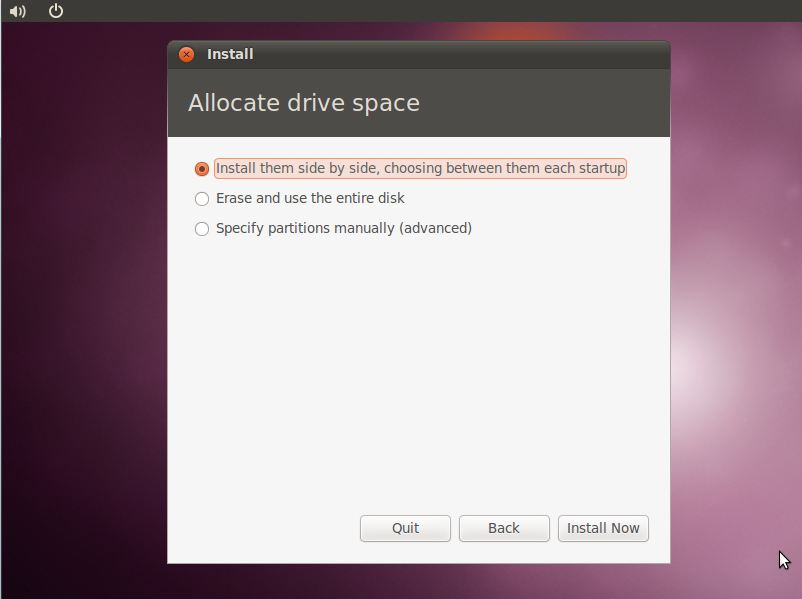
Having made appropriate selections, click the Forward button to proceed to the disk allocation screen. At this point, the installer will have detected the presence of an existing operating system on the target disk drive and will provide a number of options in terms of how the disk should be used to accommodate the Ubuntu installation:
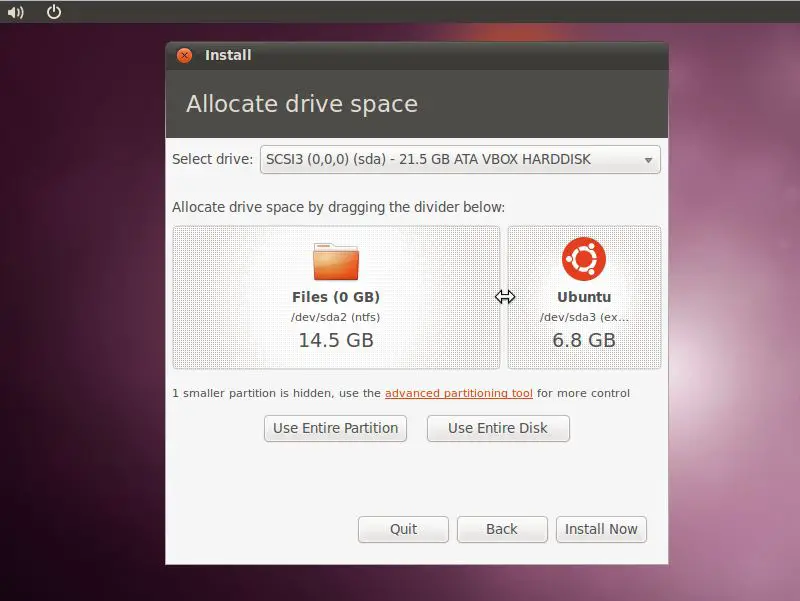
Given that it is our intention to configure a dual boot system, the option to Install them side by side, choosing between them at each startup is the desired choice. With this option selected, click the Install Now button to proceed. The subsequent screen allows the amount of disk space allocated to each operating system (in this case Windows and Ubuntu) to be configured:
At this point it is necessary to decide how much of your Windows partition you wish to donate to the Ubuntu installation. Move the slider (positioned between the Windows and Ubuntu partitions in the diagram) until the Ubuntu partition allocation is a size you are comfortable with. As mentioned previously, at least 8 GB should be allocated to Ubuntu if possible.
When you have selected the size of the Ubuntu partition, click the Install Now button to proceed with the installation. When the warning dialog appears read it carefully and click Continue if you are sure you wish to proceed.
Configuring Time Zone, User and Keyboard Information
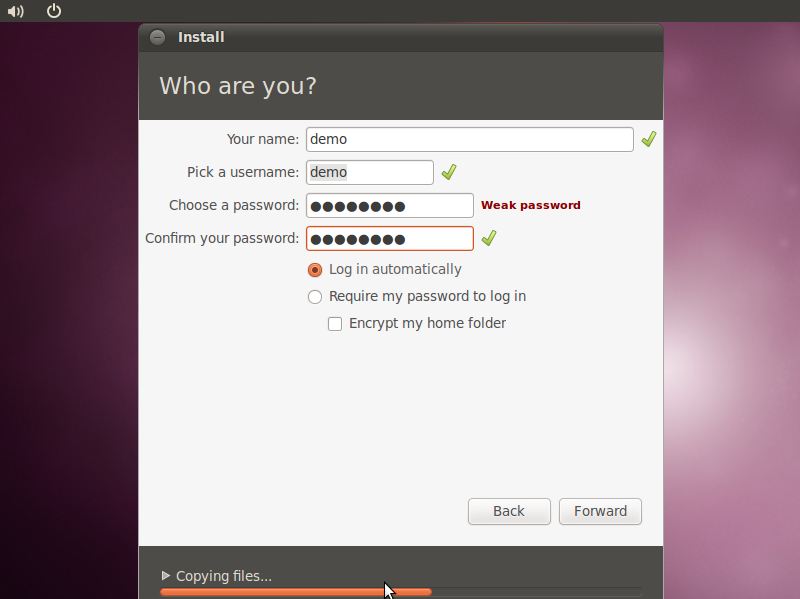
Whilst the installation is in progress, the installer will ask for information about your geographic location in order to configure Timezone settings, your keyboard language configuration, and a user name and password for the first account on the system. The account configuration screen also provides the option to encrypt your home folder to increase the security of your files and data:
The option is also provided to dictate whether the password must be specified each time the user wishes to log into the system. By default, each time Ubuntu starts a login screen will be presented seeking username and password credentials. If you are the sole user of the system and would like to bypass this screen and be logged in automatically each time the system boots, be sure to set the Log in automatically checkbox before proceeding.
Once all the questions have been answered, the installer will simply proceed with the installation. Depending on the speed of your system this process can take some time.
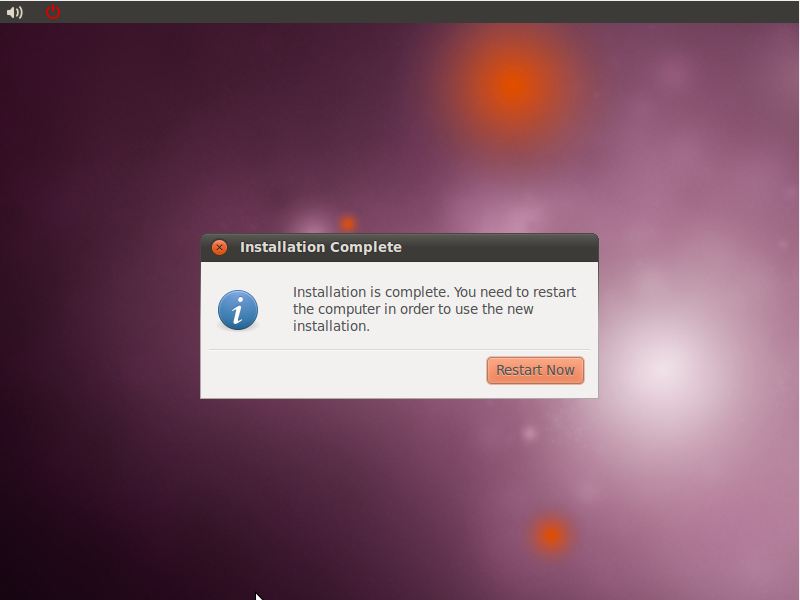
When the installation is complete, the following dialog will appear to inform you the system is ready to be restarted.
When you are ready to reboot, press the Restart now button. The system will take a few moments to shut down. The installer will prompt you to remove the installation media. At this point remove the CDROM or USB flash drive (depending on which you used to perform the installation) and press the Enter key to proceed.
Booting Ubuntu for the First Time
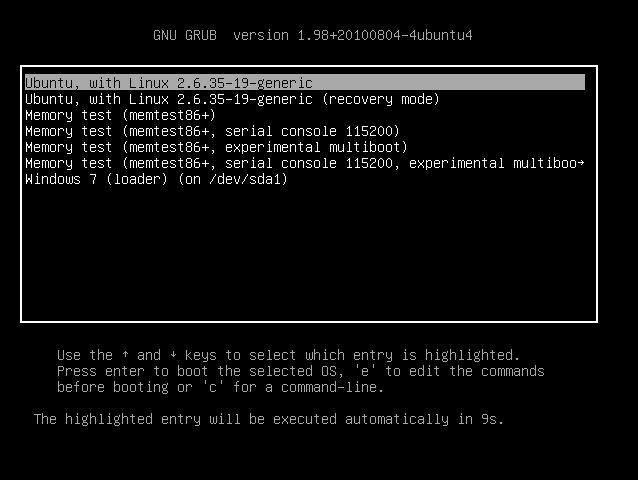
When the system reboots the screen below will appear providing the option to boot either Windows or Ubuntu:
Press Enter to boot Ubuntu. If you wish to boot Windows use the keyboard arrow keys to select the Windows option. If you choose to boot Ubuntu the operating system will load and the Ubuntu login screen will appear (unless the automatic login option was selected). Enter the user name and password you set up during the installation process and you will be logged into the Ubuntu Desktop environment.
Accessing the Windows Partition from Ubuntu
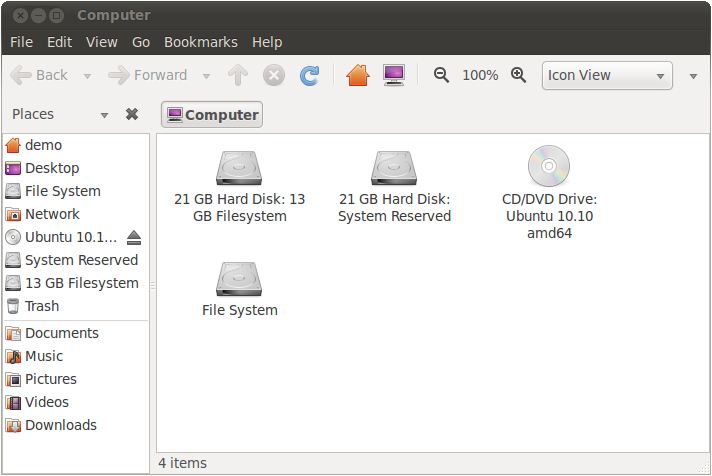
As previously mentioned, Ubuntu provides access to the files and folders stored on the Windows partition of a dual boot configuration. These can be most easily accessed using the desktop file manager tool. From the Ubuntu desktop, select the Computer item from the Places menu to display the devices attached to the system:
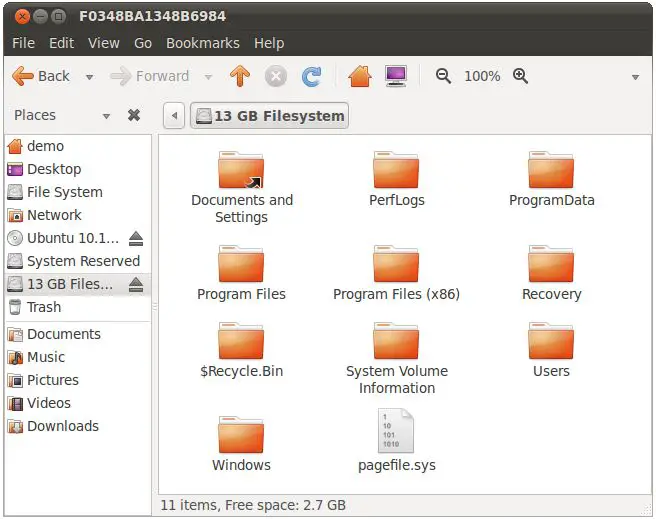
In the above illustration, the visual representation of the system shows a 13 GB Filesystem partition on the 21GB hard disk drive representing the files and data partition of the Windows system, a System Reserved partition which, in this instance, represents the boot partition for Windows 7 and, finally, the File System. The File System icon represents the Ubuntu partition of the disk. To access the Windows partition, therefore, simply double click on the 13 GB Filesystem icon to display the contents of the top level of the Windows partition:
In order to provide access to the Windows partition, Ubuntu has essentially mounted it as a Linux folder. Once mounted, the filesystem also appears as an icon on the Ubuntu desktop. In order to unmount this filesystem when you have finished accessing the Windows files you needed, simply click on the eject style button next to the filesystem in the left hand pane of the file manager window, or right click on the desktop icon and select Unmount from the resulting menu.
| Previous | Table of Contents | Next |
| Performing a Clean Ubuntu Installation | Installing Ubuntu 10.x on a Windows Disk with Wubi |
