Difference between revisions of "Installing and Configuring Fedora KVM Virtualization"
(→Building a Fedora KVM Virtual System) |
(→Building a Fedora KVM Virtual System) |
||
| Line 71: | Line 71: | ||
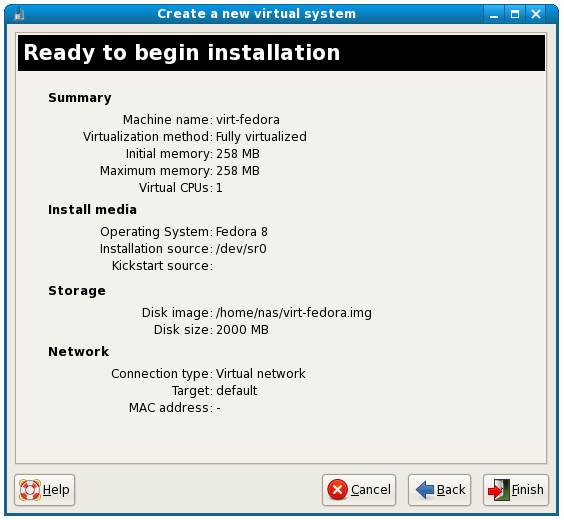
[[Image:kvm_summary.jpg|KVM settings summary]] | [[Image:kvm_summary.jpg|KVM settings summary]] | ||
| + | |||
| + | == Starting the KVM Virtual System == | ||
Click on the ''Finish'' button to begin the creation process. The virtualization manager will create the disk and configure KVM before starting the system. Once started, the guest OS installation will begin: | Click on the ''Finish'' button to begin the creation process. The virtualization manager will create the disk and configure KVM before starting the system. Once started, the guest OS installation will begin: | ||
Revision as of 15:48, 1 February 2008
| Previous | Table of Contents | Next |
| Sending and Receiving GMail Email on a Linux System | Managing and Monitoring Fedora based Xen Guest Systems |
As discussed in previous chapters of this book, virtualization is the ability to run multiple operating systems simultaneously on a single computer system. There are a number of ways to implement virtualization on Fedora. Options include (but are not limited to) VMWare, Xen and KVM. In the preceding chapters we looked in detail and configuring and maintaining Xen based virtualization. In this and subsequent chapters we will look at KVM based virtualization.
Preparing Fedora for KVM Virtualization
KVM support is pre-built into the Fedora Linux kernel for Fedora release 7 and later. As a result KVM support is already available in the standard kernel negating the need to install and boot from a special kernel.
The tools required to setup and maintain virtualized system are not, however, installed by default. To fully utilize the KVM support built into the kernel the following packages are required:
- kvm
- virt-manager
- qemu
Check to find out if these packages are already installed on your system by running the following commands:
rpm -q qemu kvm virt-manager
If any of these packages are reported as not installed they may be installed using the yum package manager:
su -
yum install kvm qemu virt-manager
This command will install all the required packages. All that is required to enable KVM support is to reboot the system. When the re-boot has completed, log in as usual.
Building a Fedora KVM Virtual System
Virtual systems can easily be configured using either the virt-install command-line tool, or the virt-manager GUI tool. For the purposes of this chapter we will use the virt-manager tool.
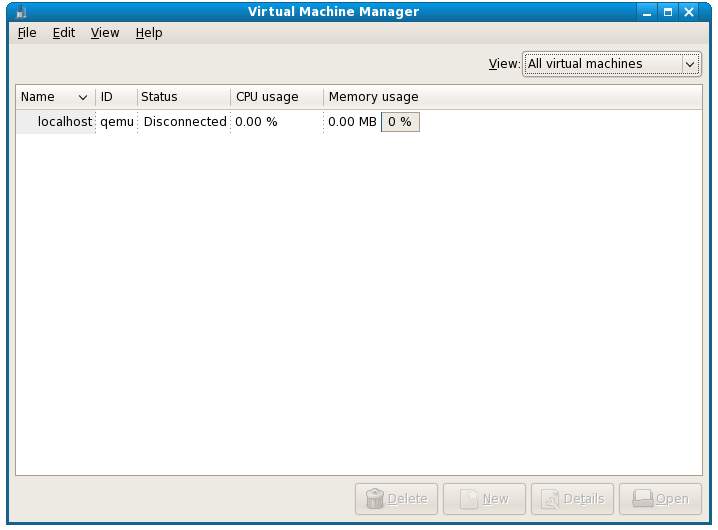
Begin by launching virt-manager either by selecting the Applications->System Tools->Virtual Machine Manager or from the command-line by running /usr/sbin/virt-manager. Once loaded, the virtual manager will display the following screen:
The main virt-manager screen lists the current virtual machines running on the system. At this point there should only be one, the host system. Connect to the host system by right clicking on the entry in the list and selecting Connect from the popup menu. The Status field for this VM should now change to Active, and the New and Details buttons at the bottom of the dialog should be enabled.
To create a new virtual system, click on the New button to display the first configuration screen. Click the Forward button to proceed to the Naming screen and enter a name for the virtual system can be any name you choose. Clicking Forward once more will display the virtualization options screen. As KVM supports only full virtualization this is the sole option on this screen
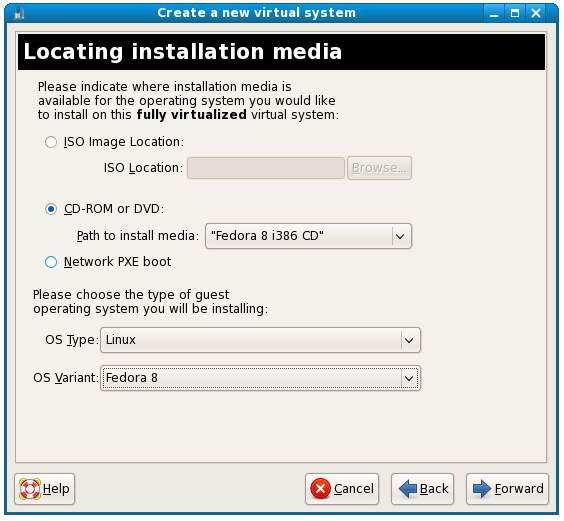
On the next page, you can choose where the installation media can be found for this virtual system. Options include CDROM or ISO image. You can also choose whether you plan to install Windows or Linux into the virtual system. The following figure shows the settings configured to install Fedora 8 from a DVD drive. For details on installing Windows in a KVM virtual system read Running Windows on Fedora Using KVM Virtualization.
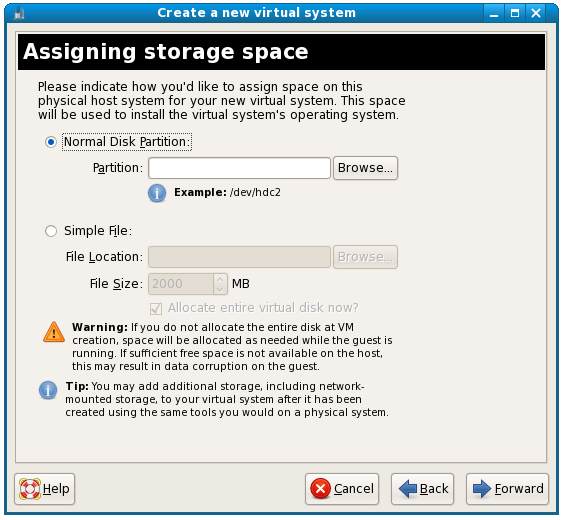
Once an appropriate address has been entered, click the next button to assign storage space:
If you have a disk partition available for the guest operating system, enter the device path. Otherwise, select Simple file and enter the path of the file to be created and select a file size (keeping in mind the space requirements for your chosen guest OS). Click the Forward key once more.
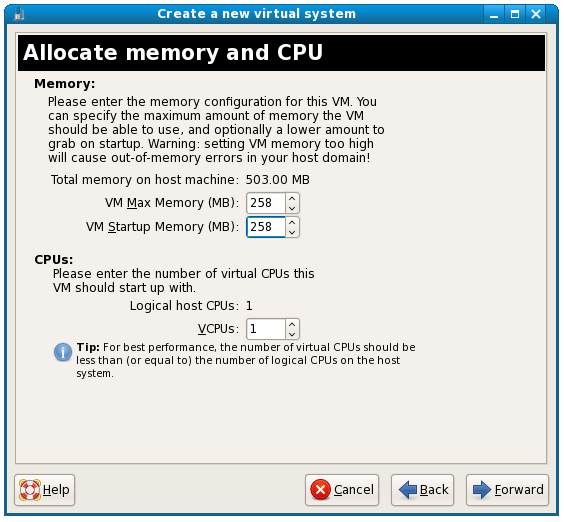
The next screen allows configuration of memory and CPU usage:
Setting the startup memory lower than the maximum will configure the system to allocate the minimum specified memory at start up and then acquire more as needed until the maximum is reached.
Select a memory setting which allows sufficient memory for the host system and the guest system to co-exist. If you plan to run multiple guest operating systems, be sure to allow for this.
On a multi-CPU or multi-core CPU environment it is possible to define how many CPUs the guest OS will have access to. The final screen displays a summary of the configuration:
Starting the KVM Virtual System
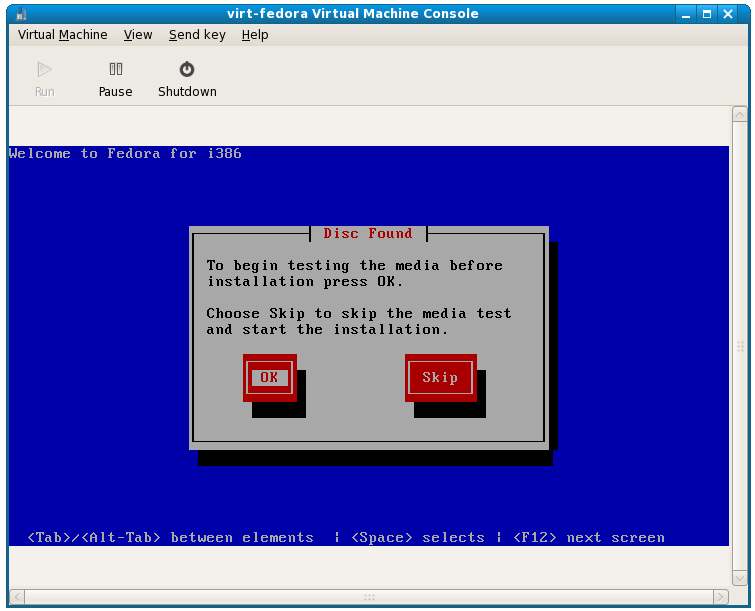
Click on the Finish button to begin the creation process. The virtualization manager will create the disk and configure KVM before starting the system. Once started, the guest OS installation will begin:
From this point on, simply follow the operating installation instructions to install the guest OS.
The next chapter will focus on Managing and Monitoring Fedora based KVM Guest Systems.
