Difference between revisions of "Browsing My Computer, Files and Folders on the Ubuntu Desktop"
m (Text replacement - "<google>BUY_UBUNTU_BOTTOM</google>" to "<htmlet>ubuntu</htmlet>") |
m (Text replacement - "<table border="0" cellspacing="0">" to "<table border="0" cellspacing="0" width="100%">") |
||
| (6 intermediate revisions by the same user not shown) | |||
| Line 8: | Line 8: | ||
| − | < | + | <htmlet>ubuntu11</htmlet> |
| Line 86: | Line 86: | ||
| + | |||
| + | <htmlet>ezoicbottom</htmlet> | ||
<hr> | <hr> | ||
<table border="0" cellspacing="0" width="100%"> | <table border="0" cellspacing="0" width="100%"> | ||
Latest revision as of 20:02, 27 October 2016
| Previous | Table of Contents | Next |
| Enhance your Ubuntu Desktop with gDesklets | Configuring the Ubuntu File Manager |
The Ubuntu GNOME desktop includes a powerful graphical environment that provides easy access to files, folders, network locations and storage devices. Whilst such a concept may not be revolutionary to those who are familiar with Windows Explorer (the technology that enables you browse your disks, files, folders etc on Microsoft Windows) it is important to keep in mind that up until the late 1990's Linux didn't have anything like this.
The technology that provides this functionality is called Nautilus. Nautilus was created by a company called Eazel. Eazel was founded by Andy Hertzfeld, one of the original developers of the first Apple Macintosh. Sadly, Eazel went out of business a few years after it was started. Fortunately, thanks to the unique power of open source software, Nautilus lived on and is now an integral part of the GNOME desktop.
Accessing the File Browser
The file browser is primarily accessed via the Places menu on the Ubuntu desktop. The places available from this menu are the current user's home folder, various sub-folders, the computer, other network locations and any other storage devices connect to the system. Selecting any of these choices will cause a file manager window to appear and display the contents of the corresponding location.
The File Browser and the Computer
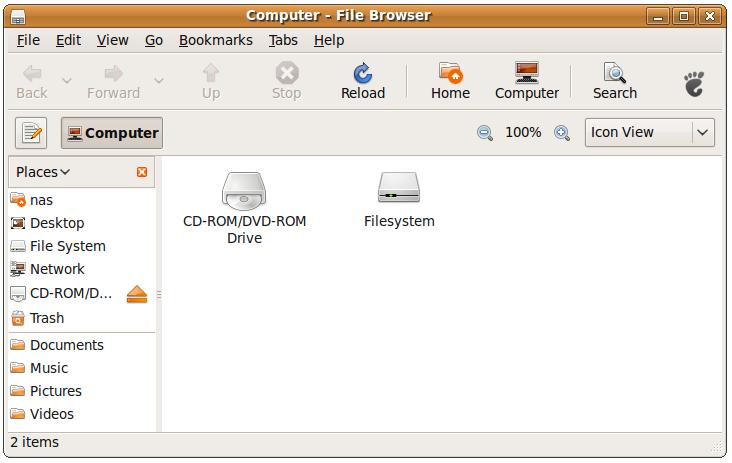
Selecting Computer from the Places menu will invoke the File Browser with a list of devices and locations available for browsing. The following figure shows a typical File Browser Computer display:
In the above example the primary devices on the system are listed. Double clicking on any of these icons will open a new window containing the files and folders located on that device.
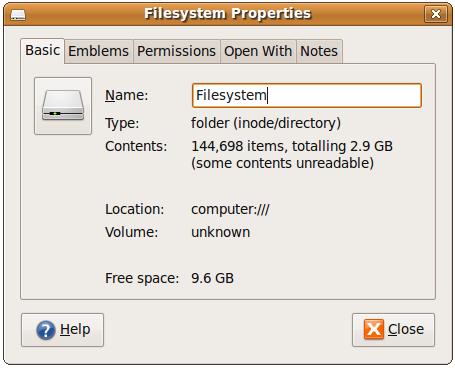
The properties of any icon (such as filesystem type and disk usage) can be display by clicking with the right mouse button over an icon and selecting Properties from the resulting dialog. The following figure shows the properties dialog for a hard disk drive:
Adding Emblems to Files and Folders
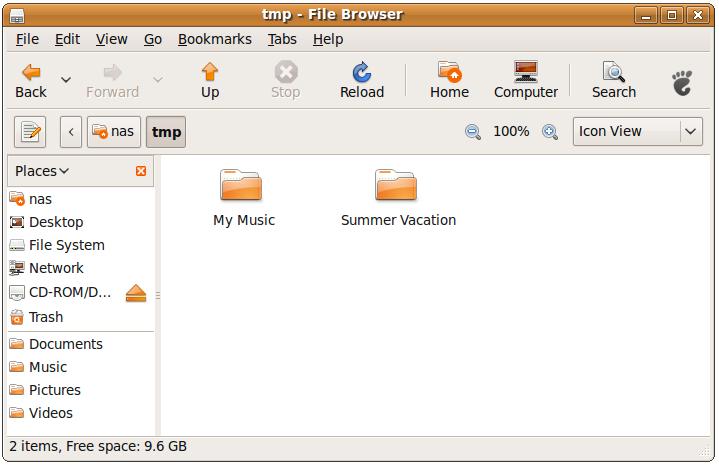
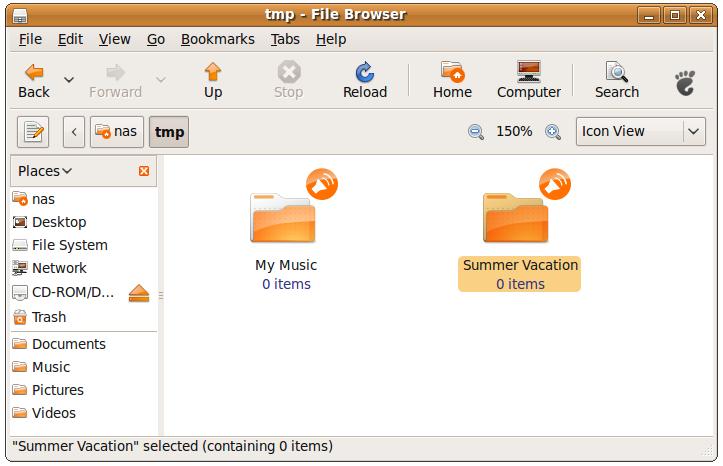
Recent versions of Nautilus provide a useful feature that allows descriptive emblems to be placed next to file or folder icons. For example, you might want to a Pictures emblem next a folder in which you store digital photos, or a Music emblem next to a file containing a MP3 files. The addition of emblems is achieved using the File Browser Properties panel. As an example, we will add emblems next to the following Summer Vacation and My Music folders:
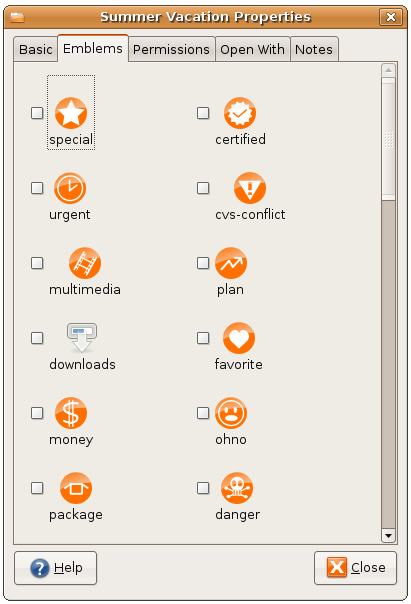
To add an emblem, select the Summer Vacation folder and right click with the mouse. From the popup menu, select Properties and in the properties dialog click on the Emblems tab:
Scroll down the list of emblems until you find the Pictures emblem and select the checkbox to add the emblem. Note that you can add more than one emblem to each file or folder. Repeat these steps to add a Sounds emblem to the My Music folder and close the properties dialog. The end result should appear as follows:
Changing File and Folder Permissions
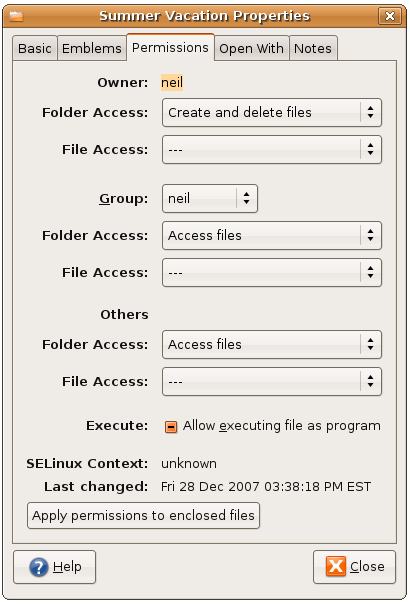
The access permissions on files and folders may also be changed using Nautilus. As with most other file and folder settings this is achieved using the Properties dialog. Click with the right mouse button over the file or folder to be changed and select Properties from the popup menu. In the resulting properties dialog select the Permissions tab to display the current settings for the file or folder:
Permissions are divided into three main categories with a few miscellaneous settings at the bottom of the dialog:
- Owner - Defines the permissions for the owner of the file or folder
- Group - Specifies the permissions for users in the same group as the owner of the file or folder
- Others - Specifies the permissions for any users that do not fall into the above categories
- Execute - Defines whether the file can be executed as a program or not
- SELinux Context - A setting specific to the Security Enhanced Linux standard
Pressing the Apply permissions to enclosed files will set the chosen permissions on all files contained in the selected folder (this button is not available when a file, rather than a folder, is selected).
Renaming and Deleting Files and Folders
Files and folders can be renamed by right clicking on the icon and selecting Rename from the popup menu. Files can be moved to the Trash in a number of ways. One option is to simply select the icon and press the Delete key on the keyboard. Another is to click on the icon and drag and drop into the trash can in bottom right corner of the desktop. Yet another option is to right click on the icon and select Move to Trash.
Now that we have looked at some of the features of Nautilus we will now look at Configuring the Ubuntu File Manager.
| Previous | Table of Contents | Next |
| Enhance your Ubuntu Desktop with gDesklets | Configuring the Ubuntu File Manager |
