Difference between revisions of "Creating a New Visual Basic Project"
(→Creating a Project in Visual Studio) |
(→Creating a Project in Visual Studio) |
||
| Line 11: | Line 11: | ||
Select the ''Windows Application'' icon from the New Project dialog and give your new project a name by typing it into the ''Name:'' field (for example you might want to name your project "VBexample"). Click on the ''OK'' button to create the project. Once the project is created Visual Studio will display the new project, which at this poitn consists of a single form, ready for us to start adding visual components: | Select the ''Windows Application'' icon from the New Project dialog and give your new project a name by typing it into the ''Name:'' field (for example you might want to name your project "VBexample"). Click on the ''OK'' button to create the project. Once the project is created Visual Studio will display the new project, which at this poitn consists of a single form, ready for us to start adding visual components: | ||
| − | [[Image: | + | [[Image:visual_studio_example_project.jpg]] |
Revision as of 19:08, 13 July 2007
Visual Studio uses the concept of projects to contain everything to build an application using Visual Basic. Typically there will be one Visual Studio project per individual application you develop. In this chapter we will look at creating a new Visual Studio project.
Creating a Project in Visual Studio
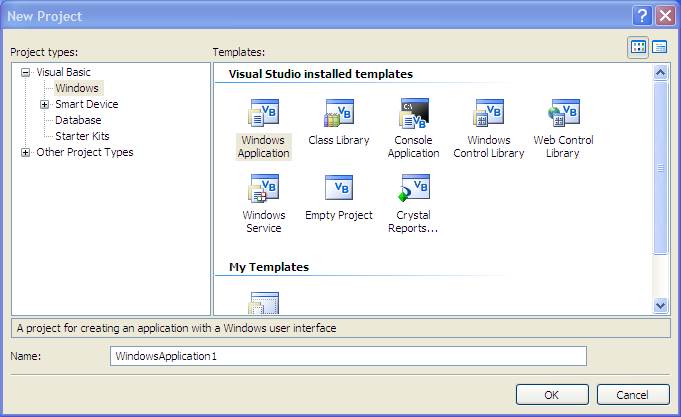
Now that Visual Studio is installed it is time to create a new project. Begin by starting Visual Studio from the Windows Start menu. When the main Visual Studio Window appears click on the File menu and select New Project. Visual Studio will display the "New Project" dialog shown below:
The New Project dialog provides a number of options with regard to the type of project being created. In this example we are going to build a Windows Application. A Windows Application is a graphical application (in other words an application that appears in a window and contains buttons, text fields and all the other graphical items we expect to see when we run Microsoft Windows applications).
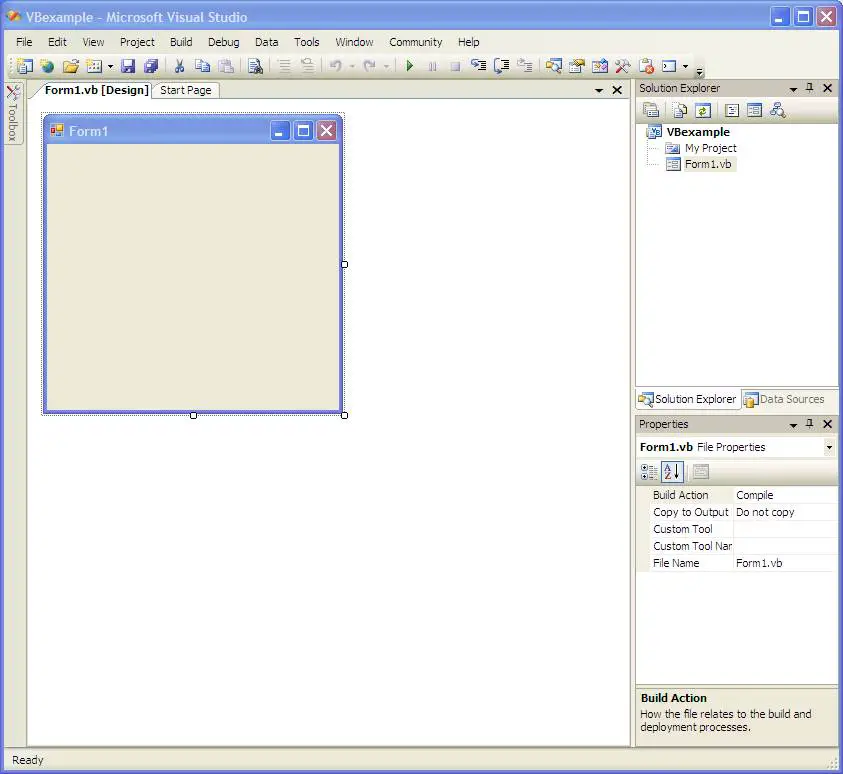
Select the Windows Application icon from the New Project dialog and give your new project a name by typing it into the Name: field (for example you might want to name your project "VBexample"). Click on the OK button to create the project. Once the project is created Visual Studio will display the new project, which at this poitn consists of a single form, ready for us to start adding visual components:


