Difference between revisions of "A Simple Amazon In-App Purchasing Example Application"
(New page: <table border="0" cellspacing="0" width="100%"> <tr> <td width="20%">Previous<td align="center">[[Kindle Fire Development Essentials|Tab...) |
(No difference)
|
Revision as of 14:29, 21 May 2013
| Previous | Table of Contents | Next |
| An Overview of the Amazon In-App Purchasing API | Integrating Ads with the Amazon Mobile Ads API |
<google>BUY_KINDLE_FIRE</google>
In this chapter, some of the concepts outlined in the previous chapter will be put to practical use. The goal of this chapter is to work through the creation of a simple application designed to demonstrate the use of the Amazon In-App Purchasing API to make a consumable content purchase.
Creating the Example Application
Launch the Eclipse environment and create a new Android Application Project named InAppDemo consisting of an activity named InAppDemoActivity with a corresponding layout named activity_in_app_demo.
Adding the in-app-purchasing Library to the Project
Locate the new project within the Eclipse Package Explorer panel, right-click on the project name and select the Properties option from the resulting menu. Within the Properties dialog, select the Java Build Path category from the left hand panel and, within the Java Build Path panel, select the Libraries tab before clicking on the Add External JARs… button. In the JAR selection dialog, navigate to the following location (where <sdk path> is replaced by the location on your file system where the Amazon Mobile SDK was installed in the previous chapter):
<sdk path>/InAppPurchasing/lib
From within the libs directory, select the in-app-purchasing-<ver>.jar file (where <ver> is the latest release of the library). Once selected, click on the Open button to add the JAR file to the project. On returning to the properties dialog, click on OK.
Next, the jar file needs to be added to the libs folder of the project. Within a file browser window, locate the jar file and drag and drop it onto the libs folder of the project in the Package Explorer panel. When prompted whether to copy or link the library, select the Copy files option.
Adding the Receiver to the Manifest File
In order for the application to receive intents from the purchasing system, it is necessary to add the receiver to the application manifest file. From within the Package Explorer panel, locate and double click on the project’s AndroidManifest.xml file. Using the tabs along the bottom edge of the manifest editor panel, select the AndroidManifest.xml tab to directly edit the XML. Modify the file so that it reads as outlined in the following listing:
<?xml version="1.0" encoding="utf-8"?>
<manifest xmlns:android="http://schemas.android.com/apk/res/android"
    package="com.example.inappdemo"
    android:versionCode="1"
    android:versionName="1.0" >

    <uses-sdk
        android:minSdkVersion="8"
        android:targetSdkVersion="17" />

    <application
        android:allowBackup="true"
        android:icon="@drawable/ic_launcher"
        android:label="@string/app_name"
        android:theme="@style/AppTheme" >
        <activity
            android:name="com.example.inappdemo.InAppDemoActivity"
            android:label="@string/app_name" >
            <intent-filter>
                <action android:name="android.intent.action.MAIN" />

                <category android:name="android.intent.category.LAUNCHER" />
            </intent-filter>
        </activity>
        <receiver android:name="com.amazon.inapp.purchasing.ResponseReceiver">
		<intent-filter>
		  <action android:name="com.amazon.inapp.purchasing.NOTIFY"
android:permission="com.amazon.inapp.purchasing.Permission.NOTIFY" />
			</intent-filter>
		</receiver>
    </application>
</manifest>
Once the changes have been made, save and close the file.
Designing the User Interface
With the res -> layout -> activity_in_app_demo.xml file selected in the Package Explorer panel and the user interface loaded into the Graphical Layout tool, select and delete the existing “Hello world!” TextView object.
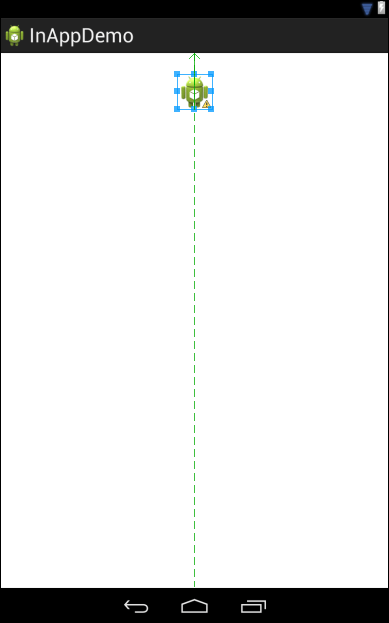
From the Images & Media section of the palette, drag and drop an ImageView object onto the layout canvas so that it is positioned centrally in the horizontal plane and close to the top of the device display. When prompted for an image resource, select the ic_launcher resource to display the default Android logo as illustrated in Figure 44-1:
Figure 44-1
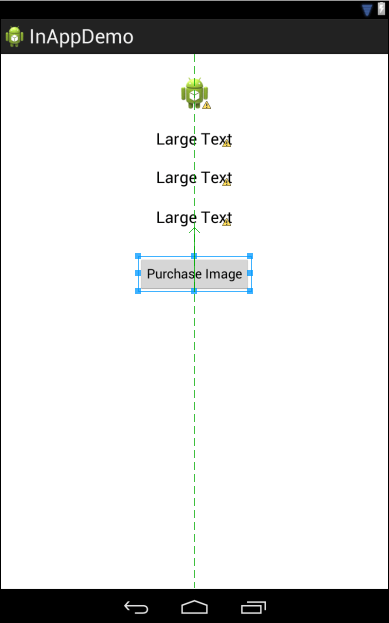
Drag a Large TextView object from the Form Widgets palette category and position it beneath the ImageView. Change the ID of the TextView to titleText. Repeat this step to add two more TextView objects beneath the titleText view with IDs set to descriptionText and priceText respectively. These views will be used to display the title, description and price of the item before the user initiates the purchase.
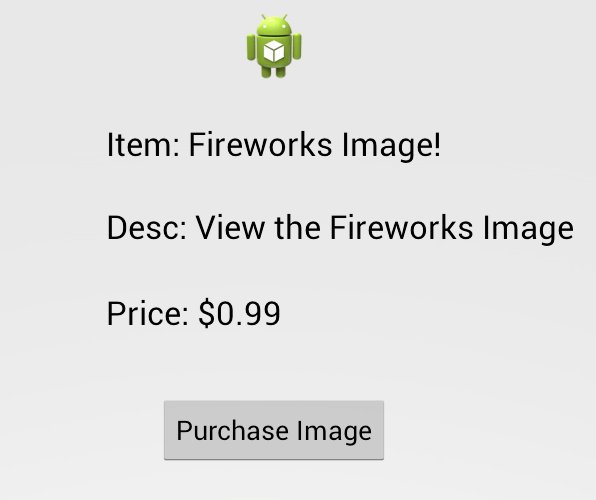
Finally, beneath the priceText view, place a Button object configured to display a string resource that reads “Purchase Image”. Once completed, the layout should resemble that of Figure 44-2:
Figure 44-2
Right-click on the Button view and select the Other Properties -> All By Name -> OnClick… menu option. In the resulting dialog box, configure the button to call a method named makePurchase when clicked. On completion of the user interface layout design, the activity_in_app_demo.xml file should read as follows:
<RelativeLayout xmlns:android="http://schemas.android.com/apk/res/android"
    xmlns:tools="http://schemas.android.com/tools"
    android:layout_width="match_parent"
    android:layout_height="match_parent"
    android:paddingBottom="@dimen/activity_vertical_margin"
    android:paddingLeft="@dimen/activity_horizontal_margin"
    android:paddingRight="@dimen/activity_horizontal_margin"
    android:paddingTop="@dimen/activity_vertical_margin"
    tools:context=".InAppDemoActivity" >

    <ImageView
        android:id="@+id/imageView1"
        android:layout_width="wrap_content"
        android:layout_height="wrap_content"
        android:layout_alignParentTop="true"
        android:layout_centerHorizontal="true"
        android:layout_marginTop="29dp"
        android:src="@drawable/ic_launcher" />

    <TextView
        android:id="@+id/titleText"
        android:layout_width="wrap_content"
        android:layout_height="wrap_content"
        android:layout_below="@+id/imageView1"
        android:layout_centerHorizontal="true"
        android:layout_marginTop="26dp"
        android:text="Large Text"
        android:textAppearance="?android:attr/textAppearanceLarge" />

    <TextView
        android:id="@+id/descriptionText"
        android:layout_width="wrap_content"
        android:layout_height="wrap_content"
        android:layout_alignLeft="@+id/titleText"
        android:layout_below="@+id/titleText"
        android:layout_marginTop="26dp"
        android:text="Large Text"
        android:textAppearance="?android:attr/textAppearanceLarge" />

    <TextView
        android:id="@+id/priceText"
        android:layout_width="wrap_content"
        android:layout_height="wrap_content"
        android:layout_alignLeft="@+id/descriptionText"
        android:layout_below="@+id/descriptionText"
        android:layout_marginTop="28dp"
        android:text="Large Text"
        android:textAppearance="?android:attr/textAppearanceLarge" />

    <Button
        android:id="@+id/button1"
        android:layout_width="wrap_content"
        android:layout_height="wrap_content"
        android:layout_below="@+id/priceText"
        android:layout_centerHorizontal="true"
        android:layout_marginTop="40dp"
        android:onClick="makePurchase"
        android:text="@string/purchase_string" />

</RelativeLayout>
Once the design is complete, save and close the file.
Creating the Purchasing Observer Class
As outlined in An Overview of the Amazon In-App Purchasing API, the application is going to need a Purchasing Observer class to receive notifications relating to the purchasing process. To add this new class, right-click on the InAppDemo top level item in the Package Explorer panel and select New -> Class from the resulting menu. Within the new class dialog, set the package name field to reflect the name of the package specified when the project was created (for example com.example.inappdemo). Name the new class InAppObserver and configure the Superclass to be com.amazon.inapp.purchasing.PurchasingObserver. Click on the Finish button to create the new class.
Once the new class has been created, it should appear in the main editing window and read as follows:
import com.amazon.inapp.purchasing.GetUserIdResponse;
import com.amazon.inapp.purchasing.ItemDataResponse;
import com.amazon.inapp.purchasing.PurchaseResponse;
import com.amazon.inapp.purchasing.PurchaseUpdatesResponse;
import com.amazon.inapp.purchasing.PurchasingObserver;


public class InAppObserver extends PurchasingObserver {

	@Override
	public void onGetUserIdResponse(GetUserIdResponse arg0) {
		// TODO Auto-generated method stub

	}

	@Override
	public void onItemDataResponse(ItemDataResponse arg0) {
		// TODO Auto-generated method stub

	}

	@Override
	public void onPurchaseResponse(PurchaseResponse arg0) {
		// TODO Auto-generated method stub

	}

	@Override
	public void onPurchaseUpdatesResponse(PurchaseUpdatesResponse arg0) 	{
		// TODO Auto-generated method stub

	}

	@Override
	public void onSdkAvailable(boolean arg0) {
		// TODO Auto-generated method stub

	}
}
The first task is to implement the constructor method for the class. This can be added as outlined in the following listing. The main objective of this method is to store a reference to the activity that initiated the purchase. This will be used later to make changes to the user interface in response to the purchase:
package com.example.inappdemo;

import com.amazon.inapp.purchasing.GetUserIdResponse;
import com.amazon.inapp.purchasing.ItemDataResponse;
import com.amazon.inapp.purchasing.PurchaseResponse;
import com.amazon.inapp.purchasing.PurchaseUpdatesResponse;
import com.amazon.inapp.purchasing.PurchasingObserver;

public class InAppObserver extends PurchasingObserver {

	private final InAppDemoActivity baseActivity;

	public InAppObserver(final InAppDemoActivity buyerActivity) {
        super(buyerActivity);
        this.baseActivity = buyerActivity;
     }

	@Override
	public void onGetUserIdResponse(GetUserIdResponse arg0) {
		// TODO Auto-generated method stub

	}
.
.
}
Save the changes to the file before proceeding.
Having created a PurchasingObserver subclass, the next step is to make sure that it is registered with the application’s PurchasingManager instance. To achieve this, edit the InAppDemoActivity.java class and add an onStart() lifecycle method as follows (note also that the onResume() method has been added to ensure that changes in user are detected):
package com.example.inappdemo;

import com.amazon.inapp.purchasing.PurchasingManager;
import android.os.Bundle;
import android.app.Activity;
import android.view.Menu;

public class InAppDemoActivity extends Activity {

	@Override
	protected void onCreate(Bundle savedInstanceState) {
		super.onCreate(savedInstanceState);
		setContentView(R.layout.activity_in_app_demo);
	}

	@Override
	public void onStart() {
        	super.onStart();
        	InAppObserver observer = new InAppObserver(this);
        	PurchasingManager.registerObserver(observer);
	}

	@Override
	protected void onResume() {
        super.onResume();
        PurchasingManager.initiateGetUserIdRequest();
	}
	@Override
	public boolean onCreateOptionsMenu(Menu menu) {
		getMenuInflater().inflate(R.menu.activity_in_app_demo, menu);
		return true;
	}
}
Adding the SKU as a String Resource
Later in this chapter, the product item declaration will be declared in a JSON data file and uploaded to the device or emulator in which the application is being tested. In-app purchase items are identified by a SKU code, which will need to be part of the item definition. The SKU code will also be used when requesting information and initiating the item purchase. For the purposes of this tutorial, we will be using the following SKU code and storing it as a string resource: com.example.inappdemo.fireworks
To add the SKU code as a string resource, navigate in the Package Explorer to the res -> values folder and double click on the strings.xml file to load it into the editor. Select the strings.xml tab along the bottom edge of the Android Resources panel to edit the XML definition directly. Add a new line to the XML so that the file reads as follows:
<?xml version="1.0" encoding="utf-8"?>
<resources>
    <string name="app_name">InAppDemo</string>
    <string name="hello_world">Hello world!</string>
    <string name="menu_settings">Settings</string>
    <string name="purchase_string">Purchase Image</string>
    <string name="consumable_sku">com.example.inappdemo.fireworks</string>
</resources>
Once the resource has been added, save and close the file.
Displaying the Purchase Item Details
When the user interface for the application was designed, three TextView objects were included to display the title, description and price of the item to the user. Generally, an application should always obtain this information using the purchasing API rather than hard coding the information into the application. This ensures that the information always matches what is set up in the distribution portal and allows the information to be changed without having to modify the application.
The standard mechanism for obtaining product information is to call the initiateItemDataRequest() method of the Purchasing Manager, passing through a set of SKUs for the items for which data is required. This, in turn, will result in a call to the onItemDataResponse() method of the registered observer instance which will be passed an ItemDataResponse object containing the requested data.
In the first instance, the onStart() method in the InAppDemoActivity.java file needs to be modified to create a Java Set including the SKU of our product, and then call the initiateItemDataRequest() method of the Purchasing Manager:
package com.example.inappdemo;

import java.util.HashSet;
import java.util.Set;
import com.amazon.inapp.purchasing.PurchasingManager;
import android.os.Bundle;
import android.app.Activity;
import android.view.Menu;
import android.widget.TextView;

public class InAppDemoActivity extends Activity {
.
.
.
  @Override
  public void onStart() {
     super.onStart();
     InAppObserver observer = new InAppObserver(this);
     PurchasingManager.registerObserver(observer);

     Set<String>skuList = new HashSet<String>(1);
     skuList.add(getResources().getString(R.string.consumable_sku));

     PurchasingManager.initiateItemDataRequest(skuList);
  }
.
.
}
When the observer receives the product item data, it is going to call a method of the InAppActivityDemo class, the purpose of which is to update the user interface with information about the item. We will name this method displayItem() and implement it in the InAppDemoActivity.java file as follows:
package com.example.inappdemo;

import java.util.HashSet;
import java.util.Set;

import com.amazon.inapp.purchasing.Item;
import com.amazon.inapp.purchasing.PurchasingManager;


import android.os.Bundle;
import android.app.Activity;
import android.view.Menu;
import android.widget.TextView;
import android.view.View;
import android.widget.ImageView;

public class InAppDemoActivity extends Activity {
.
.
	 public void displayItem(Item item)
	 {
	    	TextView titleText = (TextView) findViewById(R.id.titleText);
	    	TextView descriptionText =
                   (TextView) findViewById(R.id.descriptionText);
	    	TextView priceText = (TextView) findViewById(R.id.priceText);

	  	titleText.setText("Item: " + item.getTitle());
	    	descriptionText.setText("Desc: " +
                              item.getDescription());
	    	priceText.setText("Price: $" + item.getPrice());
	 }
.
.
}
This method will be passed an Item object containing information relating to the specified SKU. All that it then does is obtain references to the TextView objects before displaying the corresponding data on each view.
The next task is to implement the onItemDataResponse() method in the observer class. Select the InAppObserver.java file, therefore, and modify this method so that it reads as follows:
package com.example.inappdemo;

import java.util.Map;
import com.amazon.inapp.purchasing.GetUserIdResponse;
import com.amazon.inapp.purchasing.Item;
import android.app.AlertDialog;
import com.amazon.inapp.purchasing.ItemDataResponse;
import com.amazon.inapp.purchasing.PurchaseResponse;
import com.amazon.inapp.purchasing.PurchaseUpdatesResponse;
import com.amazon.inapp.purchasing.PurchasingObserver;

public class InAppObserver extends PurchasingObserver {
.
.
	@Override
	public void onItemDataResponse(ItemDataResponse itemDataResponse) {

		switch (itemDataResponse.getItemDataRequestStatus()) {

			case SUCCESSFUL:
				final Map<String, Item> items =
                              itemDataResponse.getItemData();

				for (final String key : items.keySet()) {
					Item i = items.get(key);
					baseActivity.displayItem(i);
				}
				break;
			case SUCCESSFUL_WITH_UNAVAILABLE_SKUS:
				// Handle Unavailable SKUs
			    break;
			case FAILED:
				// Handle failure
				break;
        }
    }
.
.
}
The first action performed by this method is to get the status information from the response. If the request was successful, the code works through the map of items returned (since we specified a single SKU there will only be one item returned in this case) and then calls the displayItem() method previously added to the InAppDemoActivity class, passing through the item as an argument. No action is taken if the SKU was invalid or the request failed.
Initiating the Purchase
The user interface of the application’s main activity contains a Button view which is configured to call a method named makePurchase() when touched by the user. This method now needs to be implemented in the InAppDemoActivity.java file. All this method needs to do is initiate the purchase by passing through the SKU to the initiatePurchaseRequest() method of the PurchasingManager instance as follows:
public void makePurchase(View view)
{
   String skuString = getResources().getString(R.string.consumable_sku);
   PurchasingManager.initiatePurchaseRequest(skuString);
}
When the purchase is completed, the onPurchaseResponse() method of the registered observer will be called. In the event that the purchase is successful we want this method to call a method on the InAppDemoActivity class named unlockImage() to display the purchased image to the user. First, however, this image needs to be included in the project (note that in this instance the purchase is unlocking content already included with the application as opposed to downloading remote content). The image for this project can be downloaded from the following link:
http://www.ebookfrenzy.com/android_book/fireworks.png
Once downloaded to a temporary location, drag and drop the image file onto the project’s res -> drawable-hdpi folder. Select the option to copy the file to the project when prompted to do so.
With the image added to the project the unlockImage() method can now be implemented in the InAppDemoActivity.java file:
public void unlockImage()
{
	ImageView image = (ImageView) findViewById(R.id.imageView1);
	image.setImageResource(R.drawable.fireworks);
}
Save the file before proceeding.
Handling the Purchase Response
Regardless of whether the purchase was successful or not, the onPurchaseResponse() method of the observer class will be called when the purchase process completes. This callback method will need to check that the purchase was successful and, assuming that it was, make a call to the unlockImage() method so that the purchased image is displayed to the user. Within the InAppObserver.java file, locate the stub for this method and implement it as follows:
@Override
public void onPurchaseResponse(PurchaseResponse purchaseResponse) {

	switch (purchaseResponse.getPurchaseRequestStatus()) {
    		case SUCCESSFUL:
    			baseActivity.unlockImage();
    			break;
    		case FAILED:
    			// Add code to handle purchase failure if necessary
    		case INVALID_SKU:
    			// Add code to handle invalid SKU if necessary
    			AlertDialog.Builder builder = new
				AlertDialog.Builder(baseActivity);
    			builder.setMessage("Invalid Product SKU")
    	       		.setTitle("Purchase could not be completed");
    			AlertDialog dialog = builder.create();
    			dialog.show();
        }
}
In the event that the purchase is unable to complete due to an invalid product SKU code, an alert dialog will be presented to the user notifying them of this. As always, save the file before continuing.
Creating and Installing the SDK Tester Purchase Item File
Since this example application is neither going to be submitted to, nor accepted by the Amazon Mobile App Distribution portal, it will not be possible to test the in-app purchasing functionality in the real world. We will, instead, utilize the SDK Tester application as outlined in the previous chapter. The first step, however, is to create the product description JSON file. This file needs to be named amazon.sdktester.json and is formatted as follows:
{
  SKU1:{
   "itemType": "ENTITLED|CONSUMABLE",
   "price": <price as string>,
   "title": <title>,
   "description": <description>,
   "smallIconUrl": "http://path_to_image",
  },

  SKU2:{
  .
  .
  },
.
.
}
Note that the file can contain multiple purchase items and that each item contains information about the product in terms of title, price, description and a product image.
For the purposes of this example, the file needs to contain the following item information:
{
"com.example.inappdemo.fireworks" : {
    "itemType": "CONSUMABLE",
    "price": 0.99,
    "title": "Fireworks Image",
    "description": "An image of Fireworks on New Year's Eve in Australia",
    "smallIconUrl": "http://some/image.jpg"
  }
}
Create this file using any suitable text or programming editor and save it.
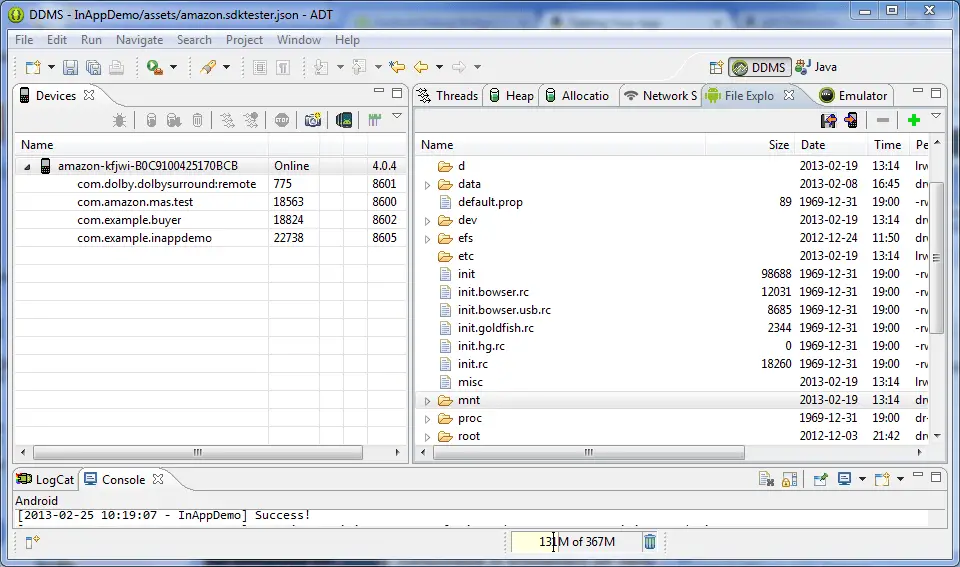
Once created, the file needs to be placed in the sdcard folder of the device or emulator on which the application is to be tested. To achieve this, begin by launching the emulator or connecting the Kindle Fire device and display the DDMS perspective within the Eclipse main window (Window -> Open Perspective -> DDMS).
In the left hand panel of the DDMS perspective, select the target device from the list of devices and, from the main panel, select the File Explorer tab:
Figure 44-3
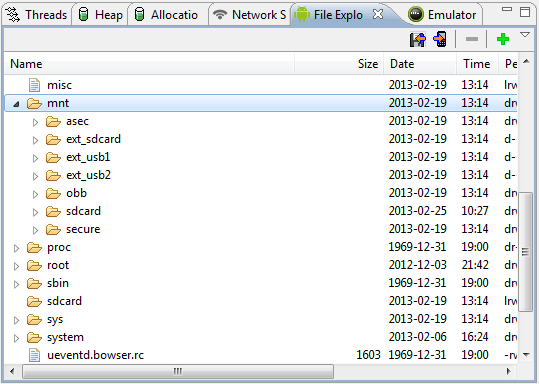
This will display a listing of the file system on the selected device. The sdcard folder is located under mnt. If the mnt folder is currently folded, click on the small right facing arrow next to the folder name to unfold it. At this point, the sdcard folder should be visible as illustrated in Figure 44-4:
Figure 44-4
Using the file system browser for your operating system, locate the previously created amazon.sdktester.json file and drag and drop it onto the /mnt/sdcard folder of the device or emulator.
Installing the SDK Tester
The SDK Tester app is installed by default on recent versions of the Kindle Fire AVD emulator. When testing in app purchasing on a physical Kindle Fire device, it is necessary to manually install the SDK Tester application package. This package is included in the Amazon Mobile SDK and has the following path (where <sdk path> is the location into which you originally installed the SDK):
/<sdk_path>/Apps-SDK/InAppPurchasing/tools/AmazonTester.apk
With the device connected, open a terminal or command prompt window, change directory to the /<sdk_path>/Apps-SDK/InAppPurchasing/tools directory and execute the following command to install the package onto the device:
adb –d install AmazonSDKTester.apk
At this point, the application has been developed and the product item file created and installed along with the SDK Tester tool. All that remains is to test the application.
Testing the Application
Compile and run the application on the device or emulator on which the SDK testing environment has been configured. On loading, the three TextView objects (Figure 44-5) should be populated with the product information as it was specified in the amazon.sdktester.json file:
Figure 44-5
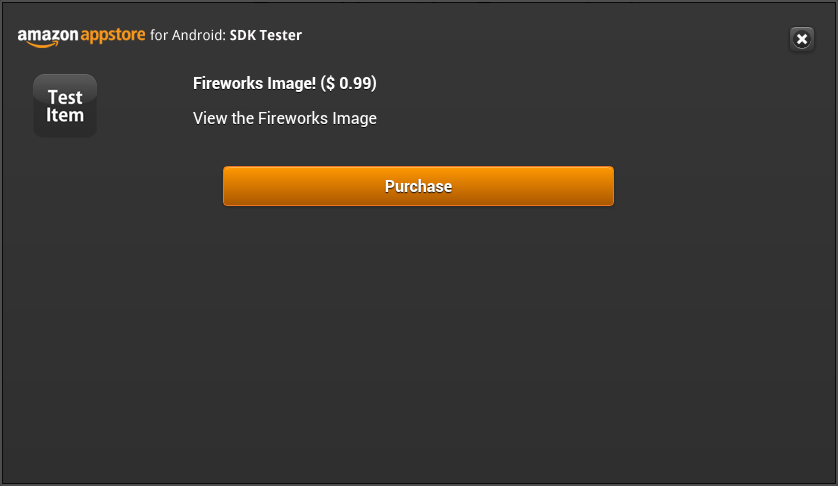
When the Purchase Image button is selected, the SDK Tester will take over from the application and present a dialog box (Figure 44-6) from which the purchase may be initiated:
Figure 44-6
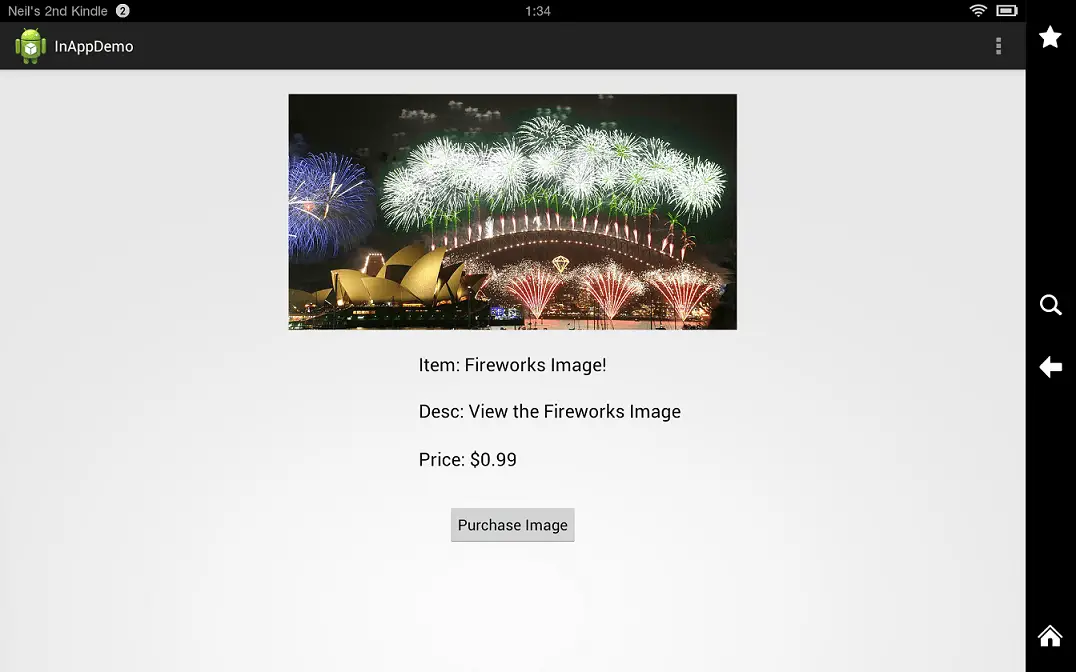
Once the purchase has been completed, a confirmation dialog will appear. After this dialog has been closed, the purchased image will appear within the application:
Figure 44-7
Simulating Purchase Problems
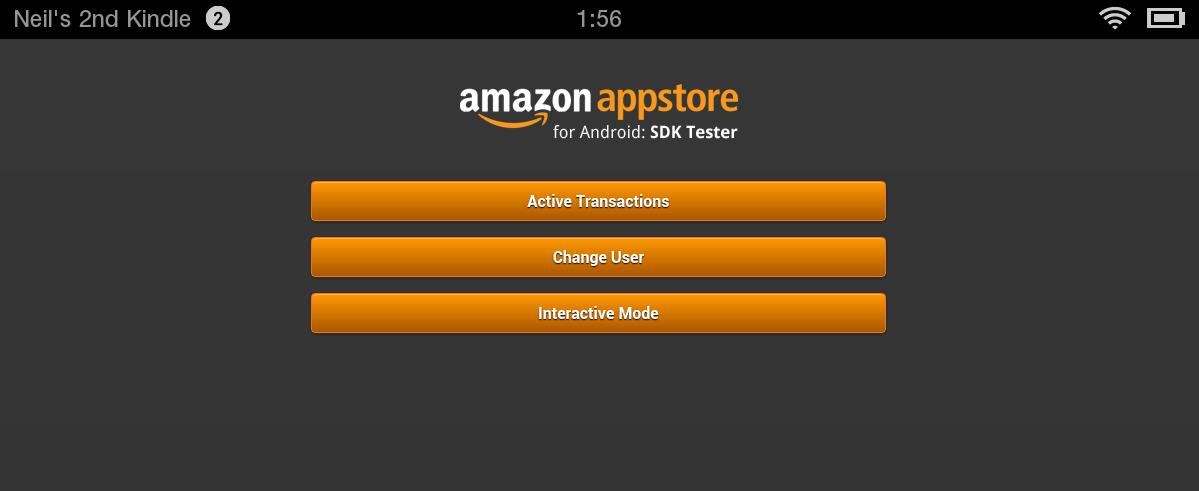
Testing the functionality of an application requires more than making sure that success is handled correctly. An application must, of course, also gracefully handle failures. Fortunately, the SDK Tester tool allows a variety of in-app purchasing scenarios to be simulated. It is possible, for example, to test that the application can handle an invalid SKU code. To test this particular scenario, launch the SDK Tester tool on the device or emulator and, from the initial screen, select the Interactive Mode button as illustrated in Figure 44-8:
Figure 44-8
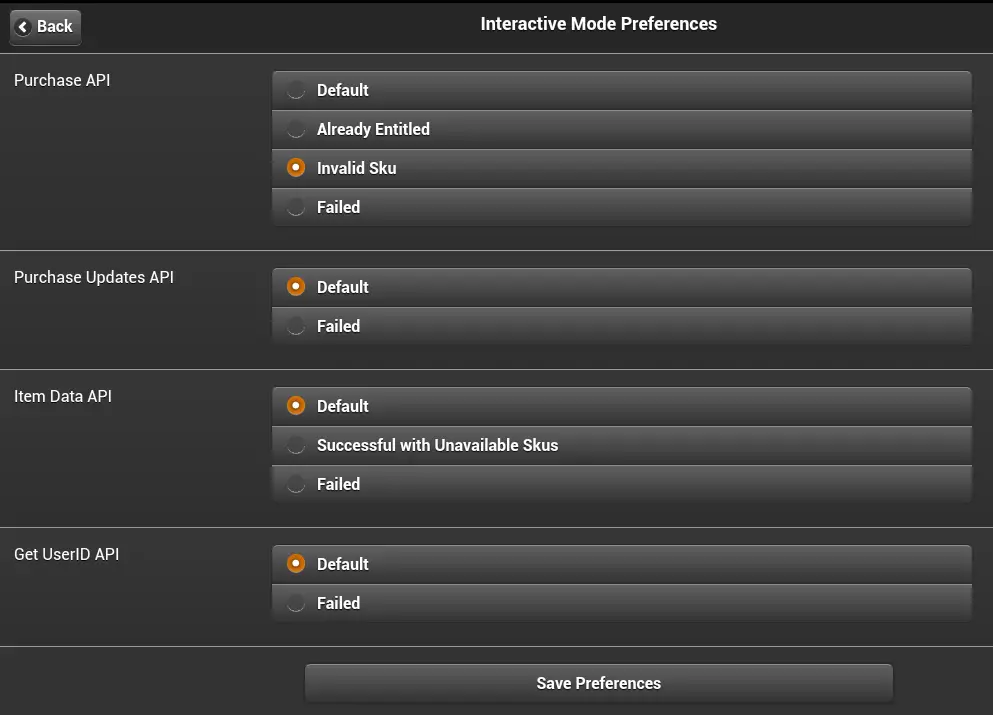
Within the Interactive Mode screen (Figure 44-9), change the Purchase API setting from Default to Invalid SKU before selecting the Save Preferences button.
Figure 44-9
Once the settings are saved, return to the InAppDemo application and attempt to re-purchase the image. This time, the alert dialog implemented in the onPurchaseResponse() method of the observer class will appear reporting that the SKU is invalid.
Summary
This chapter has worked through the creation of a simple application designed to demonstrate the use of the Amazon In-App Purchasing API to implement the purchase of a consumable item from within a Kindle Fire application.
<google>BUY_KINDLE_FIRE</google>
| Previous | Table of Contents | Next |
| An Overview of the Amazon In-App Purchasing API | Integrating Ads with the Amazon Mobile Ads API |
