Difference between revisions of "Configuring the Ubuntu 11.04 Unity Launcher and Workspaces"
(New page: Now that you have read the previous chapter entitled An Overview of the Ubuntu 11.04 Unity Desktop it is assumed that you have a basic understanding of the various elements that compri...) |
(No difference)
|
Revision as of 20:02, 9 June 2011
Now that you have read the previous chapter entitled An Overview of the Ubuntu 11.04 Unity Desktop it is assumed that you have a basic understanding of the various elements that comprise the Ubuntu 11.04 Unity desktop environment.
As previously noted, one of the goals of Unity is to simplify the wide range of configuration options that existed in the classic GNOME desktop environment. Whilst this goal has largely been achieved the good news is that there is still a wide range of configuration and customization options available through Unity to enable users to tailor the desktop experience to specific needs and preferences. The objective of this chapter is to highlight and demonstrate the Unity desktop configuration options that are available to configure the appearance and behavior of the Ubuntu 11.04 Unity Launcher and Workspace Switcher.
Adding and Removing Unity Launcher Items
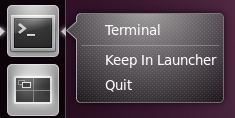
When Ubuntu is first installed a number of items are added to the Unity launcher. It is likely that as an Ubuntu user you will want to add additional, frequently used applications to the launcher or remove items that you find you do not need. By far the easiest way to add an item is to run the application in question so that an entry appears in the launcher and then right click on the launcher item and select the Keep In Launcher menu option:
Alternatively click on the Applications launcher item, search for the application and, once located, simply drag the application icon from the application dash to the location in the Launcher where you would like the item to appear.
Changing the Location of a Launcher Item
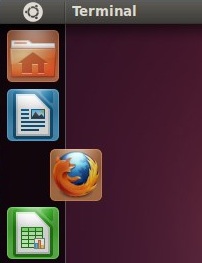
To move a launcher item to a new position in the stack click on the item and drag the mouse pointer to the right. This action will pull the icon from the launcher. Drag the icon to the new location (the icons at that location will part to make room for the selected item) and release the mouse button to complete the move:
Changing the Size and Appearance of the Unity Launcher
The default size of the icons on the launcher and, therefore, the size the launcher itself may be configured using a tool named the CompizConfig Settings Manager (CCSM) which should have been installed by default on Ubuntu 11.04. In the event that it is not already installed, open a Terminal window (Ctrl-Alt-T) and enter the following command:
sudo apt-get install compizconfig-settings-manager
In order to access the settings for the size of the launcher click on the power button in the top right hand corner of the desktop and select System Settings to display the Control Center. In the control center dialog select CompizConfig Settings Manager located in the Personal category. Within the CompizConfig Settings Manager scroll down to the Desktop category and click on Ubuntu Unity Plugin (the actual text and icon, not the check box next to it):
[[Image:|Accessing the Compiz Ubuntu Unity Plugin configuration settings]]
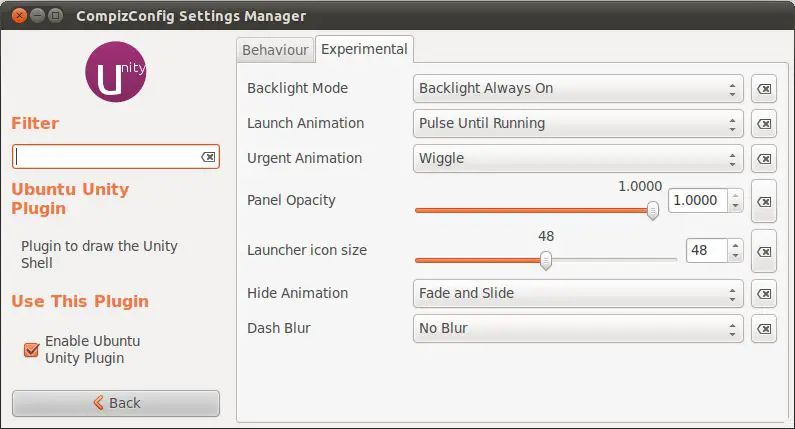
The settings for the appearance of the launcher are located on the Experimental tab of the resulting screen so click on this tab to display the following settings panel:
To change the size of the launcher icons simply move the slider next to Launcher Icon Size to increase or decrease the size of the launcher. Once the change has been made the launcher will automatically adjust to match the new setting.
This configuration panel also provide options to turn the launcher backlighting on and off (it looks better with it on) and also the animation effects used to indicate when an application is loading or needs attention.
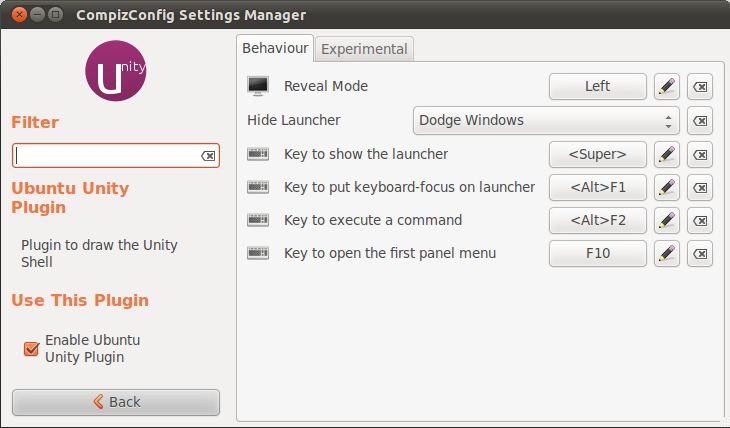
The Behavior tab of the configuration screen allows a variety of hot keys to be defined to perform launcher related tasks from the keyboard. Also provided is the option to control the conditions under which the launcher will be hidden:
By default the launcher will hide in order to avoid obscuring a window (for example when a window is moved into the space occupied by the launcher). This feature may be altered such that the launcher never hides, only hides to avoid obscuring an active window or to hide automatically after a short period of time.
Revealing a Hidden Launcher
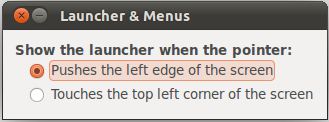
As outlined in the previous section under certain circumstances and based on configuration settings the launcher may be hidden from view. The standard mechanism for revealing the launcher in this situation is to move the mouse pointer to the far left hand edge of the screen. This setting may be altered so that the launcher reappears when the pointer is moved the top left corner of the screen. To change this setting, select the desktop power button followed by the System Settings menu option. In the control center screen, click on the Launcher & Menus option under the Personal category to display the following dialog:
To change the setting, click on the Touches the top left corner of the screen option and close the window using the orange window close control located in the title bar. Drag a window to the launcher so that it hides and then move the mouse pointer to the top left hand corner of the screen to reveal it once again.
Changing the Number of Workspaces
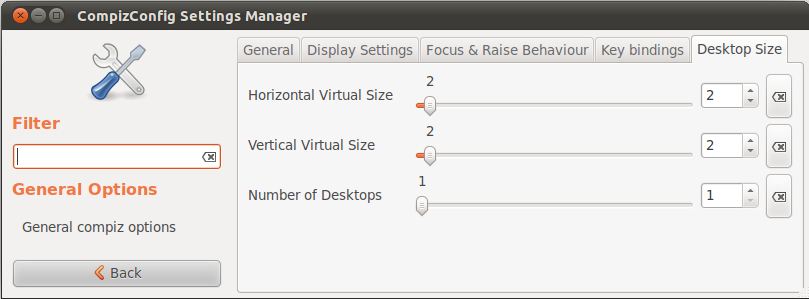
By default Unity configures four workspaces which are accessible from the Workspace Switcher icon located in the launcher. Whilst this is sufficient for the needs of most users it is possible to increase or decrease this number. This, once again, is achieved using the CompizConfig Settings Manager. Within the manager, select the General Options button and on the resulting screen, select the Desktop Size tab as illustrated in the following figure:
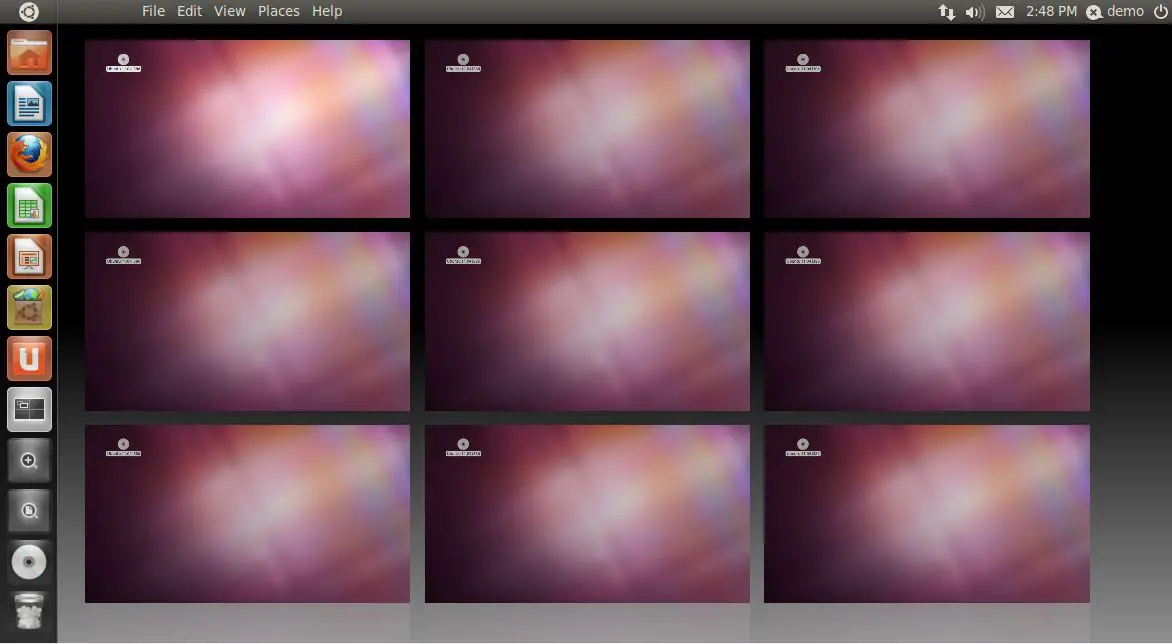
The workspaces (or virtual desktops as they are also known) are organized in a grid pattern consisting of rows and columns. Currently there are four desktops (two rows and two columns). To increase the number of workspaces to nine, change the Horizontal Virtual Size and Vertical Virtual Size sliders to 3. Close the settings manager and click on the Workspace Switcher. Note that there are now 9 workspaces available for use on the desktop:
Summary
In this chapter we have looked at some of the configuration options available to change the appearance and behavior of the Ubuntu 11.04 Unity launcher and workspace switcher. Clearly this provides some level of opportunity for the user to customize the Unity desktop but is only a small part of the Unity configuration story. In the next chapter we will look at options for changing the desktop background.
