Working with Maps on the iPad with MapKit and the MKMapView Class (Xcode 4)
| Previous | Table of Contents | Next |
| An Example iOS 4 iPad Location Application (Xcode 4) | Accessing the iPad Camera and Photo Library (Xcode 4) |
Learn SwiftUI and take your iOS Development to the Next Level |
In the preceding chapters we spent some time looking at handling raw geographical location information in the form of longitude, latitude and altitude data. The next step is to learn about the presentation of location information to the user in the form of maps and satellite images. The goal of this chapter, therefore, is provide an overview of the steps necessary to present the iPad application user with location, map and satellite imagery using the MapKit framework and, in particular, the MKMapView class.
About the MapKit Framework
The MapKit Framework is based on the Google Earth and Google Maps data and APIs and provides iPad developers with a simple mechanism for integrating detailed and interactive mapping capabilities into any application.
The core element of the MapKit framework from the point of view of the app developer is the MKMapView class. This class is a subclass of UIView and provides a canvas onto which map and satellite information may be presented to the user. Information may be presented in map, satellite or hybrid (whereby the map is superimposed onto the satellite image) form. The displayed geographical region may be changed manually by the user via a process of pinching stretching and panning gestures, or programmatically from within the application code via methods calls and property manipulation on the MkMapView instance. The current location of the device may also be displayed and tracked on the map view.
The MapKit framework also includes support for adding annotations to a map. This takes the form of a pin or custom image, title and subview that may be used to mark specific locations on a map.
Implementation of the MKMapViewDelegate protocol allows an application to receive notifications of events relating to the map view such as a change in either the location of the user or region of the map displayed or the failure of the device to identify the user’s current location or to download map data.
Understanding Map Regions
The area of the map that is currently displayed to the user is referred to as the region. This is defined in terms of a center location (declared by longitude and latitude) and span of the surrounding area to be displayed. Adjusting the span has the effect of zooming in and out of the map relative to the specified center location. The region’s span may be specified using either distance (in meters) or coordinate based degrees. When using degrees, one degree of latitude is equivalent to 111 km. Latitude, however, varies depending on the longitudinal distance from the equator. Given this complexity, the map view tutorial in this chapter will declare the span in terms of distance.
About the iPad MKMapView Tutorial
The objective of this tutorial is to develop an iPad application that displays a map with a marker indicating the user’s current location. Buttons located in a navigation bar are provided to allow the user to zoom in on the current location and to toggle between map and satellite views. Through the implementation of the MKMapViewDelegate protocol the map will update as the user’s location changes so that the current location marker is always the center point of the displayed map region. Finally, a basic annotation will be implemented to mark a specific location on the map with a pin and title.
Creating the iPad Map Tutorial
Begin by launching Xcode and creating a new iOS iPad project named mapSample using the View-based Application template.
Adding the MapKit Framework to the Xcode Project
Since we will be making use of the MapKit framework during this tutorial the first step is to add the framework to the project. To achieve this, select the Build Phases tab on the mapSample summary panel and unfold the Link Binary with Libraries section. Click on the ‘+’ button, locate the MapKit.framework entry from the resulting list and click Add.
Declaring an Outlet for the MapView
Clearly since we plan on working with an MKMapView object in our iPad application it will be necessary to declare an outlet for this object. Later in the tutorial we will add code to update the map based on changes to the user’s location. To do this it will also be necessary to implement the MKMapViewDelegate protocol within our view controller class. Finally, the code will require that the <MapKit/MapKit.h> file be imported. All these code changes may be implemented in the mapSampleViewController.h file as follows:
#import <UIKit/UIKit.h>
#import <MapKit/MapKit.h>

@interface mapSampleViewController : UIViewController {
    <MKMapViewDelegate>
{
        MKMapView *mapView;
}
@property (nonatomic, retain) IBOutlet MKMapView *mapView;
@end
Having declared the outlet, add the corresponding synthesize directive to the mapSampleViewController.m file:
#import "mapSampleViewController.h"

@implementation mapSampleViewController
@synthesize mapView;
.
.
@end
Creating the MKMapView and Connecting the Outlet
The next step is to create an instance of the MKMapView class we will be using in our application. Begin by selecting the mapSampleViewController.xib file so that the Interface Builder panel appears. At this point there are two options for creating an MKMapView object. One is to simply drag one from the Object library (View -> Utilities -> Object Library). Another option is to change the class of our existing UIView object to be an MKMapView. The latter option is actually a cleaner solution, so display the Identity Inspector (View -> Utilities -> Identity Inspector), select the view object and simply change the Class value from UIView to MKMapView.
Connect the mapView outlet to the object by Ctrl-clicking on the File’s Owner object and dragging the resulting line to the Map View object. Release the line and select mapView from the menu.
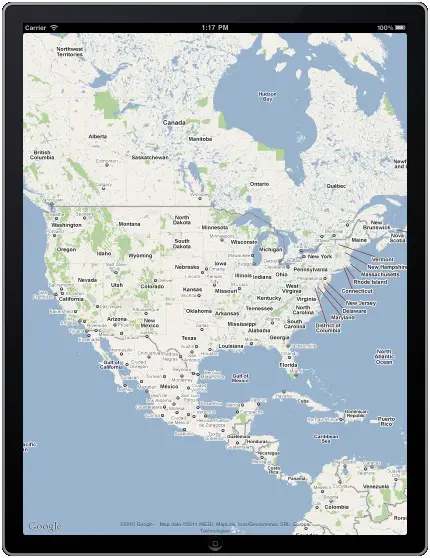
Perform a test run of the application’s progress so far by clicking on the Run button in the Xcode toolbar. The application should run in the iOS iPad simulator as illustrated in the following figure:
<google>ADSDAQBOX_FLOW</google>

As previously described, the completed application will consist of two buttons located in a navigation bar that will be used by the user switch the map type and to zoom in on the current location. In order to add the navigation controller to the application we need to add some code to the didFinishLaunchingWithOptions: method. Select the mapSampleAppDelegate.m and modify this method as follows to initialize and add the UINavigationController instance:
- (BOOL)application:(UIApplication *)application
didFinishLaunchingWithOptions:
(NSDictionary *)launchOptions
{
    // Override point for customization after application launch.
    UINavigationController *navigationContoller =
         [[UINavigationController alloc]
         initWithRootViewController: self.viewController];

    self.window.rootViewController = self.viewController;
    [self.window addSubview:navigationContoller.view];
    [self.window makeKeyAndVisible];
    return YES;
}
Next, the two buttons need to be added to the navigation bar. This code will be placed in the viewDidLoad method located in the mapSampleViewController.m file. Now is also a good time to configure the mapView to display the user’s current location by setting the showsUserLocation property:
- (void)viewDidLoad
{
    [super viewDidLoad];
    mapView.showsUserLocation = YES;
    UIBarButtonItem *zoomButton = [[UIBarButtonItem alloc]
      initWithTitle: @"Zoom"
      style:UIBarButtonItemStylePlain
      target: self
      action:@selector(zoomIn:)];

    self.navigationItem.rightBarButtonItem = zoomButton;
    [zoomButton release];

    UIBarButtonItem *typeButton = [[UIBarButtonItem alloc]
      initWithTitle: @"Type"
      style:UIBarButtonItemStylePlain
      target: self
      action:@selector(changeMapType:)];

    self.navigationItem.leftBarButtonItem = typeButton;
    [typeButton release];
}
First the mapView is configured to show the user location (which appears on the map as a blue translucent ball):
mapView.showsUserLocation = YES;
Next a button item labeled “Zoom” is added to the navigation controller and is assigned to appear on the right hand side of the navigation bar. The button is configured to call a method named zoomIn: when selected by the user. A second button, labeled “Type” positioned on the left of the navigation bar is configured to call the changeMapType method. The next step, therefore, is to write these methods.
Learn SwiftUI and take your iOS Development to the Next Level |
Changing the MapView Region
When the Zoom button is tapped by the user the map view region needs to be changed so that the user’s current location is set as the center location and the region span needs to be changed to 50 meters (analogous to zooming in to the map region). The code to implement this belongs in the zoomIn: method located in the mapSampleViewController.m file:
- (void)zoomIn: (id)sender
{
    MKUserLocation *userLocation = mapView.userLocation;
    MKCoordinateRegion region =
       MKCoordinateRegionMakeWithDistance (
          userLocation.location.coordinate, 50, 50);
    [mapView setRegion:region animated:NO];
}
This method performs some very simple operations in order to achieve the required effect in the mapView object. Firstly, the user’s current location is ascertained by accessing the userLocation property of the map view object. This is stored in the form of an MKUserLocation object which in turn contains the coordinates of the user. Next, the MKCoordinateRegionMakeWithDistance function is called in order to generate an MKCoordinateRegion object consisting of the user’s location coordinates and a span that stretches 50 meters both to the North and South of the current location. Finally, this region object is passed through to the setRegion method of the mapView object.
Now that the Zoom functionality has been implemented it is time to configure the map type switching feature of the application.
Changing the Map Type
The map type of a map view is controlled by the object’s mapType property. Supported values for this property are MKMapTypeStandard, MKMapTypeSatellite and MKMapTypeHybrid. For the purposes of this example application the map will switch between standard and satellite modes. Within the mapSampleViewController.m file add the changeMapType: method assigned to the Type button as follows:
- (void) changeMapType: (id)sender
{
    if (mapView.mapType == MKMapTypeStandard)
        mapView.mapType = MKMapTypeSatellite;
    else
        mapView.mapType = MKMapTypeStandard;
}
This very simple method simply toggles between the two map types when the button is tapped by the user.
Testing the iPad MapView Application
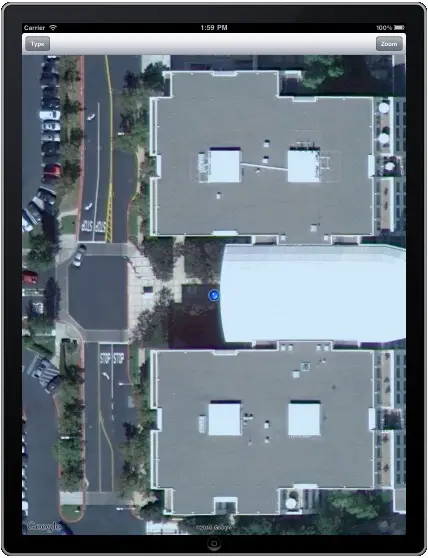
Now that more functionality has been implemented, it is a good time to build and run the application again so click on the Xcode Run button to load the application into the iOS iPad Simulator. Once the application has loaded, a blue dot should appear over Northern California. Since the application is running in the simulator environment the location information is simulated to match the coordinates of Apple’s headquarters in Cupertino, CA. Select the Type button to display the satellite view and then zoom in to get a better look at the main building:
To get real location information, load the application onto an iPad device (details of which can be found in the Testing iOS 4 Apps on the iPad – Developer Certificates and Provisioning Profiles chapter of this book).
Updating the Map View based on User Movement
Assuming that you installed the application on a physical iPad device and went somewhere with the device in your possession you may have noticed that the map did not update as your location changed and that the blue dot marking your current location eventually went off the screen (also assuming, of course, that you had zoomed in).
In order to configure the application so that the map automatically tracks the movements of user the first step is to make sure the application is notified when the location changes. At the start of this tutorial the view controller was declared as conforming to the MKMapViewDelegate delegate protocol. One of the methods that comprise this protocol is the didUpdateUserLocation: method. When implemented, this method is called by the map view object whenever the location of the device changes. We must, therefore, first specify that the mapSampleViewContoller class is the delegate for the mapView object, which can be performed by adding the following line to the viewDidLoad method located in the mapSampleViewController.m file:
mapView.delegate = self;
The next task involves the implementation of the didUpdateUserLocation: method in the mapSampleViewController.m file:
- (void)mapView:(MKMapView *)mapView
didUpdateUserLocation:
(MKUserLocation *)userLocation
{
    self.mapView.centerCoordinate =
          userLocation.location.coordinate;
}
The delegate method is passed as an argument an MKUserLocation object containing the current location coordinates of the user. This value is simply assigned to the center coordinate property of the mapView object such that the current location remains at the center of the region. When the application is now installed and run on a device the current location will no longer move outside the displayed region as the device location changes.
Adding Basic Annotations to a Map View
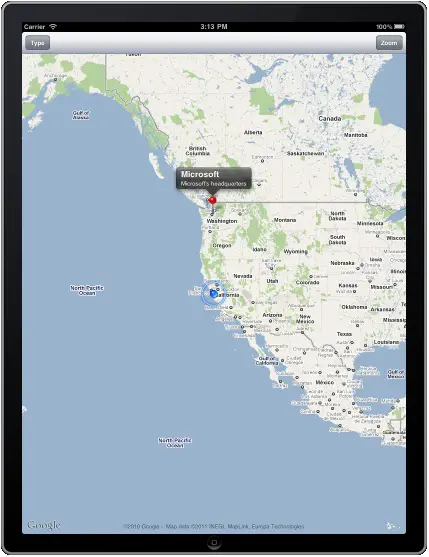
The last task in this tutorial is to add an annotation at a specific location on the map view. For the purposes of this example, we will add a standard annotation (represented by default by a red pin) at the coordinates of Microsoft’s headquarters in Redmond, Washington. Although this is a very simple example it is important to keep in mind that annotations may also be used to perform more advanced tasks such as displaying custom images and multiple annotations on a single map.
The annotation in this example will also display a title and subtitle when selected by the user. In order to create a basic annotation it is necessary to create a CLLocationCoordinate2D object containing the coordinates at which the annotation is to appear. An MKPointAnnotation object is then created and assigned the coordinate object, title and subtitle strings. Finally the addAnnotation: method of the map view object is called to add the annotation to the map. The code fragment for these steps is as follows:
CLLocationCoordinate2D annotationCoord;

annotationCoord.latitude = 47.640071;
annotationCoord.longitude = -122.129598;

MKPointAnnotation *annotationPoint = [[MKPointAnnotation alloc] init];
annotationPoint.coordinate = annotationCoord;
annotationPoint.title = @"Microsoft";
annotationPoint.subtitle = @"Microsoft's headquarters";
[mapView addAnnotation:annotationPoint];
Add this code to the end of the viewDidLoad method and build and run the application. The map should now appear with a red pin located at the designated location. Tapping the pin will display the title and subtitle:
Learn SwiftUI and take your iOS Development to the Next Level |
| Previous | Table of Contents | Next |
| An Example iOS 4 iPad Location Application (Xcode 4) | Accessing the iPad Camera and Photo Library (Xcode 4) |


